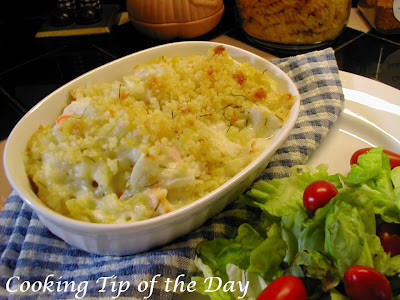
Recipe: Strawberry Vanilla Oreo Ice Cream


This post and recipe was inspired by the Dairy Queen Blizzard of the month.. which I might add… was fabulous… yes… I just had to have one…

First a little background… I grew up on Long Island in New York… and vaguely remember Dairy Queen.. and frankly… I’m not even sure it was from there.. it could have been from family vacations we took around the country… in any case… I have lived in numerous places since then… and there hasn’t been a Dairy Queen around… so you could say I was a Dairy Queen novice…

Then Warren entered my life.. and I came to Georgia… and during a visit early on.. Warren mentioned ..would I like to go for some Dairy Queen?.... I’m always up for ice cream… (I take after my Mother …if you call from earlier posts… my Mother is addicted to ice cream.. and don’t let her tell you any different… )… anyway.. he mentioned a Blizzard… I was clueless… so off to Dairy Queen we went… all I can say.. I was hooked….

Okay fast forward to last week… I was running errands… getting hungry.. it was really hot…and I thought… ohhhh I want to try that flavor of the month at Dairy Queen and the month is almost over… Warren was out of town on business… so hey… I’m an adult.. I can have ice cream for dinner… so I did…

Well… let me tell you… it was a great flavor… and it wasn’t until I was eating it and thinking…. gee this is the consistency of the ice cream coming out of the ice cream maker… did it hit me… I can make this at home… for a fraction of the cost… yes a fraction… for what I paid for a small Blizzard… I could have maybe added only a dollar and made a quart and a half… (actually … it made 2 quarts… my ice cream maker almost runneth over… but thankfully it didn’t…)

When Warren came home… we talked about it.. and apparently the Blizzards are made with a vanilla ice cream base and things are just added to it… so I figured I’d give it a try… glad I did!

TIPS

This does make almost 2 quarts… it filled the ice cream maker to the brim at the end… when I added all the chopped cookies in… you don’t have to add all the cookies in while the ice cream maker is on… you can add more when you finish and stir them in as you pour the ice cream into your container.

The ice cream will be very soft because of the additional liquid added with the topping… and will require you to continue freezing for longer… freeze until you have the right consistency for your Blizzard… or pour it into the container and put it in the freezer for a while and just scoop it out when you want to serve it… or it will harden to a regular ice cream which is also fabulous!

You really need to try this… not only does it taste great… buy your milk and cream at Walmart… and you’ll save a fortune… it won’t take long for the ice cream maker to pay for itself.. you can give your family ice cream treats all summer long without going broke!


Recipe: Strawberry Vanilla Oreo Ice Cream

All you need:

1 cup whole milk, well chilled
¾ cup granulated sugar
2 cups heavy cream
1-2 teaspoons pure vanilla extract (to taste…I used 2)
1 ½ jars (from 2 jars 11.75 oz. each) Smucker’s Strawberry Topping
3 cups chopped Vanilla Oreo Sandwich cookies

All you need to do:

In a mixing bowl combine the milk and sugar… beat at low speed until sugar is dissolved…about two minutes.

Remove the bowl from the mixer and stir in the heavy cream and vanilla.

Take the freezer bowl out of the freezer and set it on the machine base.

Insert the paddle with the little point into the little hole in the freezer bowl.

Place the plastic lid over the freezer bowl and turn to lock it into place.

Flip the machine on and pour the ice cream batter through the opening at the top of the plastic lid.

Set a timer for 25 minutes. It will take between 25-30 minutes for the ice cream to thicken (this is using the Cuisinart ICE-20 model)… if you are using a different brand or model… check your instruction booklet to be sure the timing is the same.

Add 1 ½ jars of the Strawberry Topping… and add about ½ of the cookies to the ice cream maker and continue to freeze until it has thickened….

I stopped mine after 10 minutes… and poured it into a container … stirred in the remaining chopped cookies… put the lid on tight and froze it in the freezer for about 2 hours before serving… it will still be fairly soft like a Blizzard… freeze longer and you will have a regular ice cream hardness.

NOTE: You will need a 2 quart container for this recipe.
My Continuing Ice Cream Making Series


Today will have another installment in my summer-long ice cream making series…. today’s fabulous flavor was inspired by the Dairy Queen Blizzard of the month…. more about that in a minute…. but first… I want to explain what I’m doing with this ice cream making series…

When I first started Cooking Tip of the Day… I had a vision… no… seriously.. I really did…

I wanted a site that catered to the home cook… beginner to experienced… that wanted great recipes… that were not too time consuming to make or difficult… everyday foods that they would want to serve their families or friends on a daily basis… cooks like me… families and friends like mine… family recipes and new ones… using an occasional exotic ingredient… but not often… information about substitutions, conversions, herbs, spices … foods… wines… beers (to come)…

I’m proud of the fact.. I’ve stuck to my mission… and hope you can find something here to help you or inspire you in your everyday life.

Money saving has become a focus also.. along with health.. avoiding too many processed foods… and preservatives… so ice cream making just falls easily into these categories… I’m not here to dazzle you with my culinary prowess or with difficult recipes… I’m here to show you how easy things can be… and offer tips that will help you be successful.

As the ice cream series progresses… I’ll get into lower fat or non-fat alternatives… sorbets.. yogurts… so stick with me.. there is a rhyme and reason to my madness… I’m picking recipes to help you progress to the point you will feel comfortable striking out on your own.. trying new things… another goal to this series is to show you how you can truly save money in the long haul by making these treats yourself… and that brings us to today’s ice cream making post… Strawberry Vanilla Oreo Ice Cream

Recipe: Banana Sour Cream Bundt Cake


Bananas …bananas… and more bananas… if there was ever a challenge in this household… it’s what to do with bananas. They are good for you and truly delicious on their own… so I am glad Warren eats one every day for breakfast… it’s a far cry from when we first got together… the man ate those crumb cakes you get in the machine at work… you know the ones… the ones that for some reason never spoil…makes you wonder just what they put in those things…

The problem is… when we shop.. he picks out a bunch… and I admit.. I’m part of the problem… sometimes I eat them.. some times I don’t… but it just seems funny that every week.. I have 3 bananas left… and they’re deemed too ripe to munch on by you know who… tsk … so I guess I have to make banana bread… I must have ten recipes for banana bread alone.. not counting muffin variations … so I am always on the lookout for a good banana recipe… I personally like a little variety… for Warren’s part.. I could make that one Banana Bread recipe he loves every week.

So in my searching I found a bundt cake recipe… I really like bundt cakes.. and I really need to make more of them…they really are simple and really very good… a perfect cake to snack on.


My favorite pan isn’t a traditional bundt pan that you think of when someone talks about bundt pans.. usually they have flat tops and with straight high sides…. my pan is also a bundt pan amd has pretty little ridges in the top… it’s a little wider and not quite as deep… it’s the one my Mother gave me… she used it constantly while I was growing up… she would make all kinds of bundt… some with mixes .. some from scratch… plain good cake… some with powdered sugar others with a glaze…perfect with a glass of milk after school.

This recipe is from recipezaar… the minute I saw it .., I knew it was for me… sour cream.. I love baking with sour cream… it gives cakes a really great texture and flavor…

I actually followed the recipe exactly… only I did leave out the nuts… they’re not listed as optional in the original recipe.. but I did list them as optional here… the cake was terrific without them.

TIP

My only tip is to use really ripe bananas… lots of black speckles or even almost black… they should be mushy when you take them out of the peel… they are the most flavorful and easiest to work with when they’re like that.


Here’s a great little recipe you can put together in 15 minutes or less…


Recipe: Banana Sour Cream Bundt Cake

All you need:

1/3 cup butter, softened
1 ¼ cups sugar
2 eggs
1 teaspoon vanilla
3 medium ripe bananas,, mashed
2 cups flour
1 ¼ teaspoons baking powder
1 teaspoon baking soda
½ teaspoon salt
1 cup sour cream
¾ cup chopped nuts (optional)

All you have to do:

Preheat the oven to 350 degrees F.

Grease and flour the bundt pan and set aside.

Using a mixer with the paddle attachment, cream together the butter and sugar.

Add the eggs, one at a time… beat on low speed until well blended.

Add the vanilla and the bananas.

In a separate bowl, combine the flour, baking powder, baking soda and salt. Mix well.

Alternate adding the sour cream and the flour mixture to the banana mixture.

Stir in nuts, if using.

Pour into the prepared bundt pan.

Bake at 350 degrees F. for 50 minutes or until a pick comes out clean.

Cool 10 minutes in the pan.

Remove the cake from the pan and cool completely.

Dust with powdered before serving.

Recipe: Tortellini Spinach Soup


This quick and easy recipe for Tortellini Spinach Soup is perfect for those weeknight meals when you come home a bit late and don’t have time to prepare a big meal…. or even better... a great weekend meal so you can relax and not spend time in the kitchen.

The original recipe was from a Pillsbury Classic Cookbook… Dinner in Minutes… and this certainly fits the bill.. you can have dinner on the table in under 30 minutes.

TIPS

I cut up a medium onion and throw it into my mini processor with the clove of garlic… a few pulses and it’s perfectly chopped and mixed.

The recipe calls for cheese-filled tortellini… you can substitute any flavor you prefer… Italian sausage filled or chicken and pesto are also terrific in this soup.

Serve this with Crescent Garlic Toast and you have yourself a quick and easy… and terrific supper in no time!

Recipe: Tortellini Spinach Soup

All you need:

1 tablespoon olive oil
1 cup sliced carrots
1 medium onion, finely chopped
1 large clove garlic, finely chopped
3 (14 ½ oz.) cans chicken broth
1 pkg. (9 oz.) refrigerated uncooked cheese-filled tortellini
2 cups frozen cut leaf spinach (from a 16 oz. bag)
½ teaspoon dried oregano
½ cup shredded mozzarella cheese

All you have to do:

In a 4 quart pot or Dutch oven, heat the olive oil over medium heat.

Add the carrots, onion and garlic. Cook until the onions are soft, do not let the onions or garlic brown, if they start to, turn the heat down a little.

Add the broth and bring to a boil.

Add the tortellini and boil gently for 4-5 minutes or until the tortellini are almost tender.

Add the spinach and oregano and simmer for an additional 3 minutes or until the spinach is tender. Stir occasionally.

Serve in bowls and sprinkle each with a little mozzarella cheese.

Recipe: Crescent Garlic Toast


This simple little recipe can add pizzazz to a simple dinner salad or soup… tasty and attractive… it’s made with refrigerated crescent rolls and salad dressing… and a little cheese… what could be easier than that?

TIPS

The original recipe calls for prepared Caesar dressing… I used fat free Zesty Italian dressing from Kraft… I like the bold flavor and the fact it’s fat free… use whatever dressing suits your tastes.

The original recipe also calls for dried basil leaves crushed.. I changed it to oregano.. I like the flavor better for this.. it also called for ¼ teaspoon… I simply used a pinch of dried oregano on each triangle.. it was more than enough.

They specified grated Parmesan cheese.. I like to use shredded for this… it makes a pretty presentation and I think the cheese is more flavorful… you can use either.

This recipe is from the folks at Pillsbury and was in their Dinner in Minutes Classic Cookbook 1991. It goes perfectly with another recipe of theirs in the same cookbook… Tortellini Spinach Soup… they make a wonderfully quick and delicious meal.


Recipe: Crescent Garlic Toast

All you need:

1 (8 oz.) can Pillsbury Crescent Dinner Rolls
3 tablespoons Kraft Zesty Italian Fat-Free dressing
3 tablespoons grated or shredded Parmesan cheese
Dried oregano

All you need to do:

Preheat the oven to 375 degrees F.

Unroll the crescent dough and separate them into triangles.

Lay the triangles on a baking sheet.

Brush with the dressing.

Sprinkle with the cheese and the oregano.

Bake for 8-11 minutes or until the triangles are golden brown.

Recipe: Chocolate Fudge Brownie Ice Cream


As I continue my Ice Cream Making Series… I decided to take a basic ice cream … one that we’ve already made… and add in an ingredient… in this case… Chocolate Ice Cream with Fudge Brownie pieces. This is very basic and very easy… I figured it would be a natural next step to our Ice Cream making.

This simple recipe is the same as the Chocolate Ice Cream recipe… with chopped brownie added during the last 5 minutes of the freezing.

TIPS

You can use any brownies you have… store bought… brownies made from a boxed mix.. or my Chewy Fudge Brownie recipe.

The original recipe is from Cuisinart. Their directions say to add ½- 1 cup of chopped day old brownies… which I did follow the instructions… however… in my opinion… this quantity is no where near enough to make a decent Chocolate Fudge Brownie Ice Cream…. as a result, I’m writing the recipe to add 2- 2 ½ cups of chopped brownie.

Unfortunately my photo doesn't show the chunks of brownie which ended up buried... it was good... but with more brownies it will definitely be better.

I also found that the paddle in the ice cream maker tended to break up the brownies even more.. which is okay.. but I wanted more chunks… my recommendation is to add about 1 cup during the freezing process… and when your done with the freezing process… the ice cream will have the consistency of soft ice cream… add more brownies in with larger chunks… about dime size… and stir them in with a cooking spoon.

If you need to see pictures of the step by step process of making the chocolate ice cream…. go to my Chocolate Ice Cream post.

So let’s get to some ice cream making…


Recipe: Chocolate Fudge Brownie Ice Cream

All you need:

1 cup whole milk
½ cup granulated sugar
8 ounces semi-sweet chocolate, broken into ½ inch pieces
2 cups heavy cream
2 teaspoons vanilla extract
2- 2 ½ cups chopped day old brownies

All you need to do:

To get the batter ready:

Heat the whole milk until it’s just bubbling around the edges (you can do this on the stove top or the microwave… I did mine in the microwave).

In a blender or food processor (I used the food processor) fitted with a metal blade, pulse to process the sugar and chocolate together until the chocolate is very finely chopped.

Add the hot milk and process until well blended and smooth.

Transfer the chocolate mixture to a medium size bowl… and let the chocolate mixture cool completely.

Stir in the heavy cream and vanilla (add the vanilla to taste…I added 2 teaspoons totally).

Chill in the refrigerator for 30 minutes or longer.

To make the ice cream:

Put the freezer bowl on the base… put in the mixing arm… put the lid on over the freezer bowl and lock into position.

Flip on the machine.

Pour the chilled chocolate mixture through the ingredient spout into the freezer bowl.

Process for 25 minutes.

Add about 1 cup of the chopped brownies to the ice cream maker.

Continue to process for 5 minutes.

Turn off the ice cream maker, remove the lid and paddle.

Add the remaining chopped brownies and stir with a cooking spoon.

Pour into an airtight container and freeze at least 2 hours.

Recipe: Herbed Potato and Bacon Frittata


I love making eggs… all kinds… I can eat eggs for breakfast, lunch or dinner… scrambled, fried or poached.. it’s all good to me..

I featured a number of frittatas last year… and then moved on to many other egg recipes… recently Warren and I were talking about frittatas and how I first started eating them… believe it or not .. it was over 30 years ago… I worked in management in a large department store in New York… back then.. all the big department stores had restaurants… by the way.. it was a sad day when they petered out… in any case… the restaurant had this “Italian Omelet” … which was actually a frittata… it had potatoes, peppers, onions and mushrooms… seasonings and was just fabulous.. I loved it… a small side salad and it was dinner on the nights I had to work…

It occurred to me as I was telling Warren the story that I hadn’t posted a frittata with potatoes… silly me… so I decided to post one of my potato frittatas… not the one I had in the restaurant .. this one is just as good… herbed potatoes and bacon… everything is better with bacon.. you know.

This simple recipe features herbed potatoes, bacon, cheddar cheese and some parsley… you can make it in a 9 inch non-stick round or square cake pan or a pie plate… the recipe serves 3 comfortably. Serve it with a English muffins for breakfast or small side salad or cup of soup for lunch or dinner.

TIPS

You can make the bacon in the oven or on the stove… if you need instructions on how to cook bacon in the oven… check out my post.

I used 1 ½ tablespoons of bacon grease for the potatoes… you can substitute melted butter if you prefer.

I would recommend greasing the pan with cooking spray even if it is non-stick… it can be difficult getting it to cut into nice wedges if it does stick.

The frittata will probably puff up in spots… this is expected and okay.

This recipe is quick and easy …


Recipe: Herbed Potato and Bacon Frittata

All you need:

3 strips thick sliced smoked bacon, cooked and coarsely chopped
3-4 Yukon Gold potatoes, peeled and diced
1/8 teaspoon Thyme
1/8 teaspoon Rosemary
¼ teaspoon Oregano
½ teaspoon Paprika
¼ teaspoon pepper
1 teaspoon salt
1 teaspoon garlic powder
1 teaspoon onion powder
6 eggs, beaten with dash of milk
½ cup shredded mild cheddar cheese
1 tablespoon fresh parsley, chopped

All you need to do:

Preheat oven to 425 degrees F.

Cook the bacon (any method you prefer)… coarsely chop the bacon and reserve 1 ½ tablespoons bacon grease. Set aside.


Place the diced potatoes in a medium bowl.

In a small bowl, combine the spices and salt and pepper.


Add the spice mixture to the potatoes and toss to evenly coat.

Add the bacon grease and toss to coat.


Place the diced potatoes evenly in a 9 inch non stick baking pan.

Bake the potatoes for 10-15 minutes until evenly browned.

Remove from the oven.


Sprinkle the bacon evenly over the potatoes.

Sprinkle the cheese evenly over the bacon and potatoes.

Sprinkle with the chopped parsley.

Pour the beaten eggs over the potatoes.

Bake for 10 minutes or until set.


Allow to stand for 5 minutes…then cut into wedges or squares (if using a square pan).

Serve immediately.

Recipe: Chicken Breasts with a Tomato Wine Sauce


This recipe is an old one… from the Galloping Gourmet… remember him? Always cooked with a glass of wine in his hand… and was so funny… he got funnier as the show progressed and as the wine disappeared… My mother and I used to watch it when I got home from school. My best friend, Michele, lived three doors away … and used to come over to watch it… or we’d watch it with her mother…

My mother and I missed this episode but Michele and her mother caught it and gave us the recipe… it really is very good… and I know the ingredients are a little unusual… muenster cheese on the chicken instead of mozzarella… but honestly it really makes the dish stand out. The tomato wine sauce is similar to other ones I’ve posted… very easy and very good.

My mother always served it with spaghetti … I serve it with Roasted Garlic Mashed Potatoes… either one works really well.

I did make a few minor changes from the original recipe:

The original recipe says to mash the sauce… I don’t... I leave it as is… I like the chunky tomatoes and carrots… you can do either.

I used ½ teaspoon roasted garlic… you can use 1 clove garlic, smashed as the original recipe reads.

The original recipe uses thin sliced boneless chicken breasts… I use thick boneless skinless chicken breasts.. I just happen to like them in this dish.

The original recipe only slices 1 carrot.. I use 1 cup of sliced carrots.

I use good quality grated Parmesan cheese when preparing the chicken.

The recipe didn’t specify an amount or type of dry white wine.. I found 1 cup to be a good amount… and I use Turning Leaf California Sauvignon Blanc… you can use any other dry white wine you prefer.

This recipe makes enough sauce for 4 servings… if you want more servings.. it easily doubles.

This really is a terrific recipe… and old one from a very good chef.


Recipe: Chicken Breasts with a Tomato Wine Sauce

All you need:

To make the sauce:

1 cup sliced carrots
1 medium onion, sliced
1 tablespoon olive oil
1 tablespoon butter
1 can (14.5 oz.) Del Monte canned tomatoes with Basil, Garlic and Oregano
1 cup dry white wine2 tablespoons tomato paste
1 tablespoon sugar
Salt and pepper to taste

To Prepare the Chicken:

4 boneless skinless chicken breasts
1 egg beaten with a teaspoon olive oil
About a ½ cup grated Parmesan cheese
½ cup flour seasoned with salt and pepper and ¼ teaspoon garlic powder
2 tablespoons olive oil
2 tablespoons butter
8 slices Muenster cheese
Chopped parsley for garnish

All you have to do:

To make the sauce:

In a medium size pot, melt the butter with the olive oil.

Add the carrots and onions… sauté until carrots are translucent.

Add the rest of the sauce ingredients.

Lower heat and cook for 1 hour on a low simmer.

You can either serve the sauce as is (the way I do) or mash it.

To make the chicken:

Dip the chicken breasts in the egg mixture.

Then sprinkle to coat the chicken in grated Parmesan cheese.

Then dredge in seasoned flour.

In a large skillet, over medium high heat, melt 2 tablespoons butter with two tablespoons olive oil.

Fry the chicken until done… it should be golden.. if you find it browning too much.. lower the heat a bit.

About 2-3 minutes before the chicken is completely done.. lay 2 slices of muenster cheese on them and put the lid on the skillet until the cheese has melted nicely.

To serve, spoon the sauce over the chicken breast.

Garnish with chopped parsley.

Recipe: Roasted Garlic Mashed Potatoes


I love garlic mashed potatoes… we are a garlic loving family… when I started making roasted garlic mashed potatoes … liking them no longer applied… I became obsessed … roasted garlic has this wonderful buttery light flavor… that just melts in your mouth… a perfect combination with creamy mashed potatoes.

TIPS

You can either roast a head of garlic just for this dish… or you can use already roasted garlic... if you keep some in a jar in your refrigerator like I do. If you do use previously roasted garlic.. you will need approximately 1 ½ teaspoons… or to taste…

If you need instructions on how to roast garlic… it’s super quick and easy… see my previous post for a step by step instruction.

I personally like to use Yukon Gold potatoes when I make creamy mashed potatoes… you can use whichever variety you prefer.

So… let’s get to making the best Roasted Garlic Mashed Potatoes you will ever eat… promise!


Recipe: Roasted Garlic Mashed Potatoes

All you need:

4 large Yukon Gold Potatoes
1 tablespoon salt
½ cup milk
4-6 tablespoons unsalted butter
¼ teaspoon ground pepper
3 tablespoons heavy cream
1 roasted head of garlic or 1 ½ teaspoons roasted garlic
Salt to taste

All you need to do:

Peel and dice the potatoes… making sure the pieces are the same size so they cook in the same amount of time.

Place in a large pot with 1 tablespoon salt and cover with water and bring to a boil.
Turn down the heat and simmer the potatoes about 20 minutes or until fork tender.

Drain and return to the pot or place into the bowl of an electric mixer.

Heat the milk and 4 tablespoons butter until butter is just melted.

Mash the potatoes and the roasted garlic until desired consistency.

Add the milk and butter mixture and stir.

Add the heavy cream and stir.

Add the ground black pepper and stir.

Salt to taste.

Pour the mashed potatoes into a large serving bowl.

Cut the remaining 2 tablespoons of butter into small “pats” and add them on top of the potatoes.

How to Roast Garlic


Roasting garlic is so easy… and so much cheaper than buying it in jars already roasted… as with making your own spices blends… roasting your own garlic can save you money considerably… and having it on hand… well… makes using it easier…. making meals come alive with fabulous flavor.

Roasting garlic makes it almost sweet… and takes the pungent flavor and smell away… the insides become a buttery yellow ans soft… fabulous spread on fresh bread… and no… you won’t reek from it for days… it actually is very mellow.

TIPS


I like to make a batch of roasted garlic and store it in a jar in the refrigerator… it should easily last two weeks…

I use pimentos in my macaroni salad and some other salads… I clean and save the little jars … they’re perfect for storing roasted garlic… the two ounce size holds roasted garlic from about 3 average sized heads.

You can use a ceramic ramekin or… you can use a non-stick pan which I recommend… a muffin tin works especially well … but any small pan will do.

Try this… you won’t believe how easy it is to do!


Recipe: Roasting Garlic

All you need:

Whole garlic heads
Olive oil

All you need to do:

Preheat oven to 400 degrees F.


Peel the loose paper-like outer skin from the head.

Cut about ¼ inch off the top of the head.

Drizzle about 2 teaspoons of olive oil on each head, making sure it gets into the cut cloves.


Place in a baking dish or pan.. cover with foil.

Bake at 400 degrees F for 35 minutes or until the cloves are extremely soft.


Remove form the oven and allow to cool enough to handle.


Remove the soften cloves with a small fork or squeeze out the roasted garlic into a clean jar.

Refrigerate.

Recipe: White Chocolate Amaretto No-Bake Cream Cheese Pie


This cream cheese pie is heaven!.... the cream cheese pie is light and smooth with a hint of Amaretto … then a white chocolate ganache with a hint of Amaretto again… all with a shortbread pie crust… divine!

This recipe uses my base recipe for a No-Bake Cream Cheese Pie… and gives it a little twist with the Amaretto instead of vanilla … and so easy to make!

TIPS

Soften the cream cheese well… it should be creamy… I let it sit out for a minimum of 4 hours.. you can also

Usually I tell you to fold in the Cool Whip… not this time.. mix it in thoroughly… don’t over mix but make sure it is well blended… it will give the cream cheese pie a wonderfully smooth and light filling.

The White Chocolate Amaretto Ganache is not difficult… however… it does run all over the place if you’re not careful… as ganaches do… I recommend you chill it a bit before spooning it over the pie… and do it lighty… don’t use all the ganache… you can add more ganach on each slice as you serve it…. otherwise you will have Okefenokee Swamp… for sure…

Chill the pie and let the ganache chill as well….before putting it on….. it will help.

If you don’t want to use Amaretto in this pie… you can substitute almond extract… 1 teaspoon (or to taste) in the cream cheese mixture and 1 teaspoon (or to taste)in the ganache.

Well … here we go.. this is one fantastic pie…


Recipe: White Chocolate Amaretto No-Bake Cream Cheese Pie

All you need:

1 Ready-Crust Shortbread crust
1 pkg. (8 oz.) Philadelphia Cream Cheese, softened
1/3 cup sugar
1 cup sour cream
1-2 tablespoons Amaretto (to taste)
1 tub Cool Whip
White Chocolate Amaretto Ganache

All you need to do:

Using the paddle attachment of the mixer, beat the softened cream cheese in a mixing bowl until creamy.

Add the sugar and Amaretto, and beat until well mixed, scraping the bowl and paddle periodically.

Add the sour cream and beat on low speed until well mixed.

Remove the paddle attachment and add the Cool Whip, stir it until well incorporated.

Scoop the cream cheese mixture out of the bowl and into the pie shell.

Refrigerate one hour, then remove and add the white chocolate ganache on top of the pie… don’t use all the ganache otherwise it will run… use a spoon to spoon small amounts over the pie. Return the pie to the refrigerator for at least another hour... longer is better... it will set and cut beautifully if refrigerated overnight.

Note: You can also add the ganache over each pie slice as you serve it…

Recipe: White Chocolate Amaretto Ganache


Ganaches are fabulous on all kinds of cakes… this ganache is one I came up with while trying to duplicate a “glaze” that was on a birthday cake Warren bought me one year… the cake was a white chocolate Amaretto cheesecake… I thought I died and went to heaven… it was fabulous!....

Even Bubba .. could smell it and wanted it… he looked at me like ... hand over the cake and nobody gets hurt...and after all it was my birthday and he does love me.. so the “boys”… Bubba and Duke got a bit of birthday cake that year…. I think Bubba thought he died and went to heaven too! Duke… well… Duke is Duke.. he loves sweets too… but he’s not over the moon for it like Bubba is…

Note: Picture is the ganache on a White Chocolate Amaretto No-Bake Cream Cheese Pie.

TIPS

I used Bakers White Chocolate… unwrapped each square and then diced it.

I heated the cream and butter in the microwave… I have an ancient microwave … so the time and setting will depend on your microwave strength… you can also heat them in a small pot on the stove… it’s just easier to put it in a measuring cup and nuke it.

This is very simple to make…. it will be very runny… let it cool to room temperature and it will be less runny… refrigerate it and it will thicken enough to be spreadable.

This is fabulous on cheesecake … try it!


Recipe: White Chocolate Amaretto Ganache

All you need:

6 ounces of white chocolate, chopped
½ cup heavy cream
1 ½ tablespoons unsalted butter, cut-up
½ -1 tablespoon Amaretto (to taste)

All you need to do:


Put the chopped chocolate in a large metal or heat proof glass bowl.

Measure the heavy cream into a 1 cup measuring cup… and add the butter.

Microwave until the butter and milk boil.

Pour the milk mixture over the chocolate and let sit for about 5 minutes until it’s mostly melted.

Use a cooking spoon and stir until smooth and chocolate has completely melted.

Add the Amaretto and stir well.

Let cool …. at room temperature pour over cake… it will run so be careful not to do too much at once. OR…

If you refrigerate it … it will be spreadable.

This makes enough for a 9 inch cake.

Recipe: Banana Soufflé


Many people are intimidated about making soufflés… and they shouldn’t be.. they really are very easy to make… very simple steps… and you have a wonderfully airy dish… and depending on the ingredients… soufflés can be the main dish, side dish or dessert…

I learned how to make soufflés as a teenager… my parents would have to go to a meeting one Sunday a month and would leave me to take care of my brother… invariably I would forget to defrost meat… and back then we didn’t have microwaves… and I knew nothing of speed defrosting.. so I learned to make a lot of different egg or pasta dishes... oh.. and tuna too… it’s amazing how many things you can come up with … with those ingredients.

So I was left to read cookbooks and make the best of what I had… I learned how to make soufflés from reading my Mother’s Gourmet cookbooks… with a little practice.. I began experimenting with different ingredients and sizes of soufflé dishes… I was 14…. so trust me, you can do this.

This recipe for Banana Soufflé is so delicious… a perfect finish to a special meal… or even a brunch… and for you dieters… this is surprisingly something most dieters can consider… it has very little sugar.. and is mostly egg whites…

TIPS

Follow the directions in the steps I will break out for you… and you will have a perfect soufflé.

I wrote the recipe for rum extract… you can substitute rum for it. Since I used 1 ½ teaspoons of rum extract… it is approximately equal to 2 ½ tablespoons of rum… I would eyeball the ½ tablespoon…

To make this without the rum flavor… substitute vanilla for the rum extract amount… (in addition to the vanilla extract in the recipe).

Want to WOW your guests? …. here’s a serving suggestion


To serve on a serving plate… use little small round hot pads… and cover them with a small paper doily or a flattened paper muffin wrapper… or … I have heat resistant plates… so I cut about a quadruple thickness of thick paper towel into a circle a little larger than the soufflé dish.. then place a flattened paper muffin liner over it…

These are individual soufflés… and they make a fabulous presentation… perfect for a dinner party… these bake in 15 minutes… so while your guests linger at the table… excuse yourself and do the last couple of steps… see instructions below to make these partially ahead.

So.. there’s lots to show you.. so let’s get to it!


Recipe: Banana Souffle

All you need:

1 tablespoon butter, melted
2 very ripe bananas
1 large egg yolk
1 tablespoon lime juice
4 tablespoons sugar, divided
½ teaspoon vanilla extract
1 ½ teaspoons rum extract
3 large egg whites
Pinch of salt
Confectioner’s sugar (for garnish)

All you need to do:

Preheat the oven to 400 degrees F.


In a small processor or blender, add the banana, the egg yolk, 2 tablespoons sugar, lime juice, vanilla and rum extracts. Process until smooth.


Pour the banana mixture into a large bowl and set aside.


Brush 5-6 one cup soufflé dishes with the melted butter (I used only 4 because that's what I had at the time.. I discarded the rest of the unused batter.


Put 1 tablespoon sugar in a small custard cup…. gently pour about half the sugar into a souffle dish and turn completely, coating with the sugar… dump the excess sugar back into the custard cup and repeat until all souffle dishes have been coated… discard any leftover sugar (you shouldn’t have very much left).

Place the soufflé dishes on a baking sheet and set aside.


Using a large mixer, place the egg whites and a pinch of salt into the mixer bowl. Beat until soft peaks.


Add 1 tablespoon sugar to the egg whites and beat until stiff peaks form when the beater is stopped and pulled up… the egg whites should be glossy.


Using a spatula, fold in the egg whites into the banana mixture, a quarter of the egg whites at a time… do not over mix… but the egg whites should be well distributed throughout the banana mixture.


Spoon the mixture into the soufflé dishes, fill to slightly above the rims. Tap them gently on the counter top.

With a knife, flatten any peaks and then using the knife gently cut a circle in the top of the mixture… it should be a circle about half the size of the soufflé dish.


Place in the center of the preheated oven and bake for about 15 minutes.. keep an eye on them… you want them risen and browned slightly but not burned…


Remove and place on a protected serving plate and dust with powdered sugar.

Serve immediately.


Note: Do not panic about how fast they will fall… and they will fall… this photo was taken about 10 minutes after coming out of the oven… even after falling the soufflé is still light and airy and beautiful.


To make partially ahead…

Prepare the individual soufflé dishes and set aside (see instructions above).

Prepare the banana batter portion .. and set aside.

Keep the egg whites in the fridge in a small cup ….

Have all your ingredients for the egg whites ready.

Set up the serving plates ahead of time and set aside…

Preheat the oven.

Five minutes before the oven is done preheating… follow the instructions for beating the egg whites.

Fold the whites into the banana batter and spoon into the prepared individual soufflé dishes.

Bake for 15 minutes… leave the oven light on and watch… the tops shouldn’t brown too much.

While the soufflés are baking… prepare the confectioners sugar in a small strainer… set it down near where you plan on plating the soufflés.

When they come out of the oven… place on prepared plates.. sprinkle with confections sugar and serve.

Manly Man Hearty Breakfast Ideas


With Father’s Day this weekend… we need to think of ideas to pamper the men responsible for doing all the things Fathers do… whether they’re older or younger… middle-aged or not… Fathers-To-Be…. or Fathers to furry four-legged “children”… they’re all honored this Sunday…

So what better way to do that than make foods he can really enjoy… here is a selection of breakfast foods Dad might like… from sweet to hearty … find the perfect breakfast for that special man… here are some ideas...


Eggs Beauregard


Mexican Omelet


Hash Brown Potato Nests & Eggs


Grits and Sausage Casserole


Eggs Hendricks


Breakfast Burrito


Loco Moco


Warren’s Sausage Egg Potato Scramble

Corned Beef Hash and Eggs

Western Omelet

Eggs Benedict

Aloha Pineapple Cream Cheese Stuffed French Toast

Waffles

Buttermilk Pancakes

Biscuits and Sausage Gravy

Sides


Hash Brown Potatoes


Home Fries


O'Brien Potatoes

Something for Dad's Sweet Tooth


Gooey Butter Cake


Linzer Torte Bars


Frosted Irish Cream Brownies


A Couple of "How To" links

How to Make Bacon in the Oven

How to Poach Eggs in the Oven

Looking for More Recipes?

If you are looking for more recipes click the "Older Posts" link to page back to older posts or go to the archives in the right column. The list of labels at the bottom in the right column will help you find specific types of recipes or try our search engine at the top and search by name or ingredient.


What's more comforting on a cold day than Homemade Chicken Noodle Soup? .. and it's so easy to make!

Chicken Noodle Soup