Recipe: See’s Candies Easter Coconut Macaroons with Jelly Bird Eggs


This recipe is my coconut macaroon recipe with wonderful See's Candies in the center. I make the macaroon the same except that before baking them I make an indentation in the middle for the See’s Jelly Bird Egg…. when the macaroon comes out of the oven… I pop a Jelly Bird into the indentation…. They look so Springy and festive…. kid’s will love them.

I’ve re-posted the instructions and recipe for your convenience…. I hope you try these… they’re perfect for any Spring celebration….

This recipe is from the Barefoot Contessa of the Food Network. It’s a simple recipe and I have copied it exactly.

I do have a few comments about making them though. I read the reviews before making these.. most people raved but others weren’t so wild about them… but it seems it comes down to two very important things…

Be sure to use sweetened shredded coconut… it will make a huge difference if you happen to use the unsweetened variety.

Be sure to use sweetened condensed milk…. I use Borden’s Eagle Brand….

I stress this because these are the only sweeteners in the cookie besides vanilla extract and that really isn’t a sweetener… it flavors it… there’s a big difference.

Make sure you fold the egg whites in carefully, you don’t want to over-work it.

And… just to warn you… this is very, very sticky… the recipe advises you to use cookie sheets lined with parchment paper… I used Reynolds Wrap Release Non-Stick foil… which is the absolute best… nothing sticks to it… mine didn’t stick but a few didn’t want to budge right away… I cooled them on the pan a little too long…don’t wait more than 1 or 2 minutes before transferring them to a cooling rack.

They were very quick to make and really not difficult. If you follow the few tips I gave you.. they should be absolutely perfect!

Yummmm!

You can purchase See’s Candies Jelly Bird Eggs in one of their many stores or visit them online at See’s Candies.

PRINT RECIPE

Coconut Macaroon Recipe:

All you need:

14 oz. sweetened shredded coconut
14 oz. sweetened condensed milk
1 teaspoon pure vanilla extract
2 extra-large egg whites, at room temperature
¼ teaspoon kosher salt

All you need to do:

Preheat the oven to 325 degrees.

Combine the coconut, condensed milk and vanilla in a large bowl.

Whip the egg whites and salt on high speed in the bowl of an electric mixer fitted with the whisk attachment until they make medium-firm peaks.

Carefully fold the egg whites into the coconut mixture.

Drop the batter onto sheet pans lined with parchment paper using either a 1/ ¾ inch diameter ice cream scoop or 2 teaspoons.

Make sure that you drop them into rounded mounds, then make an indentation in the center for the Jelly Bird Egg that you will put in it after it is baked.

Bake for 25 to 30 minutes, until golden brown.

Drop a Jelly Bird Egg in each indentation.

Cool and Serve.

Recipe: Mini Buffalo Style Chicken Empanadas


These terrific little snacks are loaded with flavor... perfect for watching the big game or maybe even family game night.

This Mini Buffalo Style Chicken Empanadas recipe is adapted from Pillsbury…. It’s very simple… but I do have some tips to make it successful…

TIPS

Roll the biscuits out using a rolling pin to about double the original size.… and bake them about 8-10 minutes…. keep an eye on them so the tops don’t burn.

Another tip I would say…. You really need to flour your board and hands otherwise the dough does stick to the rolling pin and the board.

For the chicken… I prefer to use cooked leftover chicken…. but you can use the canned chicken you find in the supermarket. This will make enough for 2 cans (10 each) of biscuits. If that’s too many for you… simply make one can and store the filling in the refrigerator for another night.

You can also make them ahead… be sure they are lightly floured so they don’t stick to the container or waxed paper when you stack them in the container.

Fill each rolled out biscuit with about a rounded teaspoon of filling…. I over-filled mine (I usually do) and they leaked…. but they were gobbled up just the same.

You can use any Buffalo wing sauce that you like… we didn’t know what to choose… so we guessed…. and we lucked out with a great sauce…. It’s called “Texas Pete Buffalo Style Chicken Wing Barbecue Sauce”….

Serve these with Bleu Cheese or Ranch Dressing….. yummmmm


PRINT RECIPE

Mini Buffalo Style Chicken Empanadas Recipe:

All you need:

About ¾ pound of cooked chicken, diced
½ cup chopped green onions
1/3 cup purchased Buffalo wing sauce
2 cans Refrigerated Biscuits (dinner size)
1 cup shredded Cheddar – Monterey Jack cheese
½ cup purchased blue cheese or ranch dressing

All you need to do:

Preheat oven to 375 degrees.

Combine a medium bowl, the cooked chicken, cheese, chopped green onions and Buffalo wing sauce.

On a floured board, roll out each biscuit to about double the original size.

Put about 1 heaping teaspoon of meat mixture on half of each circle.

Fold the one side of the circle over the side with the filling.

Press the edges firmly to seal.

Bake 10 minutes or until golden brown.

Recipe: Black Bean and Bacon Soup


This recipe for black bean and bacon soup is absolutely delicious. I was looking to make a light mid-afternoon Saturday lunch …. It’s raining out… and this soup sounded so good… I had to try it. It’s quick and very easy.

So I made the soup and some Mini Buffalo Chicken Empanadas…. a perfect lunch.

I used hickory smoked thick cut bacon mostly because that’s what I had on hand and it added so much flavor… that I recommend you use that…. I will from now on.

The recipe calls for 4 Ortega Yellow Corn Taco Shells, crumbled…. I substituted crushed tortilla chips.

I also garnished it with a little chopped green onion and shredded cheese.

The recipe is from the folks at Ortega and was in a soft book titled “Mexican Fiesta Recipes”. It really is excellent.

Enjoy!

PRINT RECIPE

Black Bean and Bacon Soup Recipe:

All you need:

5 strips of hickory smoked bacon
1 medium onion, diced
2 tablespoons Ortega Diced Green Chiles
2 cans (15 oz. each) black beans, undrained
½ cup Ortega Taco Sauce
4 cups chicken broth
½ cup sour cream (for garnish)
4 Ortega Yellow Corn Taco Shells, crumbled (for garnish)
Shredded cheddar or Mexican blend cheese (optional for garnish)
Chopped green onions (optional for garnish)

All you need to do:

In a large pot, cook bacon over medium heat for 5 minutes, stir several times to prevent burning.

Add the onions and diced green chiles. Cook for 5 minutes or until the onions begin to brown.

Add the entire contents of both cans of black beans, taco sauce and chicken broth. Stir to combine and bring to a boil.

Reduce heat and simmer on low for 20 minutes to combine flavors.

Remove half of the soup and puree in a food processor (I used a blender).

Return pureed soup to pot and stir to combine.

Serve in soup bowls and garnish as desired.

Recipe: See’s Candies Toffee-ette Brownies


This recipe for See’s Candies Toffee-ette Brownies uses my basic brownie recipe with broken pieces of See’s Toffee-ettes. It is absolutely delicious. This brownie recipe produces a chewy fudgy brownie. The toffee flavor from the Toffee-ettes add a wonderful toffee flavor to the brownie… a perfect compliment to it.

Be sure to coarsely chop the Toffee-ettes.. some of my Toffee-ettes chopped finer and the toffee flavor wasn’t as strong. You can use a mini processor… but be sure to pulse… and not over chop them. I suggested you use 20 Toffee-ettes… you can use more… if you want even more toffee flavor.

I used unsweetened chocolate... not powder... the chocolate comes in 1 oz. squares in a box of 8. You can find it in the baking aisle of the supermarket.

I line my pan with foil for easy removal (see my previous Tip of the Day about using foil to line your pan)... I use Reynolds Wrap Non-stick foil... it's the best. I still lightly sprayed the foil with cooking oil to be sure they would come out easy.

The brownies tend to be very wet when first baked… they are actually better the next day… be sure to cool them completely before lifting them out of the pan and cutting them.

I cut mine and put them on a serving plate… then covered them with plastic wrap. They are absolutely the best brownies the second day.

You can purchase See’s Candies Toffee-ettes in one of their many stores or visit them online at See’s Candies.

I hope you will try these wonderful brownies.

Enjoy!


See's Toffee-ette Brownie Recipe:

All you need:

4 oz. unsweetened chocolate
2 Sticks (1 cup) butter, cut into 2 tablespoon chunks
2 ½ cups sugar
½ teaspoon salt
4 large eggs
1 teaspoon vanilla
1 ¼ cup flour
20 See’s Candies Toffee-ettes, coarsely broken

All you need to do:

Preheat oven to 350 degrees F.

Line a 9 x 13 baking pan with non-stick foil. (I use Reynolds Wrap)

Lightly spray the foil with cooking spray.

Place the 4 ounces of unsweetened chocolate and the butter chunks in a medium bowl.

Cover the bowl with a piece of waxed paper.

Microwave on high for about 3-4 minutes, or until the butter and chocolate have melted. Stir at 1 minute intervals.

Let the chocolate mixture cool about ½ hour.

In a mixing bowl, beat the eggs until light and frothy, add the salt and the sugar.
Beat the mixture for about a minute.

Fold the chocolate mixture into the egg mixture.

Stir in the vanilla.

Stir in flour.

Fold in the coarsely chopped Toffee-ettes.

Bake in a 350 degree oven for 30 minutes.

Cool completely before lifting the brownies out of the pan.

Store on a plate covered with plastic wrap.

Recipe: Chewy Fudgy Brownies


This recipe for chewy fudgy brownies is my favorite. We like fudgy brownies… we simply don’t care for cake-like brownies… and if you’re going to eat the calories… you might as well eat what you like.

TIPS

I used unsweetened chocolate... not powder... the chocolate comes in 1 oz. squares in a box of 8. You can find it in the baking aisle of the supermarket.

I line my pan with foil for easy removal (see my previous Tip of the Day about using foil to line your pan)... I use Reynolds Wrap Non-stick foil... it's the best. I still lightly sprayed the foil with cooking oil to be sure they would come out easy.

The brownies tend to be very wet when first baked… they are actually better the next day… be sure to cool them completely before lifting them out of the pan and cutting them.

I cut mine and put them on a serving plate… then covered them with plastic wrap. They are absolutely the best brownies the second day.

These are the best brownies!!


PRINT RECIPE

Fudgy Brownie Recipe:

All you need:

4 oz. unsweetened chocolate
2 Sticks (1 cup) butter, cut into 2 tablespoon chunks
2 ½ cups sugar
½ teaspoon salt
4 large eggs
1 teaspoon vanilla
1 ¼ cup flour
1 cup nuts (optional)

All you need to do:

Preheat oven to 350 degrees F.

Line a 9 x 13 baking pan with non-stick foil. (I use Reynolds Wrap)

Lightly spray the foil with cooking spray.

Place the 4 ounces of unsweetened chocolate and the butter chunks in a medium bowl.

Cover the bowl with a piece of waxed paper.

Microwave on high for about 3-4 minutes, or until the butter and chocolate have melted. Stir at 1 minute intervals.

Let the chocolate mixture cool about ½ hour.

In a mixing bowl, beat the eggs until light and frothy, add the salt and the sugar.

Beat the mixture for about a minute.

Fold the chocolate mixture into the egg mixture.

Stir in the vanilla.

Stir in flour.

Fold in the nuts if using them.

Bake in a 350 degree oven for 30 minutes.

Cool completely before lifting the brownies out of the pan.

Store on a plate covered with plastic wrap.

Recipe: Amazing Coconut Cupcakes with White Chocolate Cream Cheese Frosting


This coconut cupcake with white chocolate cream cheese frosting recipe was given to me by my son, Erik. He and his friends had a little celebration and served champagne and these amazing cupcakes. They found an old recipe I had from Cuisine at Home Issue No. 50 April 2005.

The picture is an actual picture they took of their table…. I think it looks fabulous.

All they did was rave about these cupcakes… the taste was orgasmic….

So if you have a special occasion coming up… a spring celebration… a baby or wedding shower…. these are perfect for your party..... or maybe you just want to indulge yourself and your family with a yummy treat.... either way.... yummmmmm


Recipe: Amazing Coconut Cupcakes with White Chocolate Cream Cheese Frosting

All you need:

For Cupcakes:

1 ¾ cup all-purpose flour
2 teaspoons baking powder
½ teaspoons table salt
3 egg whites
¾ cup coconut milk or whole milk (he used coconut milk)
1 teaspoon vanilla
½ teaspoon almond extract
¾ cup sugar
½ cup unsalted butter at room temperature
1 cup sweetened shredded coconut

For Frosting:

8 oz. Philadelphia Brand Cream Cheese at room temperature (Do not use nonfat)
½ cup unsalted butter at room temperature
2 oz. white chocolate
The juice of ½ a lime
2 cups powdered sugar
1 ½ cups sweetened shredded coconut

All you need to do:

Cupcakes:

Preheat oven to 350 degrees F.

Line a regular sized muffin tin with cupcake papers.

Sift the flour, baking powder and salt together into a bowl. Set aside.

Combine the egg whites, coconut milk, and extracts in a bowl. Set aside.

In a large bowl, cream together the sugar and butter with an electric mixer set on medium. Blend until the butter lightens in color (about 4 minutes).

Alternately add dry and wet ingredients (starting and ending with dry) in 3 additions.

Fold in coconut using a rubber spatula.

Scoop batter into the prepared tin, filling each about ¾ full.

Bake until a toothpick inserted in the center of a cupcake comes out clean, 25-30 minutes.

Cool in the pan 5 minutes, remove and cool completely.

Frosting

Beat the cream cheese and butter for the frosting with an electric mixer until smooth.

Melt the white chocolate in a microwave at high power in 30 second intervals. Stir often until smooth.

Add melted white chocolate and lime juice, beat to blend.

Add powdered sugar and beat until smooth (it will be gooey).

Spread 3 tablespoons of frosting on each cupcake.

Top cupcakes with coconut.

Sunday Breakfast Idea X – Waffles


In honor of National Waffle Day tomorrow... I'm featuring waffles for this week's Sunday breakfast idea.

Waffles…. Waffles and more waffles….are a wonderful Sunday breakfast idea. Let me count the ways you can make them….You can stack ‘em… Make ‘em in cute shapes… Make ‘em thin… Make thick Belgian waffles….top them with virtually anything from ice cream and chocolate syrup to fresh fruit or thick delicious fruity preserves…. Or just butter and maple syrup… it’s all good.

Awhile back I posted two terrific recipes…. two versions of a Bananas Foster Waffles… one with alcohol and one without… both are excellent….. Bananas Foster Waffles (with alcohol)… Bananas Foster Waffles II (non flambe or without alcohol).

They're not hard to make… but obviously a waffle iron is necessary. If you don’t have a waffle iron… you should invest in one… they make great breakfasts…. and you will be the breakfast hero of the household.

Recipe: Basic Waffle Batter

Waffles are a terrific weekend breakfast... I know very few people who don't like waffles... You can make top them simply with maple syrup or fruit syrups or get fancy with other toppings... the options are limitless.

This recipe is a basic waffle batter…. very easy. What you do with it after it's made is up to you... personally... a little vanilla ice cream and maybe some peaches with some raspberry syrup... oh and did I mention fresh whipped cream? ... you have yourself a waffle version of that classic... Peach Melba... yummm!

However you make them... I'm sure they will be a hit at the family breakfast table.

Enjoy!

PRINT RECIPE

Waffle Recipe:

All you need:

2 cups all-purpose flour
2 teaspoons baking powder
½ teaspoon salt
4 large eggs, separated
2 tablespoons sugar
2 cups whole milk
½ stick (4 tablespoons) unsalted butter , melted
½ teaspoon vanilla extract

All you need to do:

Sift the flour, baking powder and salt into a medium bowl. Set aside.

In a large bowl, whisk together the egg yolks and sugar until the sugar is completely dissolved and eggs have turned a pale yellow.

Add the milk, melted butter and vanilla and whisk until just blended… do not over beat the mixture.

Mix the wet mixture with the dry... don't over mix.

In a large bowl, beat the egg whites with a mixer until soft peaks form (about a minute or two).

Gently fold in the egg whites into the egg mixture, be very careful not to over mix as this will “deflate the egg whites”.

Waffle Making Tips

Tip of the Day

Here are a few waffle making tips to make your waffles come out perfect:

For fluffier, lighter waffles, separate your eggs and beat the egg whites until they are have soft peaks. Then gently fold the egg whites into your batter.

To add flavor to your waffles add an extract (vanilla, almond or coconut… to name a few examples) or a teaspoon of cinnamon or chocolate powder to your batter.

Buttermilk makes a great waffle batter too…. if you don’t keep buttermilk on hand… you can keep a can powdered buttermilk…. it works great.

When making your batter… measure the ingredients very precisely.

Do not open the waffle making for the first minute after pouring the batter and closing the waffle maker.

When I got my waffle maker… To figure out the perfect amount of batter for each waffle for my particular waffle maker…. I used a dry measure to scoop batter onto the waffle maker… I had many, many oddly shaped waffles until I got it just right for my waffle maker… then I knew exactly how much batter filled my maker to make the perfect waffle (nothing beats time, patience and persistence).

The waffles should be done when the steam stops coming out.

If your waffles are tough and rubbery…. Your waffle iron may not be hot enough… you may have to wait until your waffle iron gets hotter… wait extra time between waffles… check the booklet that came with your waffle maker for suggestions….if that doesn’t work… the problem may not be fixable without a new waffle maker.

I am a skim milk user for most recipes…. but NOT for waffles… for best results ..use buttermilk or whole milk.

Waffle Makers 101


Commentary

If you are considering purchasing a waffle maker there are a few features that you may be interested in having in your waffle maker. The following are features that Shopwiki feels are essential to making the perfect waffle… I tend to agree.

• “Browning Control: The crispness and darkness of the waffle can be set to your liking. This is not a necessary feature, but some waffle enthusiasts consider it a requirement. About half the devices feature this.

• Capacity: The number of waffles that can be made simultaneously. Choose between 2 and 4 waffle models, or go for the one-waffle Belgian style maker setup that makes one large, thick, round, (but still divisible) waffle. You may also like having a pizzelle press instead of a waffle maker.

• Waffle Shape: Round, square, quarters, Mickey Mouse, of course, and, my personal favorite, waffle sticks.

• Chime Feature: A bell to indicate waffle completion and assure perfect golden brown. This allows you to walk away from the waffle maker and do other things without having to pay attention to when the waffles stop steaming.

• Versatility: Waffle makers have diversified to include sandwich makers and grills, but the best waffles do not share with paninis or steaks. If you must buy a multi-function machine, make sure the aforementioned features are not excluded from the waffle maker.

• Price: Expect to spend at least $30 to $40 for a waffle maker. “

In addition, you should visit their website for Major Manufacturers and Recommendations.

When choosing an appliance, such as a waffle maker, it’s good to read reviews… I surfed the net a bit and found numerous sites that have written reviews… I would read them. Also look for recalls… I know numerous manufacturers that have recalled some of their models.

Shop around for the waffle maker of your choice... you don't replace appliances often... at least I don't... even after buying one and realizing it doesn't have everything I want... I rarely replace it... so make a wise decision the first time... There is an extensive selection of waffle makers, including ones that make heart shaped waffles at Cookware.com. ...you can go to their website and review what they have.

They even have waffle cone makers and waffle cone mixes....how cool is that?

Uno Farmyard Waffle Iron by VillaWare makes awfully cute animal shaped waffles which are carried by numerous on-line stores including Target and Amazon. Great for kids.

I like my waffle maker… but not having tried other brands… I cannot honestly tell you which one is the best and why. Both Cook’s Illustrated and Good Housekeeping reviewed waffle makers recently, you will find the reviews at Shopwiki.

Recipe: Hungarian Beef Goulash


This Hungarian Beef Goulash recipe is absolutely delicious. This is so easy… you can set this up in your crock pot and let it cook itself. It makes a wonderfully hearty meal…. Serve it with buttered noodles and a dollop of sour cream… a crusty fresh bread….yummmmm

TIPS

I use red wine in the recipe… while I think it adds a wonderful robust flavor…. and the alcohol does cook off… I fully understand that many people do not want to add alcohol to their food… the recipe is delicious without it as well…

I wrote the recipe for 2 ½ pounds of lean (round) stew meat…. It should easily make 4 hearty servings or 6 average servings. Just remember…. however much you have in meat you will need to have the same amount in onions…. so you would need 2 ½ pounds of onion. The amount of beef stock you will need will be enough to almost cover the meat and onions… don’t drown it… just add enough to almost cover it.

Make sure to use Hungarian Sweet Paprika and Hungarian Hot Paprika for the best results. You can find it by the spices in the supermarket. See my spice section for a little information on these paprikas.

Finally…. The key to tender meat that has all the flavors infused… you need to simmer this slowly…. I used a crock pot …. I’d never made it in a crock pot before…. But I had one of those duh moments… and did it… it worked out beautifully… so much so… I wondered why I hadn’t thought of it before.

I set my crock pot on high for 4 hours and low for an hour…. If you are setting this up and leaving it … you can set it on low for 6-7 hours.

I hope you will try this… and enjoy it!


PRINT RECIPE

Hungarian Beef Goulash Recipe:

All you need:

2 ½ pounds lean (round) stew meat
2 ½ pounds onions, sliced
Beef stock (enough to almost cover beef and onions)
½ cup flour
1 teaspoon garlic powder
½ teaspoon salt
¼ teaspoon black pepper
Olive Oil
1 tablespoon Hungarian Sweet Paprika
1 teaspoon Hungarian Hot Paprika
1 cup red wine (Cabernet would be an excellent choice)
Sour Cream for garnish

All you need to do:

Put the flour, garlic powder, salt and pepper in a plastic bag…. Shake to mix.

Add the stew meat and shake (you will have to do this in batches).

Over medium high heat, heat a large skillet with enough olive oil to just coat the pan.

Brown the floured beef until all sides are seared.

Remove the beef and add to the crock pot.

Slice onions in half (width wise) then thinly slice.

Add enough oil to the bottom of the skillet to just coat the pan.

Add the onions.

Cook the onions over medium high heat until they are soft and translucent (don’t brown them).

If the onions start to brown, turn the heat down a bit.

Remove the skillet from the heat.

In a small ramekin or custard cup, mix the paprikas until mixed thoroughly.

Sprinkle the paprika over the onions.

Stir the onions until the paprika is evely distributed.

Add the onions to the crock pot.

Add the red wine to the crock pot.

Add enough beef stock to almost cover the beef and onions.

Stir the pot.

Set the crock pot on high and cook for 4 hours. (you can stir occasionally but you don’t have to)

Turn the crock pot down to low for an hour.

If there is any grease on top... (looks like oil)... you can easily de-grease it by ladeling it off... I had to ladel off about 1/4 cup... this will make your meal even leaner...

Serve over hot buttered noodles and garnish with a dollop of sour cream.

Hungarian Beef Goulash – The Debate

Commentary

The recipe for Hungarian Beef Goulash that I will post today is one I have been cooking for years. My Mother and I had a discussion recently about my recipe… apparently, in her opinion, my Goulash is not “authentic”…. well…. we have a difference of opinion…

So I did some research.. and I believe my one Hungarian Cookbook says it all…. as many as there are Hungarian cooks… there are probably as many Goulash recipes…. much like the American Pot Roast… or Beef Stew.

I also surfed the net… I found many, many recipes for “Authentic” Hungarian Beef Goulash… and no two were exactly alike.

So what is Hungarian Beef Goulash? Well, they seem to agree on a few things…. beef, onions and paprika…. after that…. things go astray. Some had tomatoes… some insist absolutely NO tomatoes… some add carrots… some add celery… some use wine… some don’t…. some use beef stock …some use only wine… some use both…so I have come to the conclusion… that most are similar… and the basic taste is roughly the same… a beef stew that is seasoned heavily with sweet and hot paprika… and has onions… my recipe falls into this category.

According to my Mother, my Grandfather used wine and no stock… I honestly don’t remember that… but I was too young to remember when he made it. I use beef stock with a healthy dose of wine (which cooks off… but leaves a wonderful robust flavor).

I do remember that his golden rule was… you had to use the same amount of onions as you did beef… so if you used 2 pounds of beef…. you had to use 2 pounds of onions. He also insisted that when you added the paprika… you had to take the pot off the heat when you added it in. He also used a mix of sweet and hot paprika…. at least this much my Mom and I agree on.

Quite possibly my recipe evolved over the years… I honestly don’t know…. what I can tell you is that when vacationing in Toronto years ago… we happened on a small Hungarian restaurant… and decided to stop and eat supper there. In the restaurant, they had this map of that area from where my family was from… when the waitress asked why I was studying the map so intently… I told her I was looking for my family’s home town…. and told her the town… she ran into the back… and out came the owner/chef and his wife… they were from a town about 10 miles from my family’s… we were treated like family guests… it was a wonderful evening of fabulous food and wine…. and the Goulash was almost a carbon copy of mine.

So “authentic” recipes will always be a matter of opinion… and frankly… they are all authentic… it’s what has evolved from their family.

Recipe: German Apple Strudel


This recipe for apple strudel is very easy…. and oh so good. As many of you know from previous posts… I’m German-Hungarian and strudel is a wonderful memory from my childhood.

There was this bakery, Herbst’s, that made strudel. I would go to an Octoberfest and there they would be…. in their booth… selling long boxes containing 3 strips of strudel… oh they were so good. They had apple, cherry, cheese and a poppy seed filling to choose from… thankfully you could mix and match…. I loved… I mean loved the cheese….

Sadly, Herbst’s is no more…. but the memories live on. I have to figure out a recipe for the cheese filling…. and you will be the first to know about it… for sure.

TIPS

I know many people are intimidated by phyllo dough… but it really isn’t that hard to work with… you just need to follow a few tips that I can give you. See the directions below and my previous Tip of the Day on Handling Phyllo Dough Sheets.

When you are done using the phyllo dough... carefully roll up the dough and slip it back into the plastic bag and put back in the box. Seal the box and pop it back into the freezer of the refrigerator.

I made my filling this time using apple pie filling… then added raisins and a little brown sugar. Don’t use the entire can of pie filling… the filling will split the dough while baking… mine ended up with a sizeable split in the middle… but you know what?.... we ate it just the same and it was as good as the pieces that came out perfect. I would recommend you use about ½ to 2/3 of a can.

I hope you try this recipe and enjoy!


PRINT RECIPE

Recipe: German Apple Strudel

All you need:

5 sheets of phyllo dough
½ stick melted butter
¼ cup plain bread crumbs
½- 2/3 can apple pie filling
¼ cup golden raisins
2 tablespoons brown sugar
Powdered sugar for garnish
Fresh Whipped Cream (optional)

All you need to do:

Thaw the phyllo dough in the refrigerator overnight.

Set the dough out on the counter, with box still closed, for 1-2 hours to get the dough to room temperature.

Preheat the oven to 375 degrees F.

In a bowl, mix the apple pie filling, raisins and brown sugar. Set aside.

Cover a cookie sheet with non-stick foil (from Reynolds Wrap). Set aside.

Melt the butter in the microwave. Have a pastry brush next to the butter. Set aside.

Make sure you have the plain bread crumbs in a small bowl within easy reach.

Wet and wring out a cotton towel (you can use a paper towel if you don’t have a cotton towel). Set aside.

On a large cutting board or counter top… open the box of phyllo dough and slowly and carefully unroll the package.

Remove one sheet and carefully lay it down on the work surface. Cover the remaining dough with the wet towel.

Carefully and GENTLY brush the sheet with melted butter. Do it patiently otherwise you will have tears. If you get tears… it should be okay …especially in the inner layers… but you really don’t want too many.

Sprinkle with bread crumbs.

Repeat this 4 more times, so you have 5 layers.

Place the pie filling down the middle of the dough.

Fold over one side of the dough, then the other side.

Carefully lift the strudel and place on the cookie sheet.

Brush the strudel with melted butter.

Bake for 50-55 minutes until golden brown.

Remove from oven and allow to cool somewhat.

It’s wonderful to serve warm… but cold is good too.

Sprinkle with powdered sugar.

You can either slice it there and serve as individual servings (best idea)…or using two spatulas lift and put on a serving plate.

If serving individual servings... you can garnish with a dollop of fresh whipped cream on the side.

I like to slice it on the cookie sheet… because I can fold the foil over the leftovers for easy storage.

Pressure Cookers 101


Today we have a guest blogger, Suzanne, an expert from Cookware.com. The topic is Pressure Cookers... she gives us a rundown of what they are and things we should know about them and how they can benefit us. You can visit Cookware.com to see their complete selection of pressure cookers.

I hope you enjoy reading her blog.

What is a Pressure Cooker?

A pressure cook is a sealed pot that heats liquids to a temperature that is far higher than what can be achieved by a regular pot. This fact allows you to cook your food in about 1/3 of the time it would take you in conventional cookware or dinnerware. The pressure cooker builds up steam and pressure as the liquid boils and is released through a valve to keep the unit from exploding. Once the optimal amount of pressure is reached, the heat is turned down to maintain a constant temp for a designated period of time.

What are the Benefits of a Pressure Cooker?

Pressure cookers are great for quickly and evenly cooking meats, vegetables, and even fruits. When you boil foods they lose much of their vitamins and minerals, but in a pressure cooker foods retain their nutritional value. Also, not only do pressure cookers prepare meals in a fraction of the time, but they also save energy and prevent smells from permeating throughout the house while you cook. They help trap in flavor so they are perfect for slow cooked meals such as soups, stews, and chili.

Are Pressure Cookers Dangerous?

When ever you are working with contents under pressure, you should always be mindful of what you are doing. Many people fear pressure cookers because of stories involving them exploding, but modern pressure cookers come equipped with a back up pressure release valve to avoid any such accidents. It is important however, that you read the directions carefully before you attempt to cook anything with a pressure cooker. Pressure cookers come in a variety of sizes and with different options, so it’s important that you know the inner workings for your particular make and model before you turn it on.

Recipe: Coconut Pie


This recipe for a delicious coconut pie that’s just a little different…. a different version of coconut custard pie. The coconut is mixed throughout the pie and the custard. The taste is delicious… the texture is different. I was looking for something easy and different…

If you’re looking for a very quick and tasty dessert… this is it…. I found the recipe at Allrecipes.com …. They call it Impossible Coconut Pie II…..I liked the recipe and thought I’d try it… but I did read the reviews first…

I did make some changes based on reviews… many of the reviewers said it was too sweet… the recipe called for ¾ cup sugar…so I cut back on the sugar by about ¼ of a cup… next time I will use the full ¾ cup…possibly 1 cup of sugar… we thought the cut-back version was not quite sweet enough. .

I used sweetened coconut … the recipe didn’t specify… the recipe called for margarine… I used butter because it was what I had on hand… it didn’t specify melted or softened… so I used softened butter…. I put it in the micro for a minute or so… it was very soft.

I followed some of the reviewers’ advice… I used 2 whole eggs and 2 egg yolks… the original recipe called for 4 eggs…. and finally … the recipe said to sprinkle the nutmeg on top… I mixed it in.

The original recipe said to bake it for 45 minutes…. you need to bake it for 60 minutes.

The pie cut perfectly after it had been in the refrigerator about an hour.

This pie is a great dessert… and we will definitely make it again.

I hope you try it and enjoy!


Coconut Pie Recipe:

All you need:

2 cups milk (I used skim)
1 cup flaked coconut
2 egg yolks
2 whole eggs
1 teaspoon vanilla
½ cup flour
6 tablespoons butter or margarine, softened
¾-1 cup sugar (see notes above)
¼ teaspoon nutmeg

All you need to do:

Preheat oven to 350 degrees F.

Grease and flour a 10 inch pie plate… I used Crisco with Flour cooking oil spray.

Place all ingredients in a blender and blend well.

Pour into prepared pie plate.

Bake for 60 minutes.

Cool then refrigerate.

It’s a Blog Party… and We’re Glad You Stopped By!


Ultimate Blog Party 2009
5 Minutes for Moms is having their annual Ultimate Blog Party…. and we’re glad you stopped by to visit our kitchen to see what’s here. Whether you’re one of my regulars… or just landed here looking for something… or you’re part of the 5 minutes for Moms party…. you’re always welcome in my kitchen.

For those of you that don’t know me… let me introduce myself… I’m Linda… I love to cook and love to share recipes and tips … my cooking lessons started out in my Mom’s and Grandmothers’ kitchens and continued through the years as I cooked for my own family… I can remember being a little girl sitting on a stool watching intently as they cooked… and being thrilled when I was finally allowed to help… and so began my love of cooking and good food.

This blog is all about food…. food... and more food…. something for everyone… easy to prepare… healthy makeovers of old favorite recipes… budget conscious tips…foods for picky eaters… kid friendly foods…classic recipes…timesavers for busy lives… special dinners and desserts for those special occasions… party ideas… helpful information… and much more…

So have a look around…. Click the Home link to go to the Home Page… or check out my Recipe and Tip Index.

Most of all enjoy!

There are so many cool prizes to be won at this year’s Ultimate Blog Party, but my top three picks would be:

#58 – Kitchen Aid Artisan Stand Mixer
Provided by: Moms Who Think
Prize details: From Amish Friendship Bread to Decadent Cheesecake and all the meals in between dessert, Moms Who Think has recipes you’ll love. We would like to donate a Kitchen Aid Artisan Stand Mixer to help make one lucky winner’s home cooking even easier. (winner’s choice of color, $349.99 retail value)

#88 –$40 gift certificate to Carrabba’s Italian Grill
Provided by: The Divine Miss Mommy
Prize details: Discover the Passion, the Thrill and the Grill of Carrabba’s! The Divine Miss Mommy would like to donate a $40 gift certificate to three winners to be used at any Carrabba’s Italian Grill.

#19 — $50 gift certificate to Target Stores
Provided by: Shoot-Me-Now
Prize details: Treat your kids, or even better, treat yourself! Shoot-Me-Now would like to donate a $50 Target gift card to one winner.

And if my top three picks are already chosen, I’d love any of the following (in order of preference):

21,26,64,72,91,25,114,118,123,130


The drawings have ended.

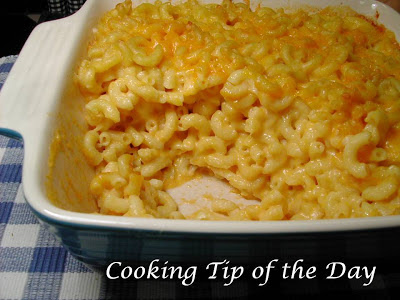
Recipe: Classic Macaroni and Cheese


This recipe for Macaroni and Cheese is one I have made for years. Admittedly, I always made it “by eye”….. you know the type of cooking I mean…. annoying cooks that don’t measure exactly and just go on their merry way…. making foods that turn out great every time and the same every time …. getting a recipe out of them is like pulling teeth…. well…. my Macaroni and Cheese recipe is a little like that.

One of the secrets to cooking “by eye” is that I use the same pot every time… I know how much should be in there…. and I just do it….. have no fear though…. I measured exactly so I could write the recipe for you. It actually was hard to do…. I’m so used to grabbing the milk container and pouring it right into the pot…. but measure I did.


Now doesn't that look yummy??


I wrote my recipe and then surfed the net to compare my recipe with other ones out there…. I was surprised to find very few that used the traditional roux (flour and butter or margarine) and milk to make the starter white sauce…. and the ones that did… didn’t use nearly as much cheese as I do….

Back in junior high, we had to take home ec (economics) where one semester was cooking and the other was sewing…. (I’m probably dating myself)…. I guess the school district felt obligated to make us into good little homemakers…. well… macaroni and cheese was one of the dishes we had to learn to make…. no shortcuts… we had to grate our cheese… and make our white sauce base and then make the cheese sauce…. etc…. so maybe my recipe has roots going back to junior high…. but in any case… my son had it often while growing up and always loved it…


Just look at that ooey gooey cheese...mmmm
TIPS

I love cheese… and my macaroni and cheese has a smooth cheese sauce… and the sauce is very cheesy… I used mostly sharp cheddar with some mild cheddar…  you can use only mild or a combination including Monterey jack cheese….

You can use different types of pasta…. elbows, bow ties, rotini, shells…. your choice…

Sprinkle some extra shredded cheddar on top for the last 10 minutes of baking and you will get a slightly crisp golden color... yummy too!


Recipe:  Classic Macaroni and Cheese

All you need:

1 pound macaroni, cooked according to package directions
4 cups skim milk (you can use 1%, 2% or whole also)
3-4 tablespoons margarine
¼ cup flour
4 cups shredded sharp cheddar cheese
2 cups mild cheddar cheese
Salt to taste
Pepper to taste

All you need to do:

Preheat oven to 375 degrees F.

Cook macaroni to al dente (cooked but chewy) according to package directions. Drain.

Using the same pot, melt the margarine over medium heat.

Add the flour and mix… to make the roux...it will be very pastey….

Add about a cup of milk and whisk vigorously until lumps disappear… you may add a little more milk if the roux is too dry.

Slowly add about 2 cups of the milk…. whisking constantly and vigorously.

When mixture begins to thicken… slowly add remaining milk… the consistency will be a little runnier than cream…

Continue to whisk over heat until sauce thickens some more.

Gradually add handfuls of the cheese into the sauce… stirring constantly with a cooking spoon.. until all the cheese has been incorporated….

The sauce should be the consistency of heavy cream…. If yours is still too runny … (it shouldn’t be but if it is…) you can add more cheese or in a measuring cup mix 1 tablespoon flour with about ¼ cup of milk … whisk with a small for until smooth… add some of the sauce into the measuring cup and whisk… then add the mixture into the pot and whisk. Give it a few minutes and it should thicken the sauce a bit more... make sure you whisk constantly.

Add the macaroni to the pot and mix thoroughly.

Add the ham, if using, mix thoroughly.

Pour the mixture into a baking dish (13x9) or two smaller dishes.

Bake for 25 minutes or until casserole is bubbly and top is golden.


Now watch it disappear!

Cooking for Two Tip – Dividing Casseroles Into Two

Tip of the Day

There is absolutely no reason why a couple cannot enjoy comfort foods such as casseroles as much as bigger families. I make casseroles and divide them into two casserole dishes… one to enjoy that night and one to enjoy another night. In fact, making a casserole ahead makes a night later in the week easier…. and who doesn’t love that?

Sunday Breakfast Idea IX


This week’s Sunday breakfast idea is fresh jumbo banana nut muffins. The recipe I have is soooo good…. and very quick and easy. While the muffins are in the oven… you can prepare scrambled eggs…. Serve them with slice of cantaloupe and a fruit juice.... maybe something different from the ordinary orange juice....and a special coffee or hot chocolate….and you have a wonderful Sunday Breakfast in no time.

Enjoy!

Recipe: Banana Nut Muffins


This banana nut muffin recipe is just terrific…. perfect for a Sunday breakfast…. Serve them warm with butter … maybe a fruit salad…. some scrambled eggs… coffee….hmmmm.

These are quick to make. The batter will make 12 muffins (standard size) or 6 jumbo muffins.

I made jumbo muffins (because I couldn't find my standard size muffin tin... don't you hate that?).

Enjoy!

PRINT RECIPE

Banana Nut Muffin Recipe:

All you need:

4 ripe bananas, mashed
6 tablespoons butter, melted
1 cup sugar
1 large egg, beaten
1 teaspoon vanilla
1 teaspoon baking soda
Pinch of salt
1 ½ cups flour
1 cup chopped walnuts

All you need to do:

Preheat the oven to 350 degrees F.

Prepare muffin tins with either paper cups or spray with cooking oil.

In a large mixing bowl, mash the bananas with a fork until fairly smooth.

Add the melted butter and stir completely with the fork.

Add the sugar, egg and vanilla, and salt ...mix completely.

Sprinkle the baking soda over the batter, mix completely.

Add the flour and mix until the flour is completely mixed into the batter.

Add the walnuts, mix completely.

Fill the muffin cups in a prepared muffin tin.

Bake 25-30 minutes for standard size muffins and 35-40 minutes for jumbo muffins and 15-18 minutes for mini muffins(or until a pick inserted into the center of a muffin comes out clean).

Greasing the Top of the Muffin Tin

Tip of the Day

This tip is about making sure muffin tops don’t stick to the muffin tin. Whether using paper muffin wrappers or not… you should spray the top of the muffin with spray oil to ensure that your muffin tops won’t stick when if they run over a bit. I do it even if I'm using a non-stick tin... because as we all know... they stick sometimes too.

If you are using the liners… simply spray the top of the tin before adding the liners… make sure to wipe out the muffin wells before adding the liners so the liners don’t get greasy.

Admittedly, my muffins rarely run over…. but it does happen. What made me think to post this tip was that I bought muffins last week at the supermarket bakery…. I know… horrors… I actually bought them instead of making them… but I was in a hurry that day.

They had this elaborate display… a cute wooden cart…. the muffins were super jumbo size…. They had left them in the tins… and tilted the tins to make a very nice display…. you had to take a waxed sheet and take what you want…. well... the muffins stuck… I had to quickly stop pulling before the top would have left the stump…. Mind you I was tempted… after all…. as one Seinfeld episode pointed out… everybody wants just the tops anyway.

It never occurred to me that a bakery wouldn’t know this tip….

Recipe: Reuben Sandwich


This recipe for a Reuben Sandwich is perfect for St. Patrick’s Day. This is a standard recipe for that wonderful sandwich. Growing up in New York… it’s a staple in every Jewish Deli …. and in my opinion, the best way to have a corned beef sandwich.

This  recipe is from the folks at Sargento…. Sargento cheese is soooo good…. I look for it whenever I need cheese. They have a terrific website that has really good recipes using their products…. You should take a peek at it….Sargento Cheese.


Reuben Sandwich Recipe:

All you need:

2 slices rye bread
3 oz. sliced corned beef
1/3 cup sauerkraut, drained
1 Tablespoon Thousand Island salad dressing
2 slices Sargento Deli Style Sliced Swiss cheese
4 tablespoons butter, softened

All you need to do:

Top 1 bread slice with corned beef, sauerkraut, dressing and cheese.

Top with remaining bread slice.

Spread the butter on the outside of the sandwich.

Cook on a pre-heated griddle or skillet over medium heat for 4 minutes per side or until golden brown. Serve hot.

Recipe: St. Patrick's Day Coconut Macaroons


Coconut Macaroons are just wonderful… I posted a fabulous recipe from the Barefoot Contessa around Christmas. I was recently fooling around with some coconut for some recipes I was trying out and got the idea to add some green food coloring for St. Patrick’s Day.

So here is the link to that terrific recipe…. Coconut Macaroons… just add a few drops of green food coloring at the end…. I think it mixes more evenly if you add the food coloring after you add all the ingredients and they're already mixed.

These are pretty quick to make... and oh soooo good.

So Celebrate St. Patrick's Day!

Enjoy!

Recipe: Rice and Tomatoes


Rice and tomatoes is a delicious southern dish. Warren made this for me for a Sunday night supper. You can serve it alone or as a side dish. It would be excellent with pork chops.

It’s very easy to make and I must warn you….. it is extremely filling…. and delicious.

Enjoy!


Recipe:  Rice and Tomatoes

All you need:

3 cups of rice, uncooked
2 cans (14 ½ oz. each) stewed tomatoes
1/3 of a pound of thick sliced bacon, cut-up
Salt to taste
Pepper to taste

All you need to do:

Cook rice according to package instructions. Set aside.

Cut the bacon slices into inch chunks.

Cook the bacon in a medium skillet over medium heat until cooked, slightly crispy.

Drain the cooked bacon on paper towels.

In a very large bowl, combine the rice, tomatoes and bacon.

You want the rice to be pale red in color and the bacon and tomatoes to be evenly distributed.

Makes about 4 (2 cup) servings.

Recipe: Beef and Bean Burrito Casserole


This recipe for beef and bean burrito casserole is not only easy but kid friendly. This tasty dish takes about 15 minutes to prep and bakes in 20 to 30 minutes. It makes 4 servings.

I used a pretty deep dish pie plate to bake it in… you can use any oven baking dish you wish.

I served it with a salad made of shredded lettuce with a dollop of sour cream and a dollop of guacamole and chopped tomatoes on top.

I hope you enjoy it!

PRINT RECIPE

Beef and Bean Burrito Casserole Recipe:

All you need:

1 cup rice
1 pound lean ground beef
1 can (15 to 16 oz.) spicy chili beans in sauce (Do Not Drain)
1 cup salsa
1 cup coarsely broken tortilla chips
3-4 medium size green onions, chopped
1 medium tomato, chopped
1 cup shredded cheddar or Monterey Jack or Mexican blend cheese
Sour cream for garnish (optional)
Guacamole for garnish (optional)

All you need to do:

Preheat the oven to 350 degrees F.

Prepare the rice according to package instructions.

In a large skillet, brown the ground beef. Drain any excess fat.

Add the can of spicy chili beans and the salsa to the beef.

Heat the beef mixture to boiling. Stir occasionally.

Cook for about 5- 10 minutes until some of the liquid has evaporated.

Remove from the heat.

Put the cooked rice in the bottom of a baking dish.

Scoop the beef mixture on top of the rice.

Sprinkle the broken tortilla chips on top of the beef.

Sprinkle the chopped tomato on top of the chips.

Sprinkle the cheese on top of the chips.

Sprinkle the chopped green onions on top.

Bake for 20-30 minutes until cheese has melted and casserole is hot and bubbly.

Recipe: Flan


This recipe for flan is quick and easy and tastes soooooo good… everyone will think you slaved in the kitchen…. but we’ll keep the secret about it being so easy just between us.

We love … and I do mean love… flan…. nothing like combining two favorite things…. custard and caramel….. it’s indescribably delicious.

Tonight we are going to a favorite Mexican restaurant with a friend and I wanted to make a dessert so we can come back to the house and enjoy a little more good conversation and a sweet, so I decided to make flan. I made individual ones…. small ones and three larger ones…. my guess is the larger ones will be the ones to go first….yummmmmmm

I used 8 (6 oz.) custard cups and 3 (10 oz.) custard cups….. it used the custard up exactly… so you can figure the size you want to use. The 6 oz. cups took 45-55 minutes and the 10 oz. cups took about 1 hour and 15 minutes.... I always test it by inserting a knife in the center of the custard... it's done when it comes out clean.

The original recipe has instructions for melting sugar until it caramelizes…. which can burn if you don’t catch it exactly…. and hardens quickly… instead I used Smucker’s Caramel Sundae Syrup… it worked like a charm. The syrup runs easily over the custard when unmolded.

I used a wire whisk to mix the ingredients. Be sure to use a large bowl. I used an 8 cup mixing bowl I have that has a spout which was great to pour the custard with…. It literally filled the bowl to the 8 cup mark… I just had to be careful mixing the last of the ingredients.

I used two glass 13x9 casserole dishes for the water bath to set the custard cups in… I put 4 in each (when making the small ones)…. I waited until they were done then I made the larger ones… I just refrigerated the mixture until I made the last batch.

You may also want to read my Custard and Flan Water Bath Tip.

This is so easy and so good….


PRINT RECIPE

Recipe:  Flan

All you need:

½ cup sugar
6 large eggs
1 (14 oz.) can sweetened condensed milk
2 (13 oz) cans evaporated milk
1 teaspoon vanilla

All you need to do:

Preheat the oven to 325 degrees F

In a large mixing bowl, whisk eggs until completely blended.

Whisk in the evaporated milk as you pour it into the eggs.

Whisk in the sweetened condensed milk as your pour it in.

Whisk as you slowly pour the sugar into the mixture.

Whisk in the vanilla.

Line up your custard cups and squeeze into the bottom of each the Smucker’s Caramel Syrup. Put a good coating on the bottom.

Pour the custard mixture into the custard cups.

Place the filled custard cups into the glass baking dish (see notes above).

Place dish into oven.

Carefully pour hot water (about an inch deep) into the glass dish.

Bake 45-55 minutes for 6 oz. custard cups and about 1 hour 15 minutes for 10 oz. custard cups... or until a knife inserted in the center of the custard comes out clean.

Remove and cool.

Refrigerate at least an hour.

When ready to serve, run a knife around the sides of the custard cup and invert onto a plate. If the custard doesn’t slip out when inverted…. (mine didn’t)…. simply run your knife around it again and invert again.

You can drizzle more caramel syrup on the plate for presentation.

Custard and Flan Water Bath Tip

Tip of the Day

When baking custard or flan in a water bath…. put the pan into the oven with the custard cups THEN add the water…. Use a large measuring cup to pour the hot water into the dish. The spout on the measuring cup will make pouring easier. By putting the water into the dish after it's in the oven will ensure there is no danger of water spilling into the custards when transferring the dish into the oven.

Sunday Breakfast Idea VIII


Another week… another Sunday breakfast idea. This week’s breakfast idea is bagels….. and no… breakfast in bed does not mean throwing a bag of bagels to the sleeping spouse or partner.

I love bagels…. as you may know from a previous post. I truly miss my bagel shop in New York. So… unfortunately…. I know this week’s breakfast idea may not work for everyone… not everyone has a bagel shop nearby….. but if you do…. it is truly a wonderful breakfast.

Growing up in New York…. My family always had a “Sunday Breakfast”…. Often that meant a variety of bagels… and my Mother would make eggs to go with it. My Aunt and Uncle lived nearby… and they and my parents took turns making the “bagel run”. Most often they’d still be warm….hmmmmm…. good memories.

You can serve them with butter and jelly (as pictured) or you can make it a little more special and quickly make one of my spreads or butters that I posted previously… the spreads and butters are quick to make and can be made ahead…. for the recipes… just click the link or ….go to the Dips and Spreads label.

For tips on making cream cheese spreads, see my previous post Making Cream Cheese Spreads.

Enjoy!

Bacon and Scallion Cream Cheese
Raspberry Cream Cheese
Honey and Walnut Cream Cheese Spread
Honey Cinnamon Butter
Orange Butter

Bagel Slicer


Tip of the Day

Cutting bagels can be hazardous to your appendages…. fingers AND hands…. There is a nifty gadget called the Bagel Guillotine… it slices the bagel without any danger of you slicing yourself in the process. This is from Larien Products. You can go to their website http://www.larien.com/ to find where you can purchase their products. They have a bagel butler that looks pretty nifty too.

Recipe: Raspberry Oatmeal Bars


This recipe for raspberry oatmeal bars came from a soft cover book from Better Homes and Gardens titled “Bars and Brownies”. This recipe is amazingly quick to put together and so good. It’s perfect to bring to work or something to send into school or even an after school snack.

You can use either seedless raspberry jam, seedless blackberry jam, strawberry preserves or apricot preserves.

I adjusted the recipe a bit... some of the amounts just didn't work well...

It makes 40 bars…. but have no fear there WILL NOT be leftovers.

They are just yummy…..

Enjoy!


Raspberry Oatmeal Bar Recipe:

All you need:

1 pkg. yellow or white cake mix
2 ½ cups quick-cooking rolled oats
¾ cup (1 stick and a half) butter, melted
1 ½ cups seedless raspberry jam (see note above)
1 Tablespoon water

All you need to do:

Preheat oven to 375 degrees F.

Grease a 13x9x2 baking pan (or for easy removal of bars, line the baking pan with foil and grease the foil). Set aside.

In a large mixing bowl, stir together the cake mix and the oats.

Stir in the melted butter. (Tip: I used a fork for this… it mixes easier with a fork).

Stir the mixture until crumbly.

Press 2/3 of the crumb mixture evenly into the prepared pan.

In a small bowl, combine jam and water.

Spread the jam mixture over the crust to within ½ inch of the edges.

Sprinkle evenly with the remaining crumb mixture.

Bake for 20 to 25 minutes or until golden brown.

Cool in pan on wire rack.

Cut into bars.

Adjust the Oven Temperature When Using Glass Baking Pans

Tip of the Day

Glass baking pans brown bar cookies faster than metal pans do. If you are using a glass baking dish, reduce the oven temperature by 25 degrees F.

Tip from Better Homes and Gardens

Looking for More Recipes?

If you are looking for more recipes click the "Older Posts" link to page back to older posts or go to the archives in the right column. The list of labels at the bottom in the right column will help you find specific types of recipes or try our search engine at the top and search by name or ingredient.


What's more comforting on a cold day than Homemade Chicken Noodle Soup? .. and it's so easy to make!

Chicken Noodle Soup