Recipe: Pea Salad


This simple …. yet delicious Pea Salad is a wonderful change from the ordinary salads … a great side dish to sandwiches and burgers .. yet special enough for a holiday meal too. With family reunions, graduations and barbeques coming up.. . add this recipe to your favorites.

Let’s face it… if you don’t sign up to bring the potato or macaroni salad fast enough… by the time you get the list… you sit there and wonder… now what?... this recipe is the perfect answer… it’s quick and easy and always a crowd pleaser.

TIPS

I always use frozen peas… I personally don’t care for canned peas … and frozen peas aren’t mushy like canned peas.

Try to make sure you get a smoked ham slice… rather than a plain ham slice.. the smokey flavor really adds to the salad. You could use bacon… but I really prefer the smoked ham.

I used Colby Jack shredded cheese.. you could easily substitute shredded cheddar if you like that better.

I used Hidden Valley Buttermilk Ranch dressing… but you could easily substitute another brand or flavor including lower fat alternatives.

The recipe uses ½ cup dressing… you may like more.. but start with ½ cup then let the salad set for 10 minutes.. stir well.. then add more if you like. Remember you can always add more… can’t take some off if you add too much.

I hope you try this wonderful recipe.


Recipe: Pea Salad

All you need:

4 cups frozen peas, thawed
2 cups smoked ham, diced
4 tablespoons red onion, finely diced
1 cup shredded Colby Jack cheese
1 small jar (2 oz.) chopped pimentos
½ cup Hidden Valley Buttermilk Ranch dressing

All you need to do:

Mix all ingredients except the dressing in a large bowl.

Add the dressing and mix well.

Refrigerate about an hour before serving.

Happy Mother's Day!


Happy Mother's Day to all the Mothers out there... enjoy your day!

Celebrations


We love celebrations… what’s more fun than celebrating festive holidays and events? This week is a busy one…. with Cinco de Mayo and the Kentucky Derby… capped off by Mother’s Day…. you have plenty of excuses to celebrate.. large or small… with friends or a family affair… make it special with fabulous food.

To celebrate Cinco de Mayo we have lots of Mexican recipes to choose from … and if you’re planning to watch the Kentucky Derby this coming weekend… we have lots of traditional Derby foods for that as well…. our archives have lots of wonderful breakfasts and brunch ideas … ladies lunches… and fabulous desserts… all terrific ideas for Mom’s special day.

So take a few minutes to see what fantastic recipes we have… all with step by step instructions made easy for even the beginner cook.


Pictured above: Amazing Coconut Cupcakes with White Chocolate Cream Cheese Frosting

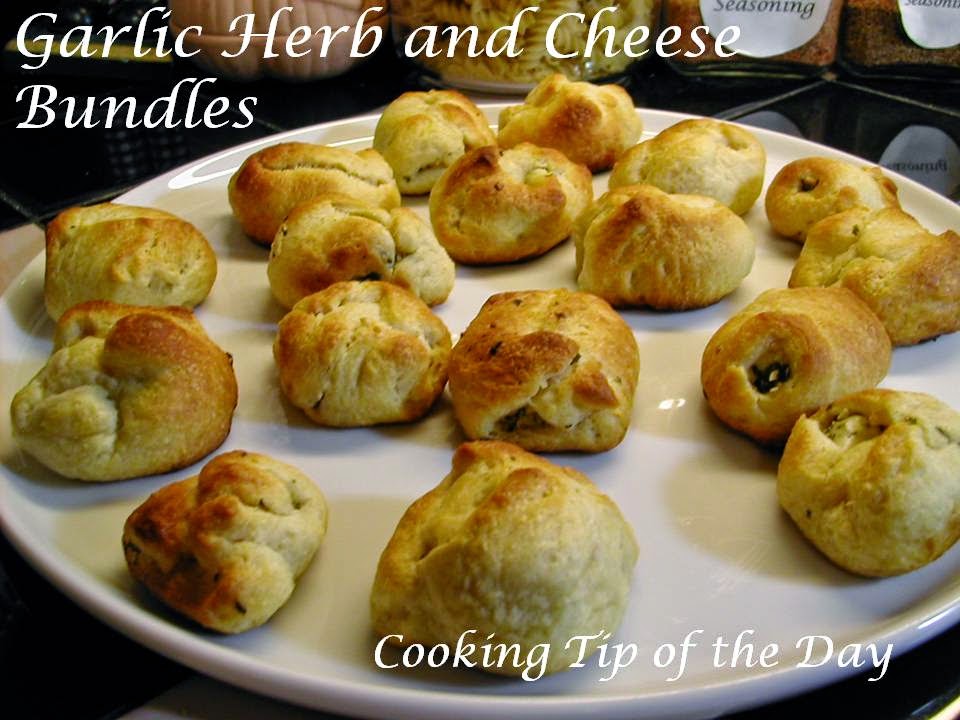
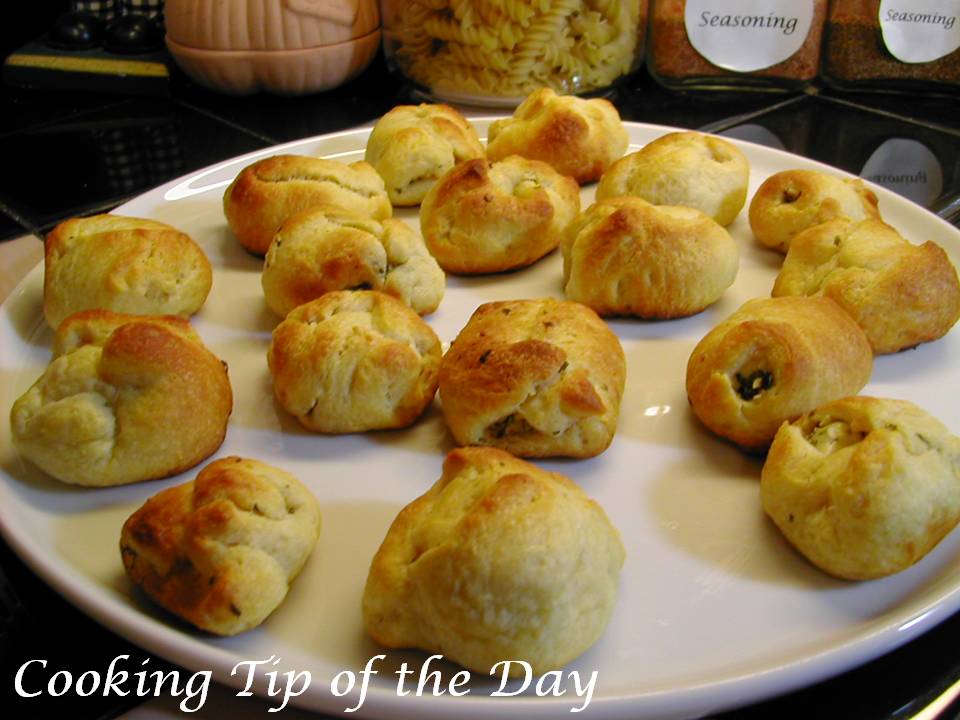
Recipe: Garlic and Herb Cheese Bundles


This is recipe for Garlic and Herb Cheese Bundles is a quick and easy hors’dourve. I like simple things that I can throw together on a moment’s notice … and this fits the bill nicely. It’s great for unexpected guests. They will also make a great addition to a variety of snacks for a party.


They're made with Pillsbury Crescent Roll dough and miniature Alouette Garlic and Herb cheese logs.

You can use Pillsbury Creations pastry dough sheets too… I just always have crescent rolls on hand.. we like them with supper sometimes… so I used what I had.

This recipe has only two ingredients and you can make them in about twenty minutes… start to finish.

You can substitute other kinds of cheeses if you prefer.


Recipe: Garlic and Herb Cheese Bundles

All you need:

1 can Pillsbury Crescent Rolls
1 pkg, (5 oz.) Alouette Garlic and Herb Cheese Logs

All you need to do:

Preheat the oven to 375 degrees F.

Open the can and unroll the crescent dough and place it on a cutting board.


Press the perforations together.

Using a sharp knife, cut along the seams to make 4 large squares.

Then cut each square in half.

Slice the cheese logs into ¼ inch thick slices.


Place 1 slice on each dough square.


Pull the corners up over the cheese and pinch the dough closed. You don't have to make them perfect, they smooth out when baking.


Place on an ungreased baking sheet and bake for about 9 minutes (or until golden brown.

Recipe: Honey Panna Cotta


Panna Cotta …a wonderful Italian dessert… so creamy and sweet… perfect after just about any meal. I have been reminded for almost a year that I promised to make Panna Cotta… and well… other things just got in the way.. so this week I decided this was the week.

Let me explain… Warren has been to Scotland at least three times and to Spain once for work… and me? .. you might ask… nope… nada… I still have a virgin passport. Either I couldn’t afford it.. or I had a job to start… and you don’t take time off on short contracts… you don’t work.. you don’t get paid.. no paid vacations here.. and before you ask.. it does have other perks… so it’s a trade off… so bottom line … his trips are a sore point… especially when it comes to fabulous dinners and desserts…

Now back to Scotland.. Warren has had to travel there for work.. Edinburgh to be exact… and after one of his trips he came home raving about this dessert he had at an Italian restaurant there…. that’s all I heard about… so I knew I had to make it.

Deciding to make it was easy.. deciding how to make it was completely another story.

There are so many variations… using only cream, cream and whole milk… skim milk and half and half… sweeten it with confectioners sugar… or regular sugar or honey. It seems everyone has the “perfect” recipe… funny I’ve had many of them and they’re really about the same… About the only thing they all agreed on was the use of gelatin.

So I decided on Giada’s recipe… I read the reviews.. most were outstanding some were dismal… BUT… the complaints were mostly about too heavy a honey flavor. I figured we’d like it.. we really like honey. My southern man loves biscuits with honey.. and I grew up eating honey in teaspoonfuls when I had a sore throat… and warm honey and milk… brings back memories for me.

In any case, I felt the honey would be safe. I followed her directions exactly…. I know… don’t faint… I actually followed a recipe…well.. okay… I added about a ½ tablespoon more sugar after tasting it and deeming it not sweet enough…. there… I feel so much better after admitting that!... but that was it.. that’s all I changed… honest!

First of all… I do not feel the honey flavor was too heavy… in fact it was quite light. The only thing I can think of is that different kinds of honey may have a heavier taste. I used clover honey.


We both liked the dessert… we tried it with thawed strawberries in light syrup… it was good… but I feel it totally masked the flavor of the Panna Cotta… it over-powered it… if you want it with fresh fruit.. I suggest fresh sliced strawberries or mixed berries and not too many.


We also tried it with caramel syrup (the way it was served at the place he went to in Scotland)… and we tried it with a little raspberry syrup. In both cases… we agreed you can’t use too much of either or they too will over-power the flavor of the Panna Cotta. We liked them both… caramel won it by a nose… but raspberry was an excellent choice too.

So the verdict… I’m probably not going to use honey the next time… I will use vanilla… BUT… if I serve it after a special meal and garnish it with a fresh sliced strawberry or a few blueberries… I will definitely use honey… I liked the flavor it was pleasantly subtle and light. The texture was smooth and creamy but held shape.

The recipe was simple and easy.

TIPS

The recipe calls for 1/3 cup of honey… take the measure out but don’t use it… eyeball the amount using the measure as a guide.. scraping honey out of a measuring cup can be a pain… and I would suggest using slightly less… cook it a while then taste it… add more honey and/or sugar to your taste.

I put the range on the sugar because I did add more than the original recipe called for… use your judgment.

I used Knox gelatin… envelopes in the orange box. One envelope measured the required tablespoon.

Toppings are optional…

I hope you give this a try.


Recipe: Honey Panna Cotta

All you need:

1 cup whole milk
1 tablespoon unflavored powdered gelatin
3 cups whipping cream
1/3 cup honey
1 – 1 ½ tablespoons sugar (see notes above)
Pinch of salt
Toppings of your choice

All you need to do:

Place milk in a small bowl and sprinkle the gelatin over it. Allow it to stand for 3 to 5 minutes to soften the gelatin.

Pour the milk into a large saucepan over medium heat… Stirring constantly until the gelatin dissolves. Do not allow it to boil. (about 5 minutes)

Add the remaining ingredients and continue to stir until the sugar dissolves. (about 5 minutes).

Remove from heat.

Pour into wine glasses, dessert glasses or custard cups. Use custard cups if you intend to invert them on a plate and drizzle syrup or sauce on them.

Cool slightly then refrigerate for at least 6 hours.

Makes about 6 servings.

Recipe: Orange Creamsicle Cake


There are some things from childhood that stick in my memory… one is the “Ice Cream Man”. I think every kid in every generation has memories of the “Ice Cream Man”. I remember hearing that jingle and running into the house to ask if I could have ice cream, wishing my Mother would move faster or I would miss him!

When my son was little we lived in an apartment… we were on the second floor but we had our own entrance… and when that jingle came around… there was my son running up the stairs as fast as his little legs could go… all the while… yelling.. “The Ice Cream Man… Mom hurry… or he’ll leave!!!”. I just smiled to myself, savoring the thought that my son was enjoying something I did when I was his age.

I grew-up in New York… a quiet, tree lined block of one-family houses in Queens. We had several different “Ice Cream Men”… there was the Good Humor Man, the Bungalow Bar Man… and then there was Mr. Softee, which sold soft serve ice cream.

As a kid… I loved the Bungalow Bar Man… he was all dressed in white and drove a cute truck with a little brown shingle roof on top…like a bungalow… I was fascinated with his coin gadget on his belt… ahh… back then ice cream cost coins not dollars… how times have changed. Unfortunately, they are no longer in business but every kid from Brooklyn, Queens and the Bronx my age probably still remembers the Bungalow Bar Man.

In fact, those trucks even made it into an episode of the Sopranos when Tony tells the story of when he tried to bid on a Bungalow Bar truck at an auction and lost to John Gotti, but John let him ride in the truck and ring the bells.

Each Ice Cream Man had a favorite kind of ice cream pop or cone… I rarely deviated from my favorites… I loved Toasted Almond… vanilla ice cream covered in tan colored almond flavored crumbles.. then there was Chocolate Eclair and Strawberry Shortcake… (both of these I have since found in the ice cream section of the grocery store)….

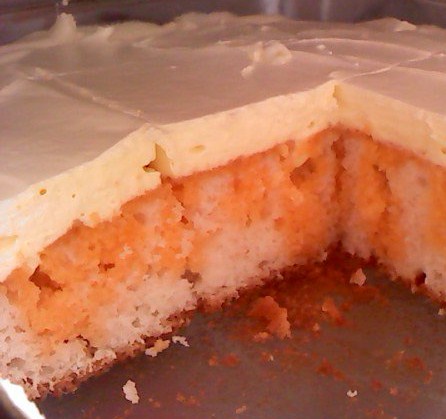
Then there was the Creamsicle… it was just so refreshing… I loved the creamy vanilla with the orange sherbet-like outer layer… just yummm… so when one of my Facebook friends posted the picture and the name of the cake.. I just had to have the recipe. I’m sure it's one that Jell-O came up with… but I got it from Heidi. The picture above is her’s too.

Thank you Heidi for sharing and bringing back a few childhood memories of the beloved “Ice Cream Man”.


Recipe: Orange Creamsicle Cake

All you need:

1 box white cake mix
Orange Extract
1 small box vanilla pudding mix
1 small box orange jello mix
1 cool whip (thawed)

All you need to do:

Mix white cake mix according to the directions on the box, using a 9x13 cake pan.

Bake and let cool for 15 minutes.

Using the other end of a wooden spoon or straw, poke holes all over the cake.

Mix orange jello with 1 cup hot water.

Spoon orange jello all over cake.

Refrigerate for 30 minutes.

Mix vanilla pudding with 1 cup milk in large bowl.

Add cool whip and 1 tsp. orange extract to pudding.

Mix well with mixer.

Spread mixture over cake.

Recipe: Fruit Pizza


Isn’t this Fruit Pizza fabulous looking? I know you will love it! The perfect recipe to make for the people at work… or a family gathering… just perfect! This recipe is courtesy of Marlo Linderman. The picture Marlo sent me is from here.

When I managed a phone unit a few years ago… we had food days… and one of the guys brought in a similar Fruit Pizza (he called it a Breakfast Pizza… leave it to a guy to advertise it for breakfast… just kidding guys... we did eat it for breakfast afterall). I meant to get the recipe and forgot… and regretted it.

Fast forward to this morning and lo and behold.. this scrumptious picture was on my Facebook feed … one of my Facebook friends had made this fabulous looking Fruit Pizza…. so being the enterprising person I am … I shot her a message asking if she would mind sharing the recipe and could I post it on my food blog… I was thrilled when she offered to share it! So this is all from Marlo… including the tips!

TIPS

The pie crust can be made from scratch however the store bought "Nestle" sugar cookie dough tastes the same…. and also saves a lot of time in the kitchen!!!!

Make sure the fruit is dry before adding.

Thanks Marlo for sharing!

Do you have a favorite recipe you'd like to share? Drop me a quick note at cookingtipoftheday at gmail.com and your name can be up in lights too!

Again .. thanks Marlo for today's fabulous recipe!


Recipe: Fruit Pizza

All you need:

Pie Crust
1/2 cup butter, softened
3/4 cup white sugar
1 egg
1 1/4 cups all-purpose flour
1 teaspoon cream of tartar
1/2 teaspoon baking soda
1/4 teaspoon salt

Filling
1 (8 ounce) package cream cheese
1/2 cup white sugar
2 teaspoons vanilla extract
1 jar marshmallow cream (6 1/2 oz)

Topping
1/2 cup white sugar
2 tablespoons cornstarch
1 cup pineapple juice
1 teaspoon lemon juice

All you need to do:

1. Preheat oven to 350 degrees F (175 degrees C).

2. In a large bowl, cream together the butter and 3/4 cup sugar until smooth. Mix in egg. combine the flour, cream of tartar, baking soda and salt; stir into the creamed mixture until just blended. Press dough into an ungreased pizza pan.

3. Bake in preheated oven for 8 to 10 minutes, or until lightly browned. Cool.

4. In a large bowl, beat cream cheese and marshmallow cream with 1/2 cup sugar and vanilla until light. Spread on cooled crust.

5. Arrange desired fruit on top of filling

NOTE: Make sure the fruit is dry before adding.

In a medium saucepan over medium heat, combine 1/2 cup sugar, cornstarch, pineapple and lemon juices. Stir and cook until sugar dissolves and mixture thickens. Pour over fruit. Refrigerate until serving.

What is the Difference Between Stock and Broth?


There are some questions that come up repeatedly … and this is one of them… so just what is the difference between stock and broth?... the short answer is … not much. You really can use them interchangeably in recipes… and in fact… many chefs use the terms interchangeably too.

Meat Stocks and Broths

BUT… there is a slight difference… in a nutshell… for meat stocks and broths…the stock is made with bones and trimmings from meat… where broth is made from the some bones and mostly the actual meat itself. I have to chuckle at some celebrity chefs and some bloggers that emphasize the use of stock and not broth…. broth is actually the richer of the two and is a more finished product… and table ready.

However, stock will thicken a sauce better than broth without using butter or cream. Stock contains gelée… gelatin, if you will… from the bones that are boiled when making the stock. Stock will deglaze a pan differently than broth because of the gelée… it will combine more easily with the pan drippings and thicken the sauce as you reduce it… replacing the butter or cream needed to finish the sauce.

The best chickens to use to make broth are stewing hens. You can also use whole chickens or parts.

Vegetable Stocks and Broths

When it comes to vegetable stock… I wasn't quite sure of the difference … since no meat is used and therefore no bones….so I investigated further… and what I found is..

With vegetable stocks and broths… the difference will lie more in the finished product. If the finished product is really a soup.. then you’d probably call it a broth. If the finished product is more of an ingredient in the finished product, say a sauce or a base for another soup.. then it would be called a stock. Notice I say called a stock…. because ultimately it really doesn’t matter… you can use them interchangeably.

The bottom line here is you can use either… but in the case of meat stocks and broths… stocks are made from mostly bones and trimmings and sometimes some meat…. and broths are mostly made with meat and some bones… it’s the ratio that ultimately decides what to call it… but again… for the most part you can use them interchangeably.

I hope this clears up any confusion for you.

Recipe: Potato Leek Soup


I haven’t met a potato soup I haven’t loved… at least not yet.. and I’ve had a lot of different potato soups… it seems potatoes, onions or leeks, bacon and stock or broth just make the best combination… everything else just makes it a little different than the next one…

I haven’t made a potato soup with leeks in a while and wanted to see what else is out there for recipes… I found one by Emeril that seemed a little different… it had the usual ingredients plus a ½ cup dry white wine… I thought… hmmm… that would be a nice little addition…

I was surprised there wasn’t a BAM! in this recipe…

The soup was excellent… but here are my thoughts on it…

First, the cream really can be left out.. I put it in.. but I don’t feel it adds that much in the way of flavor… it changes the texture… so you can consider adding less or substituting a lower fat milk or half and half would also lower the fat content.  I really don’t see a problem with leaving it out.

Second… the wine… while it smelled fabulous when cooking.. by the time it was finished… I really don’t think the wine taste was apparent… I totally think it can be omitted if you want to.

Emeril has rather elaborate instructions on how to make a bouquet garni using a leek leaf… he does say you can use cheesecloth also… well first of all… if you need to know what a bouquet garni is.. I have a previous post on that subject… just click here… and you can read about it…

Now back to his bouquet garni… I really don’t think it’s necessary.. I put the bay leaves in the soup.. and fished them out just before blending the soup… I used dried thyme instead of fresh.. and the soup was really good… the conversion from fresh sprigs of thyme to dried thyme is one fresh sprig of thyme equals ½ teaspoon dried thyme… his recipe calls for 4 sprigs which converts to 2 teaspoons of dried thyme.. I think that is just a little too much… at least for our tastes… I used a heaping ½ teaspoon and that was about right.. as it is.. the soup ended up with a strong thyme flavor.

I omitted the peppercorns.. the recipe also calls for ¾ teaspoon of white pepper… which in my opinion is more than enough.

Now I do have some tips…

TIPS

He suggests using an immersion blender.. which I wholeheartedly agree with… if you don’t have one.. it’s well worth the investment… they’re not terribly expensive… for example.. Amazon has one by Cuisinart for $28.99 (US)… it saves loads of time and makes clean-up a snap… great for soups and gravies.

If you don’t own one.. you can use a regular blender… but only fill the blender half full … make sure the lid is on tight and put a dish cloth over the top before blending.. hot soup will have lots of steam when blending.. and you don’t want to get burned… if the top flies off… hot soup and steam will not only make a mess but is dangerous.

Definitely use the snipped chives on top.. they add a really pleasant, light onion flavor… a really good finish to the soup.

His recipe calls for russet potatoes… russets are very flavorful but I find they can be a bit grainy… I used Yukon Gold potatoes… we happen to like their flavor… I would recommend either Russets or the Yukon Golds… not white potatoes.. white potatoes don’t have as strong a flavor as the others do.

He used only the white parts of the leek, I used the white and green parts.

I used smoked bacon… it has a stronger flavor and really adds a lot to the soup.

I used a Sauvignon Blanc for the white wine… you can find very affordable ones… Turning Leaf, Beringer, Yellow Tail and Monkey Bay are all decent and inexpensive to use for cooking.

About the salt.. his recipe calls for 1 ½ teaspoons salt… I added the salt later…as the soup was finishing and added it to taste… because of the bacon.. I added very little… so I changed the recipe to add the salt at the end and to your taste.

If you decide to leave out the cream and not replace it with any other milk product… you will probably need to thin the soup a bit at the end… add more chicken broth or stock until you get the thickness you want.

So… with all that said… let’s get to cooking…


Recipe: Potato Leek Soup

All you need:

2 tablespoons butter
2 strips of bacon, chopped
1 large or 2 small leeks, about 1 pound, cleaned and sliced
½ cup dry white wine (optional)
2 bay leaves
½ -1 teaspoon dried thyme (to taste)
5 cups chicken stock or broth
1 to 1 ¼ pounds potatoes, diced (see notes above)
¾ teaspoon white pepper
Salt to taste
½ to ¾ cup crème fraiche or heavy cream (optional) -see notes above
2 tablespoons snipped chives

All you need to do:

Trim the very tops of the leeks. Using a sharp knife slice the leek down the middle lengthwise. Rinse thoroughly under cold running water to be sure you have all the dirt out between the leaves.

Slice the leeks thinly crosswise.

Melt the butter in a large soup pot over medium heat, then add the chopped bacon. Cook until bacon has rendered most of the fat but is still soft. Stir frequently.

Add the leeks and cook until they’re wilted. Stir frequently.

Add the wine (if you are including it), bring to a boil.

Add the chicken stock, potatoes, white pepper, thyme and bay leaves.

Lower the heat to bring it to a simmer, cook until potatoes are very soft, about 30 minutes.

Remove from the heat and remove the bay leaves.

Use an immersion blender to blend the soup or use a blender. If using a blender, blend in small batches… see notes above on safety tips. Blend until desired consistency (I like it still a little lumpy).

Stir well.

Add the cream (if you are including it).

Adjust seasoning (salt, pepper and thyme).

Ladle into bowls and sprinkle with snipped chives.

Recipe: Irish Beef Hand Pies


These Irish Beef Hand Pies are nifty little beefy pastries that are a terrific for a lunch or light super… I had one a long time ago in a pub… and had long forgotten about them until just before St. Patrick’s Day I came across numerous recipes, all the same, and credited to Martha Stewart.

I simply didn’t have the time to get a post about them in before the ‘big day”… but I made a note to do a post on them anyway… after all.. Beef Hand Pies are good any time of year.

So I printed out her recipe and followed the directions.. yes… I actually followed the directions … well… let me qualify that… up to a point I followed the directions. I made the filling and tasted it and was not impressed. It lacked flavor and was extremely dry. So …yes… I did end up changing her recipe.

Her recipe lists ½ teaspoon Worcestershire Sauce… that is not nearly enough… I upped it to 1 tablespoon.. which worked out nicely.

I used 2 tablespoons olive oil instead of 1 that was in the original recipe. I started out with 1 tablespoon and felt it just wasn’t enough to coat all the potatoes and cabbage.

The filling was dry… not at all as I had remembered it … the only “wet” ingredients in her recipe is 3 tablespoons tomato paste and the Worcestershire sauce… I was all set to add ketchup … then I decided to add a ½ cup of beef broth instead and continue to cook it a bit more… the result was much better… much much better.

They are a little on the bland side… next time I think I will add chopped onion when browning the beef… but this recipe here looks to be the real deal.

TIPS

I used commercial pie crusts… I’m not so sure I will do that next time.. it was tough to roll out a 9 inch round of pie crust into an even 14 inch square … probably would have been just as easy to make my own pie crust.

Be careful when you press your fork around the edge to seal it… I ended up piercing the dough a bit… but the filling luckily never ran…

I used Yukon Gold potatoes, the original recipe called for red potatoes. We like the Yukon Golds and that’s what I had on hand… it worked well.. use whatever potatoes you prefer.

One of the nicest features of this dish is that you can make these completely ahead and freeze them. You don’t even have to thaw them, bake them at the same temperature but bake them for 28 to 30 minutes.

The directions say to bake them for 10-12 minutes… I ended up baking mine for 15 minutes … set your timer for 10 minutes and watch them, you want them a light golden brown color.

Now let’s get to the recipe… I hope you try it… the family will definitely like them… I served mine with oven fried steak fries.

Recipe: Irish Beef Hand Pies

All you need:

2 tablespoons olive oil
¼ head of green cabbage, shredded
½ pound potatoes, small diced
1 pound lean ground beef
3 tablespoons tomato paste
1 tablespoon Worcestershire Sauce
½ cup beef broth
½ teaspoon thyme
2 (9 inch) pie crusts (commercial or homemade)

All you have to do:

Line a large baking sheet with foil and set aside.

Preheat the oven to 400 degrees F.

In a large skillet, heat the olive oil over medium heat.

Add the potatoes and cabbage. Stirring frequently, cook until they start to brown (about 8-10 minutes).

Add the ground beef and cook until no longer red. Break the beef up into small pieces with a cooking spoon or spatula.

Add the tomato paste, thyme, Worcestershire sauce and beef broth. Cook until the potatoes are tender (about 15 minutes).

Use a potato masher or fork to mash the mixture… leaving some small potato lumps.

Allow to cool.

Roll out the pie crusts into 14 inch squares. Cut each pie crust into 4 equal squares.(mine ended up far less than equal… they had that homemade look)

Place about ½ cup of filling on half of the square leaving a ½ inch border around the side. Brush the border with water. Fold the empty half over the filling. Crimp the edges with a fork.

Pierce the top with 3 tiny slits.

Place on the foil lined baking sheet and bake for 10-12 minutes or until golden brown.

Recipe: Smokin’ Mac n Cheese


This Smokin’ Mac n Cheese is a simple “family” meal that kids and adults alike will love… it’s quick and easy.. a perfect weeknight meal.

I had a hankerin’ for mac n cheese (like that?.. hankerin’… living in the south has surely had an influence on me!)… but .. problem number one is … it’s not high on Warren’s list… “Mr. I Don’t Like Cheese” … well the Mr. has changed over the years… now he qualifies it by saying.. he doesn’t like to eat just cheese (cubed cheese etc)… but put out a tray of cut-up sausage and cheese with fruit.. and lo and behold… Mr. eats away… (big sigh)… ya gotta love a man that stubbornly refuses to acknowledge a woman may have been right…

So back to my mac n cheese… he has liked my Mexican Mac n Cheese… so I have to think of ways to change it up a little… I had a package of Lil Smokies from Hillshire Farms in the fridge that I wanted to use… so I went to the Hillshire Farms site… and sure enough.. they had a recipe with Lil Smokies added to Mac n Cheese… not rocket science there.. but the recipe used half and half instead of milk and didn’t make a roux for the sauce first… (I went back to the site to find the recipe and now I can’t find it… oh well you will have to trust me)…so I thought I’d give it a try… of course I had to add my little twist to it..

I also added one can of Rotel Mild Tomatoes and Chilies… and I must say.. it was a great combo.. even Mr. I Don’t Like Cheese liked it! ….. even loved the left overs… big sigh.. I do have to remember when creating recipes he doesn’t like cheese.

TIPS

The sauce came out perfect… very smooth and cheesy and gooey… but I know half and half adds calories and fat… you can still make a traditional cheese sauce and add the ingredients in the recipe..

I cut the Lil Smokies into thirds… you can add them whole… but cutting them makes a great presentation.

If you don’t want the zip from the Mild Rotel Tomatoes.. use a can of Petite Cut Tomatoes instead…

I didn’t drain the tomatoes.

I used elbow macaroni.. but you can use any other shape you prefer.

Truly an easy meal.. and really tasty too!


Recipe: Smokin’ Mac and Cheese

All you need:

3 cups dried elbow macaroni (any type you like)
1 package Hillshire Farms Lil Smokies
1 can Rotel Mild Tomatoes with Chilies
2 cups half and half
2 tablespoons butter
1 cup shredded Monterey Jack cheese
2 cups shredded Mild Cheddar cheese

For Topping (topping is optional):

4 tablespoons butter or margarine, melted
1 tablespoon (Fajitia or Taco Seasoning)
1 cup unseasoned dry bread crumbs

All you have to do:

Preheat oven to 350 degrees F.

In a large pot, cook the macaroni according to package directions for al dente… you want it cooked but still chewy because you will be baking the casserole in the oven later.

Drain the pasta and return to the pot.

Meanwhile, in a medium pot add the half and half, 2 tablespoons butter and shredded cheese. Cook over medium heat until cheese has melted and sauce is smooth, stirring frequently.

Add the sausage and tomatoes to the cooked macaroni and stir well.

Add the cheese sauce to the pot of macaroni, stir well.

Pour the mixture into a 9 x 13 baking pan.

To make topping: (this is optional)

Put butter into a 2 cup measuring cup or bowl and melt in the microwave.

Add the seasoning and bread crumbs.

Sprinkle the crumb mixture on top of the casserole.

Cover loosely with foil and bake for 20 minutes.

Remove the foil and continue to bake for about 20 minutes or until the casserole is bubbly.

Recipe: Ricotta Cappuccino


This fabulous dessert is so quick and easy… and oh soooo good. Ricotta Cappuccino is a classic Italian dessert.. I found it by watching Giada on the Food Network… I saw it quite a while ago and listed on my “To Do” list… and just got around to finally trying it… all I can say is.. WOW!

I lost my notes from when I watched the show and just figured I would find it online… it took me forever to find it… I had the name slightly wrong and all I kept coming up with were desserts that sounded good but not the one I wanted. The upside to all that searching is that I found a bunch more recipes for my “To Do” list… and if they’re half as good as this one… we’ll be in dessert heaven.

TIPS

I used my processor to make this… you can use a blender if you don’t have a processor… make sure you process or blend it well.. it will smooth out the graininess of the ricotta.

The original recipe uses a vanilla bean.. I used vanilla extract… the price of vanilla beans has skyrocketed and I rarely purchase them anymore… while I love them… I don’t love them $15 (US) for 3 worth… but I do recommend you use a good quality vanilla extract.

The equivalent for a vanilla bean pod to vanilla extract is one inch of vanilla bean pod to 1 teaspoon vanilla extract.

I found chocolate biscotti… one side of the biscotti has a thin layer of dark chocolate… it was a fabulous choice.

Giada’s recipe says to spoon into small coffee cups… mine were not small… while it looked great… it really was too rich to double the size of the dessert… I definitely recommend you use small dessert glasses for this.

The recipe calls for 1 biscotti… I used 3… it’s up to you how much you want to use.

This is a terrific special occasion dessert that requires little time and no expertise… and it will definitely impress.

Beware… this dessert is addicting!


Recipe: Ricotta Cappuccino

All you need:

½ cup sugar
½ vanilla bean OR 1 teaspoon vanilla extract
1 container (15 oz) ricotta cheese
½ tablespoon instant espresso powder
1-3 (3-inch) biscotti, crushed *see tips
Pinch of cinnamon
Pinch of cocoa

All you need to do:

Process or blend the sugar and vanilla.

Add the ricotta and espresso powder and process or blend until smooth.

Spoon mixture into 4 small glass dessert glasses or coffee cups.

Sprinkle each with a pinch of cinnamon and a pinch of cocoa.

Note: I put half the amount of ricotta mixture in the glass first then made a layer of crumbs and topped off with the remaining mixture and crumbs.

Cover with plastic wrap and refrigerate for 1 hour or up to 1 day.

Recipe: Gumbo


While researching various recipes for a series on Cajun food… I kept seeing recipes for Gumbo. I haven’t had Gumbo in years… so I decided to make Gumbo. I read probably dozens of recipes… all similar… some missing what I consider key ingredients.

As one reviewer of a recipe put it… it’s not Gumbo unless you have meat (chicken), sausage, fish (usually shrimp)and okra…. along with, in my opinion, tomato, onions, and garlic … they are the “must haves” of Gumbo.

I made a quick list of ingredients I felt needed to be included.. and armed with that information I went on a hunt for a recipe…I found one that mostly fit the bill… a recipe by Paula Dean. I did, however, change her recipe to fit my own recollection of a great Gumbo.

The first thing to be changed was the amount of grease (oil and margarine… by the way.. I almost fainted when I saw she used margarine not butter)… this was no big surprise… she routinely uses way too much fat in her recipes…. to follow Paula’s recipes you’d have to have a cardiologist on speed dial.

The next thing.. which again.. surprised me.. her recipe lacked spices.. true Cajun food is not bland and has some spices..and this Gumbo version is Cajun… so I added my Cajun Spice Mix.

I also changed the kind of tomatoes I used.. she uses stewed tomatoes.. I used Hunts Petite Cut Tomatoes.. also she uses beef bouillon cubes and water… I used beef broth… I saw no reason to use the bouillon in place of broth or stock… and bouillon, while not in significant amounts, has MSG in them (at least most brands), which I prefer to avoid if at all possible.

I also changed some of the cooking steps… some just didn’t make sense… namely when to add thickener (flour aka roux) and how to add it in… I think my method is easier and produces a better flavor since I cook the onions and garlic with the meats, rather than adding them after a roux is made. I make the roux and resulting thick sauce separately and then add it to the pot.

So with that all said… let’s get to making a great Gumbo.

TIPS

I bought cooked frozen shrimp, all I had to do was remove the tails…

I used a smoked beef sausage from Hillshire Farms.. you can use andouille sausage.. if you do use the andouille, then omit the spices and spice toward the end to your taste.

You can omit the spice if you prefer… the 1 tablespoon of my Cajun Spice Blend gives it a little kick.. not too much though… or you can use a commercially made Cajun Spice Blend that you like and use whatever quantity is to your tastes.

Use both the white and green parts of the green onion.

I served this with white rice and cornbread.

This recipe will easily feed 4-6 (6 if you serve white rice and cornbread with it).

We loved this dish… I hope you do too!



Recipe: Gumbo

All you need:

2 thick boneless skinless chicken breasts, cut into chunks
1 smoked sausage, cut into ¼ inch slices
2 tablespoons olive oil
1 large onion, diced
4 large garlic cloves, finely diced
1 green pepper, diced
2 stalks celery, sliced
4 cups of beef broth or stock, divided
2 tablespoons butter or margarine
2 tablespoons flour
¼ cup Worcestershire sauce
1 can Hunts Petite Cut Tomatoes (do not drain)
1 tablespoon Cajun Spice Blend (my recipe)
¼ cup fresh parsley, chopped
2 cups frozen sliced okra
½ pound cooked shrimp, deveined and tails removed
¼ cup green onion, sliced

All you need to do:

Add the olive oil to a large soup pot and heat over medium high heat.

Add the chicken chunks and sausage slices, stirring frequently. Cook until the meats start to brown. Remove about 1 tablespoon of the sausage grease that has accumulated in the pot and set it aside.

Add the onions, garlic, celery and green pepper, stirring frequently. Cook until the onions soften (about 3 minutes).

Add the Worcestershire sauce and tomatoes.

Add 3 cups of the beef broth or stock. Heat until it begins to boil, then reduce heat to medium.

Add the Cajun spice and cover. Simmer for about 15 minutes.

Meanwhile, in a small saucepan, over medium heat, melt 2 tablespoons butter and sausage grease you reserved earlier.

Add the flour and stir well with a cooking spoon. Cook for about 2 minutes (to cook off the flour taste).

Slowly add the remaining beef broth or stock, whisking constantly until you have a thick smooth “sauce”…

Add the “sauce” to the large pot stirring to completely incorporate it into the pot.

Add the okra and parsley, stir well.

Cover and simmer for 20 minutes, stirring periodically.

Add the shrimp and green onions. Lower the heat to low and cook for an additional 5 minutes.


Serve hot in bowls with white rice.

Recipe: Shrimp and Grits


This dish always sounded good to me… I love shrimp and I love grits… so what’s not to like?

We’re in south Georgia … where Low Country Boils, Fried Catfish and Shrimp and Grits reign supreme. At nearby Jekyll Island there even is a Shrimp and Grits Festival.. three days of music and great food.. lots of that terrific Southern hospitality … but alas.. it isn’t until September… so … I decided it was time I made my own Shrimp and Grits.

Don’t know what grits are? Read my post from a couple of years ago… “So Just What are Grits?”

Recipes for Shrimp and Grits vary somewhat but all in all they’re relatively close… so I took what I thought was the best part of several recipes… my recipe is altered enough not to give any one recipe credit…

TIPS

I used frozen cooked shrimp with the tails still on.. you can purchase this in the seafood department of your grocery store…

I removed the tails… I hate having to remove tails after I’ve cooked them in a dish… while the presentation is nice … it is a pain in the butt to eat them that way.
Use “quick cooking grits” not instant.

I made the grits in the microwave.. you can also make them on the stove top.. just follow the package instructions. I do not add salt to the grits since the bacon in shrimp portion has plenty of salt.

Use both the green and white parts of the green onion.

Garlic cloves are listed in the ingredient list as 1-2… I personally like a garlic flavor to be very apparent… so I would use 2… but if you only want a hint of garlic.. use only 1.

A pinch of cayenne pepper is optional.. it adds a little kick to the dish. You can add as much or as little as you like depending on how much of a kick you like.

My best suggestion is prepare the ingredients ahead so all you have to do is cook ... this dish cooks up very fast… so start the grits… and wait about 10 minutes.. then start cooking the shrimp portion.

I served this dish with fresh bread and a side salad.

This recipe serves 4.

This is truly a delicious and satisfying meal!


Recipe: Shrimp and Grits

All you need:

1 cup Quick Cooking Grits
4 cups of water
2 cups Cheddar Cheese
3 tablespoons heavy cream
1 ½ pound cooked shrimp, tails removed
4 slices smoked bacon, chopped
1 ½ cups green onion, chopped
I-2 large garlic cloves, finely chopped
1 tablespoon lemon juice
Pinch of cayenne (optional)
1 tablespoon fresh parsley, chopped (for garnish)

All you need to do:

Make the quick cooking grits according to package instructions… my package uses less water for the microwave method, but I still used 4 cups of water… and cooked them until they were thick and not soupy.

Add the cheddar cheese and the heavy cream, stir well.

In a large skillet over medium high heat, cook the bacon until it is starting to curl up…cooked but still soft.

Add the shrimp, green onions, garlic and lemon juice, stirring frequently. Cook about 4 minutes.

Place a generous serving of grits on a plate and top with a generous serving of the shrimp and bacon mixture.

Alternate Serving Method: Put the grits in a large serving bowl and add the shrimp mixture, mix well. Sprinkle with chopped parsley.

Recipe: Quick Mardi Gras King Cake


This is so quick and easy… a total shortcut! Let me first tell you how I got to this “recipe”. Just before Mardi Gras I decided at the last minute to do a recipe or two that would be a good dish for the celebration.

Now I also have to tell you I’m totally addicted to a few Facebook games.. one of which is called Baking Life. I got interested when some of my friends were posting bonuses for the game.. namely Tiramisu… so now I play the game..

During various holidays they have new recipes for a limited time… we had been playing making “Mardi Gras King Cake”… which didn’t occur to me until a few days before Mardi Gras that this was an actual cake. So I goggled it and found many recipes all almost identical… if you are like me.. I didn’t know what it was… it’s basically cinnamon rolls made into a ring.. iced and sprinkled with spring colored sugars.

It really looks so pretty with the colored sugars… I thought I would make that… but good cinnamon rolls require a yeast dough and considerable time waiting for it to rise. A couple of people who have food blogs posted a quick an easy recipe using cinnamon rolls you buy in a can and bake (like from Pillsbury)… I thought how clever! The posts that I saw did not post a picture and had little or no instructions and no tips at all.

This “recipe” took 3 tries to get it to work … needless to say… I missed posting it for Mardi Gras… and thought… oh well.. next year. Then I got to thinking how it would be a perfect brunch cake regardless of the time of year… you certainly can change the colored sugars to match whatever time of year you do it… Christmas colors at Christmas.. red, white and blue at 4th of July .. or spring colors for Easter.

Traditionally, Mardi Gras King Cake has a hidden prize .. a plastic Mardi Gras baby is hidden in the cake by making a small slit after baking and inserting the prize… I wouldn’t recommend trying that with this.. but if you do… do let me know how it went.

Now for the “recipe”… I put it in quotes because it is a shortcut recipe… I’m sure the blog snob would stick her pointy little nose in the air and disapprove… after all… it’s not from scratch… gasp… horrors!.. it’s from Pillsbury in a can!

I’m putting this in caps… it’s important… PLEASE READ MY TIPS before trying this.

TIPS

Definitely use 3 cans of cinnamon rolls. You will need that many to rise and “swell” together to form a ring that will stay together as one piece.

Cut the cinnamon rolls into 4 slices not 8… they need to be that wide so they don’t fall over during baking.


Pinch the two cinnamon rolls together so they are one piece and when laying them down in a ring also pinch the ends of each set of two together so all the rolls are connected at the middle.

Lay them on end not flat (see picture).


Bake them for 25 to 27 minutes instead of the baking times on the package.. they will require the additional time otherwise they won’t be fully baked.


Ice the cake quickly with the icing in the cinnamon roll can… work quickly and sprinkle the colored sugar quickly after acing otherwise the icing hardens and the sugars bounce off the icing.

Buy commercial colored sugars … they use a coarser sugar than the normal sugar you keep in the house. You can find them in the grocery store… I found mine at Walmart and they are inexpensive… mine were $1 (US) each.

I baked mine on a 10 inch round cardboard baking circle… otherwise the cake is difficult to slide onto a plate from a baking pan. I suggest you cover the cardboard with non-stick foil because the rolls will leak grease .. you will have to use paper towel to mop the excess grease from the middle of the ring. The foil will make clean up easier…. I didn’t do that and the grease definitely shows on the cardboard.. if I had covered it in foil, there wouldn’t be any stain.

This is definitely worth trying… a great brunch cake anytime of the year.


Recipe: Quick Mardi Gras King Cake

All you need:

3 cans Pillsbury Cinnamon Rolls with Icing (8 rolls each)
1 (10 inch) round baking cardboard
Reynolds Wrap Non-stick Aluminum Foil
Colored sugars

All you need to do:

Preheat oven to 375 degrees F.

Cover the baking cardboard in non-stick foil.

Cut each can of cinnamon rolls into 4 instead of 8.

Place them in a ring on the foil covered cardboard round.

Place on a cookie sheet.

Bake for 25 to 27 minutes or until done.

Spread the icing on top of the cake, allowing it to run down the sides.

Quickly sprinkle colored sugars on the cake, a different color in each of 3 or 4 sections.

Serve warm.

Recipe: White Pizza with Pesto Ricotta Spinach and Tomato


I really like White Pizza … you can make it so many different ways… I decided to try making it with basil pesto, ricotta cheese, fresh baby spinach and tomato…. The result?... fabulous!

It really was the perfect blend of flavors .. all topped off with a generous amount of mozzarella cheese.

TIPS

After your done layering all the toppings.. do a quick spray of olive oil cooking oil spray … it will help the cheese melt perfectly.

If you use my recipe for pizza dough… make the dough .. let it rise… punch it down… roll it in a ball .. using a sharp knife, cut off 2/3 of the dough if you want to make one large 16 inch pizza. The leftover dough can be used to make a smaller 12 inch pizza or even calzones.

You can also store the dough in a Zip Loc storage bag in the refrigerator for use at another time. Spray the inside of the bag lightly with cooking oil spray. You can store it up to 5 days in the refrigerator. The bag may puff up, just let the air out.

I served this with a large antipasto salad… a perfect combination!


Recipe: White Pizza with Pesto Ricotta Spinach and Tomato

All you need:

Pizza Dough (homemade or store bought)
¼ cup basil pesto (homemade or store bought)
½ cup part-skim ricotta cheese
Fresh Baby Spinach, stems removed
Sliced tomato
Garlic powder
Grated Parmesan cheese
Shredded mozzarella cheese
Olive oil cooking spray

All you need to do:

Preheat oven to 450 degrees F.

Lightly spray a pizza pan with olive oil cooking spray.


Roll out the pizza dough to fit into the pizza pan with about ¾ of an inch over hang. Roll the over hang over to form the crust.

Using a fork generously prick the pizza dough.


Spread the basil pesto over the pizza dough.


Spread the ricotta over the basil pesto.


Lay the spinach leaves scattered over the ricotta.


Lay tomato slices over the spinach leaves.


Sprinkle with grated Parmesan.

Sprinkle with garlic powder.


Generously sprinkle with shredded mozzarella.

Spray lightly with olive oil cooking spray.


Bake at 450 degrees F for about 20 minutes or until crust is light brown and cheese has melted and is slightly brown also.

St. Patrick’s Day Menu Ideas


I went through the archives and found a few recipes you may want to consider for your menu on St. Patrick’s Day. I remember last year when I did some research on the subject of St. Patrick’s Day I found out that Corned Beef and Cabbage dinners are not traditional in Ireland… which was a surprise… the articles went on to talk about other foods more common in Ireland…. which was really okay with me.

Don’t get me wrong I like Corned Beef and Cabbage… just not a lot. I’m not crazy about boiled plain potatoes either unless they’re drowned in butter…

So this year I decided to post a few ideas that might be an alternative to the standard Corned Beef and Cabbage… and what’s to say the whole meal will have to be “Irish”. When my son was growing up … I would make a special dish … maybe a dessert to celebrate a holiday… it was my way of making a weeknight a little more special.

So here are some ideas for you…


Cream of Cabbage Soup- a delicious addition to any meal


Irish Soda Bread – wonderful with a meal… sliced and toasted with butter for breakfast … or even a snack… an easy fool-proof recipe


Shepherd’s Pie- always a great meal.. a perfect dish to go with that Irish Soda Bread


Reuben Sandwich - for those of you like me… who really like Corned Beef.. and don’t want the whole Corned Beef and Cabbage meal….maybe make it a sandwich (photo by Sargento..the cheese people.. best cheese you can get for a sandwich)


Fried Cabbage with Bacon and Onions – a whole lot tastier than just boiled cabbage.


Frosted Irish Cream Brownies - all I can say is .. they are to die for


Irish Cream Chocolate Mousse – so easy and so good!

Looking for More Recipes?

If you are looking for more recipes click the "Older Posts" link to page back to older posts or go to the archives in the right column. The list of labels at the bottom in the right column will help you find specific types of recipes or try our search engine at the top and search by name or ingredient.


What's more comforting on a cold day than Homemade Chicken Noodle Soup? .. and it's so easy to make!

Chicken Noodle Soup