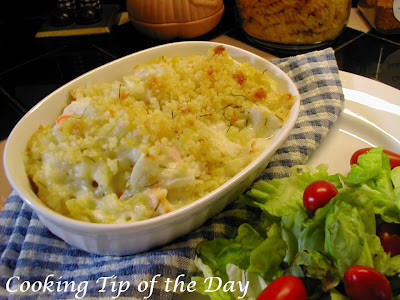
Recipe: Queso Fundido with Chorizo


This wonderful appetizer or snack is just so good… a quick little thing to make.. great for while watching the game or before a meal…

So just what is Queso Fundido with Chorizo? Queso Fundido means melted cheese… and that’s just what it is… melted cheese… and in this case with chorizo…

TIPS

I found chorizo in the section of the grocery store with the kielbasa. It was in link form, so I cut the link in half and squeezed out the chorizo… the links are about the size of hot dogs… I used two.

Be careful when handling jalapeno peppers. Wearing gloves is best… although I admit I don’t. Don’t touch your face with your hands and make sure you wash your hands after handling them. The seeds is where the heat is, so don’t add them in the food.

As the cheese cools it will get chewy… put a spoon with it to get it out of the dish easier… it’s just delicious on warm tortillas.

Serve it with tortilla chips or warm tortillas… yummmm!

Recipe: Queso Fundido with Chorizo

All you need:

½ onion, chopped
1 garlic clove, finely chopped
1 jalapeno pepper, seeded and finely chopped
2 links of chorizo, out of the casing
1 cup finely shredded Monterey Jack cheese
1 cup finely shredded mozzarella cheese
Chips and/or tortillas

All you need to do:

Preheat the oven to 400 degrees F.

In a large skillet, squeeze the chorizo out of its casing and cook over medium high heat. Break the meat up into smaller bits with a spatula as it cooks.

After the chorizo begins to render some of its fat, add the onions, garlic and pepper. Stir to mix well with the cooking chorizo.

Cook about 10-15 minutes until the chorizo is fully cooked. If the mixture is very greasy, drain on paper towels. Set aside.

In a small bowl, mix the two cheeses with your hands until well mixed.

Sprinkle ½ the cheese in the bottom of an 8 inch baking dish.

Bake until the cheese has melted (about 5-7 minutes).

Remove from the oven and sprinkle with the chorizo mixture.

Then sprinkle the rest of the shredded cheese mixture on top and return the dish to the oven until the cheese has melted and is bubbly.

Serve immediately.

Recipe: California Smoked Turkey Club Quesadilla


This quesadilla is chock full of flavor… a great little recipe to make for a weeknight meal.. quick and easy and so delicious!

All a California Smoked Turkey Club Quesadilla is .. is a Turkey Club sandwich made with a flour tortilla instead of bread…. and instead of the usual turkey breast meat… smoked turkey breast from the deli…. Add a little avocado and some spicy ranch dressing…. and you have yourself a turkey club sandwich with a twist.. and a great twist it is.

TIPS

You can use a plain or flavored mayo instead of the spicy ranch dressing… but the spicy ranch gives it a little zip… a really good addition… try my homemade Spicy Ranch Dressing recipe… it’s easy and so good.

Need tips on how to pick out an avocado and how to store them? See my post All About Avocados.

I highly recommend that you chop the bacon, avocado and tomato… it’s easier to eat… and cut the quesadilla into pieces…

I left off quantities… quantities will depend on the size of the tortilla you are using and personal tastes… I used 10 inch tortillas, I used about 6 slices of thinly sliced deli smoked turkey, half a Roma tomato, half an avocado, 2 slices of bacon, and about ¾ cup of finely shredded Jack cheese. This made 1 large quesadilla that I cut into 6 wedges…. This will feed about 2 people for a light lunch…

I usually make 2-3 quesadillas for the two of us for supper… we end up with leftover wedges.. and we store them and eat them as leftovers… Warren likes them cold .. I reheat them quickly in the microwave for me.

I have a Quesadilla Maker… it wasn’t expensive and makes making quesadillas a snap…I highly recommend them.

Hope you enjoy this twist on the old classic Turkey Club!


Recipe: California Smoked Turkey Club Quesadilla

All you need:

Flour tortillas
Spicy Ranch Dressing (homemade or store bought)
Smoked turkey, thinly sliced (from the deli)
Avocado, peeled and chopped
Roma tomatoes, chopped
Finely shredded Monterey Jack cheese
Smoked bacon, cooked and chopped

All you have to do:

Layer the ingredients on a tortilla, starting with the turkey and ending with the shredded cheese. Lay a tortilla on top and place in a tortilla maker and lower the top… follow any manufacturer’s instructions.

You can also make these on a griddle. Use smaller tortillas, so they can be flipped easier.

When the cheese has melted and the tortilla is lightly browned, remove to a cutting board. Allow to cool for about 3-5 minutes. Use a pizza cutter or a sharp knife to cut into wedges.

Recipe: Strawberries Romanoff


If you have never had Strawberries Romanoff … you really must put it on your list of things to do. If you love strawberries and whipped cream (I know very few people that don’t)… then this twist on it will be just right for you.

I don’t know where Strawberries Romanoff originated… it seems there are numerous stories out there and all different… AND there also seems to be different recipes … all very different. I’m not sure any of them agree on anything except the strawberries and sugar.

I first had Strawberries Romanoff as a teenager… as I’ve mentioned before … I loved to cook and bake and my parents indulged me… mostly my brother was the guinea pig… not that it was such a terrible fate to taste all these foods.. he loved doing it.. and as brothers are.. brutally honest …. He was too, about what he liked and didn’t like. This one was definitely in the “like” column. I found the recipe somewhere and tried it.. we loved it… and I made it for years..

And then I seemed to forget about it.. and along with a few other prized recipes.. I lost it. I don’t know what made me think of it recently … but I searched high and low for a recipe.. none rang a bell… only an ingredient here and there triggered a memory.

Then I came across a recipe attributed to a Houston newspaper (unnamed) and I knew I’d almost found the complete recipe…. the only difference was the recipe used brown sugar… I honestly don’t remember brown sugar… but I tried it and liked the results… so here it is…

TIPS

I use the real deal in this recipe… heavy cream and sour cream… it really does make a difference .. I don’t recommend substitutions … although I have seen recipes that use low fat yogurt in place of the sour cream and I’m intent on trying it.. but yogurt flavors vary widely by brand.. so I would be careful in making a choice as to which one to use.

The recipe calls for Brandy… Grand Marnier makes a decent substitution… if you need an alcohol free food.. I’d still try it.. it still has a sweet and tangy flavor that really is good.

Try this easy classic dessert!


Recipe: Strawberries Romanoff

All you need:

½ cup sour cream
3 tablespoons light brown sugar
1 tablespoon brandy
½ cup heavy cream
3 tablespoons white sugar
2 pints fresh strawberries, hulled

All you need to do:

In a medium/large bowl combine the sour cream, brown sugar and brandy. Mix well and set aside.

In a mixing bowl whip the heavy cream and white sugar until stiff peaks.

Fold the whipped cream into the sour cream mixture.

Place a generous dob of the cream mixture on a serving of strawberries.

Recipe: Cheesy Baked Eggs with Ham


Cheesy Baked Eggs with Ham is a pretty quick and easy way to enjoy eggs with much muss or fuss.

I must admit that prior to trying baked eggs… the name sort of turned me off… it conjured up images of those hated soft boiled eggs of my childhood. I absolutely hated them… still do… but I like to think I’m open minded… so I read the directions and thought… hmmm… it’s a little like a fried egg in the oven and a poached egg… and it was!

TIPS

You can use any size baking dish you like… from ramekins to au gratin dishes..
Make sure you butter the dish… the bread will stick if you don’t… which isn’t terrible… you’ll just end up soaking it in the sink when you’re done.

Trim the crust off the bread… and cut the bread to fit your dish… the dish on the picture took about 1 ½ pieces of bread.

I needed to use up some left over ham steak… so I diced it up into really small pieces… you can use sliced deli ham instead.. just chop it up.

I know a lot of people don’t keep chives on hand… we do… we love the light onion flavor… don’t omit them.. they had a touch of flavor to this and blend really well with the cheese. If you must omit it… consider sautéing some shallots to mix with the ham to add flavor.

I use a Swiss Gruyere cheese mixture since Gruyere tends to be so expensive… Sargento makes an Artisan mix that is affordable.

The half and half adds a bit of creaminess to the melted cheese… if you need to substitute.. heavy cream would be a first choice and whole milk a last choice.

Baking time is approximate… adjust it to how you like your eggs….if you like your eggs runny.. bake it less.. the time listed makes them so the whites are cooked and the yolk is slightly runny.

The final step to making this dish turns the heat up to broil… don’t walk away from it.. it will take only about 3 minutes… you want the dish to brown up slightly … it will burn easily if under the broiler too long.

The recipe is for one serving. If making for more than one, use individual serving dishes and place on a baking sheet for easy handling getting into and out of the oven.

Make this for one or for a crowd… it really is easy!


Recipe: Baked Cheesy Eggs with Ham

All you need:

Bread
2 tablespoons butter
½ cup diced ham
½ cup finely shredded Swiss and Gruyere cheese
2 eggs
3 tablespoons half and half
Snipped chives

All you need to do:

Preheat the oven to 350 degrees F.

Grease a baking dish with butter. Set aside.

Cut the enough bread in the size and shape to cover the bottom of the baking dish.

Over medium heat, melt the 2 tablespoons of butter in a skillet.

Sauté the bread until lightly browned on both sides. Lay the bread in the bottom of the baking dish.

Put the ham on top of the bread and make two nests to hold the eggs.

Sprinkle half the cheese over the ham and bread.

Break an egg into each nest.

Sprinkle the remainder of the cheese completely over the eggs and ham. Spoon the half and half over the cheese.

Bake at 350 degrees F for about 20 minutes or until eggs are just shy of desired doneness.

Turn the oven up to broil, leaving it on the middle rack.

Broil for 2-3 minutes, watch closely, you only want the cheese to brown slightly.

Remove from the broiler, snip chives over the top and serve.

Recipe: Cheesy Corn


Cheesy Corn is a great little side dish… combining some of the best foods… corn, cheese and…. Drum roll please… bacon! This is similar to the cheesy corn on the menu at Applebee’s although I do think this is better…

We had this dish with BBQ ribs and coleslaw… a great little supper.

TIPS

Use both the green and white parts of the green onion.. they’re both delicious.
You don’t have to thaw the corn.

Try to use smoked bacon, the smokey flavor really adds to this dish.

You can easily double this recipe…. the recipe makes about 4 side dish servings…

Quick and easy… the way weeknight cooking is supposed to be!


Recipe: Cheesy Corn

All you need:

2 strips thick sliced smoked bacon, chopped
1 tablespoon butter
2 tablespoons red pepper, chopped
1 green onion, chopped
1 tablespoon cream cheese (approximate), softened
¼ cup whole milk
2 slices American cheese
3 tablespoons finely shredded Monterey Jack cheese
2 cups frozen corn

All you need to do:

Place the chopped bacon in a large skillet and cook over medium heat high heat, stirring occasionally.

When the bacon has rendered some of its fat, add the butter and melt it.

Add the red pepper and cook for about 3-4 minutes.

Add the corn and stir to coat the corn.

Cook for about 3 minutes.

Reduce the heat to medium.

Add the cream cheese and stir well. Add the milk and cheeses.

Stirring frequently, allow the mixture to blend. Add the green onion.

Cook until the corn is cooked (about 5 minutes)

Recipe: Mexican Chorizo and Eggs Breakfast Skillet


This easy recipe for Mexican Chorizo and Eggs Breakfast Skillet is terrific for any time of day you want to have delicious eggs. We had a version of this in a restaurant recently and we were determined to re-create it at home.

We love breakfast in this house… for breakfast, lunch or dinner… we also like a little spice so this recipe was made to order for us.

TIPS

You can find chorizo in the grocery store… it’s in different places depending on the store… look where you normally find kielbasa or if your store has a refrigerated Mexican section with the Mexican cheeses.

I could only find links… so I cut them open and squeezed out the sausage.

I use red, green and yellow peppers… I know red and yellow peppers are more expensive but the taste is milder and we like it… if you want you can use whatever peppers you like.

I used one jalapeno pepper… it added just a little zing… make sure you don’t get seeds in your food and take precautions when cutting them… don’t touch your face and eyes when handling them… wash your hands thoroughly after cutting them or better yet wear gloves.

I used Russet potatoes… you can use any variety you want… I just like the texture and hardiness of Russets…. also leave the skin on.

The amounts in this recipe will make two very hardy meals.

So here’s one delicious breakfast!


Recipe: Mexican Chorizo and Eggs Breakfast Skillet

All you need:

2 links of chorizo
2 tablespoons diced green pepper
2 tablespoons diced yellow pepper
2 tablespoons diced red pepper
1 medium onion, diced
1 jalapeno pepper, seeded and diced
2 large russet potatoes, washed, and cut into large dice
1-2 tablespoons olive oil (optional)
4 fried eggs

All you have to do:

Squeeze out the chorizo from the casing onto a large skillet…. break into small pieces.

Cook the chorizo over medium high heat for about 3 minutes until the sausage grease begins to render.

Add the potatoes, stirring to coat them with the sausage grease.

Cover and cook, stirring frequently for about 10 minutes until they begin to crisp up on the outside and cook on the inside.

Add the peppers and onions, stir well.

Note: you want enough grease to coat everything, nit swim in it, if it’s too dry, then add some olive oil, a tablespoon at a time… you should need no more than 2 tablespoons if even that much. Grease rendered from the sausage will vary between brands.

Cook until the potatoes are thoroughly cooked and the peppers are soft.

Remove the mixture to oven proof bowls and keep warm in a warm oven until you cook the eggs.

Make the eggs in the same pan you made the potatoes and peppers.
Lay cooked eggs on top of each potato mixture in the bowls and serve.

Recipe: Pumpkin Gooey Butter Cake


All I can say about Pumpkin Gooey Butter Cake is FABULOUS … FABULOUS … FABULOUS!!!! I’m not a sweet freak… but this cake is just over the top… absolutely a show stopper!

When I started this blog… a few years ago… one of the first posts I wrote was about Gooey Butter Cake… it was a recipe that was given to me from a family member and attributed to Candace Cole. I’ve seen the recipe in all sorts of places since then and attributed to different people… so I really have no idea who really concocted the first Gooey Butter Cake… but whoever it was.. Bless them!

I took a lot of heat from the blog snob who sniffed that I posted glorified boxed recipes… (she probably scrunched her nose up and made that prune face … you know.. that constipated look from a cranky fuddy duddy)….. a lot she knows… why tamper with something that works?… besides.. I’m in good company with those that use boxed mixes on occasion … read on…

So recently I was looking for something different to make with pumpkin… Fall always gets me in the mood for pumpkin… and I found pumpkin version of that original recipe… Pumpkin Gooey Butter Cake by Paula Deen… I don’t know why I was surprised she had this recipe.. it has her written all over it… lots of butter… cream cheese … lots of sugar… yep.. that’s Paula Deen alright… so I just had to try it…

Well … let me tell you… it’s surprisingly not overly sweet… and absolutely delicious. If you want to be a rock star at your next gathering.. bring this cake.

It’s easy and… don’t alter a thing.. it’s pure perfection.

TIPS

I recommend you line the pan with non-stick foil … over hang the foil over the sides of the pan.. so you can lift this cake out…. it will make getting it out of the pan loads easier.

Absolutely grease the foil anyway… and grease it well.

Need to soften the cream cheese quickly?... Click here for tips.

In case you buy bags of powdered sugar in larger quantities like I do….. One pound (16 oz.) powdered sugar equals 4 cups (unsifted).

The cake needs to be refrigerated to totally solidify… then take it out about 15 minutes before you want to cut it… it will cut easily then.

I served this with homemade whipped cream… put a small dollop on each piece… don’t overdo … this cake is rich.

So here’s Paula’s masterpiece.


Recipe: Pumpkin Gooey Butter Cake

All you need:

Base:

1 (18 ¼ oz.) package yellow cake mix
1 egg
8 tablespoons butter melted

Top:

1 (8 oz.) pkg cream cheese, softened
1 (15 oz.) can pumpkin
3 eggs
1 teaspoon vanilla
8 tablespoons butter, melted
1 (16 oz.) box powdered sugar
1 teaspoon cinnamon
1 teaspoon nutmeg

Garnish:
Chantilly Cream (optional)

All you need to do:

Preheat the oven to 350 degrees F.

Line a 9 x 13 pan with non-stick foil. Generously grease the foil. Set aside.

In a large bowl, combine the cake mix, melted butter and egg.

Pat the mixture into the prepared pan.

In a large mixing bowl, beat the cream cheese for about 20 seconds, then slowly add the pumpkin, beat until smooth.

Add the eggs, vanilla and melted butter, beat until smooth.

Add the powdered sugar a little at a time, beating slowly so the powder doesn’t fly all over the place.

Add the cinnamon and nutmeg and mix well.

Spread the pumpkin mixture over the base in the pan.

Bake for 40 to 50 minutes. I baked mine for 45 minutes. Do not overbake. The center should be gooey and jiggle.

Allow to cool.

To make cutting easier…. Refrigerate for at least couple of hours to set cake.. then remove from the fridge about 15 minutes before cutting.

Serve with Chantilly Cream.

All About Sugar


Ahhh … this is a favorite subject… sugar. From baking to sugar in my coffee… sugar has always been a part of my life… as with most people too. What I knew about sugar just came … well.. naturally over the years… learned a bit here .. and there…

Sugar has gotten a bad rep in recent years… which .. frankly.. I’m surprised about… it’s been around for centuries.. and as most other things in life.. when enjoyed in moderation… is fine for you.

History

Sugar has been produced since ancient times. Sugarcane was native to Southeast and South Asia. It wasn’t until the 5th century AD that sugar became important when the Indians discovered how to crystallize the sugarcane juice into crystals that were easy to transport and trade. Sugar became a hot commodity for trading. Buddhist monks brought sugar crystallization methods to China. The Crusaders brought sugar back to Europe with them from the Holy Land. Soon the world was using sugar.

So just where do we get sugar?

This is a brief, probably over simplified, review of the process of how our sugars are produced:

Cane Sugar

The sugar cane plant grows above ground in warm, moist, tropical climates. Sugar is refined from plant stems. The stems are cut during harvest, leaving the root to grow again. The leaves are stripped and put through rollers that extract the sugarcane juice. The juice is filtered and heated, through an evaporation process that forms raw crystalline sugar. The raw sugar is then filtered further and boiled to remove the molasses and color.

Beet Sugar

Beet sugar grows best in temperate climates and is a root crop. The sugar is stored in the yellowish root, and harvesting involves removing the roots, so beet sugar is planted annually.

The roots are then sliced and boiled to extract the sugar into a thick syrup. The syrup then gets heated further to form crystallized sugar.

Types of Sugar

Granulated Sugar

Granulated sugar is the sugar that we just discussed, that comes from sugarcane or beet sugar, and is processed to from sugar crystals.

Brown Sugar

Brown sugar is simply white sugar with pure cane molasses added. As mentioned earlier, molasses is a by- product of sugar making process, so adding some back still produces a natural product.

The difference between light and dark brown sugar is the amount of molasses added. in general, when a recipe simply states “brown sugar” it usually refers to “light brown sugar”.

Dark brown sugar should really only be used when it is specifically specified. Substituting dark brown sugar for the light brown sugar will yield a deeper flavor with caramel (not such a bad thing… in my humble opinion).

Powdered Sugar

Powdered sugar is also known as confectioners’ sugar or icing sugar. It is a very fine sugar that is used primarily to make icing or frosting, as well as, cake decorations. It can be found in different degrees of fineness …. XXX, XXXX and 10X… the more X’s the finer the sugar.

Powdered sugar is usually mixed with cornstarch or wheat flour to improve its flowing ability. You can make powdered sugar at home by grinding granulated sugar in a coffee grinder or by hand with a mortar and pestle.

Castor Sugar

Castor sugar is also known as superfine or baker’s sugar has a larger particle size than the powdered sugar and is about half the size of granulated sugar.

Snow Powder

Snow powder is also known as snow sugar. It is a non-melting form of powdered sugar and is useful dusting cakes and pastries that require refrigeration. It is mostly used for decorating baked goods.

Storing Sugar

According to the “sugar people” at Dixie Crystals, provided you don’t have a pest control problem, sugar doesn’t go bad. The key is to have an airtight container to keep moisture out.

Softening Sugar

Okay.. so moisture has gotten into your sugar and it has solidified… now what?... according to Dixie Crystals:

Place hard brown sugar in an open microwave safe container with ½ cup of water in a second container and microwave for 1-3 minutes until soft. Measure and use the sugar as soon as the sugar becomes soft. Brown sugar will harden again when cool.

Store brown sugar with a piece of sliced bread. be sure to change out stale bread frequently.

Introduce a slice of apple to an airtight container with hardened sugar.

Put a moist paper towel in a resealable bag with the sugar overnight.

Put the hardened sugar in a food processor or blender and process until usable.

I hope you have found this information helpful.

Sugar Measurement Conversions


Have you ever started to make a recipe only to realize you weren’t sure you had enough of an ingredient?

Well it happened to me recently… I was making a cake and according to the recipe I needed a one pound box of powdered sugar…. unfortunately I buy 2 pound bags…. Which I thought… okay…. I’ll just use half… ahh but not so fast… the bag was opened and partially used… I clearly had at least half a bag… but I don’t approximate in baking… in cooking I will.. but not baking… so I needed to know just how much one pound translated to into cups…

So.. on the hunt I went for measurements… and found them… problem solved… I thought it would be a good idea to share them with you… after all … buying bags of larger quantities is cheaper.. and baking season will soon be upon us… I thought perfect timing!


1 pound powdered sugar = 4 cups (unsifted)

2 pounds powdered sugar = 8 cups (unsifted)

1 pound granulated sugar = 2 ¼ cups

4 pounds granulated sugar = 9 cups

5 pounds granulated sugar = 11 ¼ cups

1 pound carton brown sugar = 2 ¼ to 2 ½ cups (amounts will vary because brown sugar is packed and varies by carton)

2 pound poly bag brown sugar = 4 ½ - 5 1/3 cups (amounts will vary because brown sugar is packed and varies by bag)


Source: Dixie Crystals (the sugar people)

Recipe: Mexican Seasoned Rice


This recipe for Mexican Seasoned Rice is a quick and easy addition to lots of meals…. not to be confused with Mexican or Spanish Rice… that recipe is also delicious… made with onion, garlic and tomatoes…. this recipe simply combines Seasoning and Rice… that’s it…

Last week Warren took me to a Mexican place… yes… menu was on the wall… but… the food was excellent… not your Taco Bell type… not that taco Bell is necessarily bad… my son loves some of their stuff… I’m more of a purist.. I like the actual sit down places… but.. this place made awesome Burritos.. they had a wide variety of all kinds of things to have them stuff with… one of which was seasoned rice…

It was Burrito night in our household…. So … of course I had to make all the options…. And what better way to season Rice than with my Fajita Seasoning… a stellar thought… it was just perfect… and actually… this rice will go perfectly with a grilled steak too.

TIPS

I used minute rice… you make equal parts rice and water… so this recipe is easy to alter to the number of servings you need.

If you haven’t tried my homemade Fajita Seasoning.. you should… it’s easy to make … you can adjust the heat… and it’s cheaper than those packets…

I hope you enjoy this really easy recipe!


Recipe: Mexican Seasoned Rice

All you need:

1 ½ cups Minute Rice
1 ½ cups water
2 tablespoons Fajita Seasoning

All you need to do:

Combine all ingredients in a microwaveable bowl.

Cover and microwave on high for 6 minutes or until almost all the water has been absorbed and rice is tender.

Recipe: Western Eggs


Western Eggs… chock full of flavor… perfect for a breakfast any day… serve it with a bit of salsa and you have yourself one great breakfast.

I like to prep it ahead so all I have to do is cook it… the great part of this is… it takes minutes and you have a terrific plate of eggs.

TIPS

I left quantities off… they really are as much or as little as you want… for 6 eggs (with a dash of milk)… I use ½ red bell pepper, ¼ yellow pepper, ¼ green pepper, 2 tablespoons of chopped green onion, about 1 cup of diced ham and ¼ cup shredded cheddar or Colby Jack cheese.

I like to use the different varieties of pepper… they make a great presentation with all the bright colors.. but also yellow and red peppers are milder than green.. so the taste of pepper is not overwhelming.

Use both the white and the green parts of the green onion.. they’re both delicious.

I hope you enjoy this!


Recipe: Western Eggs

All you need:

Eggs, beaten
Dash of milk
Diced red pepper
Diced yellow pepper
Diced green pepper
Chopped green onion
Diced ham
Shredded Colby Jack or Cheddar cheese
2 tablespoons butter or margarine

All you need to do:

In a large skillet, melt the butter over medium heat.

Add the peppers and ham and sauté for about 5 minutes.

Meanwhile, beat the eggs and milk.

Pour the egg mixture over the ham and peppers.

Sprinkle the green onion and shredded cheese over the eggs.

Scramble as you would normally make scrambled eggs.

Serve with salsa.

Recipe: Sausage and Cheese Muffins


Nothing says breakfast like a good muffin… and these Sausage and Cheese Muffins are definitely good. They’re easy to make and so tasty.. perfect with scrambled eggs.

TIPS

The breakfast pork sausage I used didn’t render much grease… so I sautéed the onions in the little grease there was and added about half a tablespoon of butter from the 4 tablespoons of butter listed.

You can use any cheese you prefer… cheddar gives this a nice strong flavor while Colby Jack gives it a light cheese flavor.

The batter is quite thick… I used a heaping ice cream scoop to scoop the batter into the muffin tin… it made 12 muffins.

So enjoy a terrific weekend breakfast with these muffins!


PRINT RECIPE

Recipe: Sausage and Cheese Muffins

All you need:

8 ounces of bulk pork breakfast sausage
½ medium onion, finely diced
4 tablespoons unsalted butter, melted
1 ¼ cups milk
1 egg, slightly beaten
2 cups of flour
2 tablespoons sugar
1 tablespoon baking powder
¼ teaspoon salt
½ cup shredded colby jack cheese or cheddar cheese
Butter flavored cooking oil spray

All you have to do:

Preheat the oven to 375 degrees F.

Spray a non stick muffin tin with butter flavored cooking oil spray. Set aside.

In a medium skillet, brown the sausage, breaking it up into small pieces with a spatula. Drain on paper towels.

In the rendered sausage grease, sauté the onion over medium heat. If you don’t have much grease, add about ½ tablespoon of the melted butter to the pan. Cook until onions are soft and translucent. Do not let them brown. Remove from the heat and cool for about 5 minutes.

In a large bowl, combine the flour, sugar, baking powder and salt. I use a wire whisk to mix it, it mixes it evenly. Set aside.

In a medium bowl combine the melted butter, milk, and egg.

Add the butter mixture, sausage, sautéed onions and cheese to the flour mixture. Mix well with a spoon.

Spoon into the prepared muffin tin. Sprinkle a little shredded cheese on top of each muffin.

Bake for 30 minutes or until a toothpick inserted into the center of a muffin comes out clean AND the tops are a light brown.

Recipe: Salisbury Steak


Salisbury Steak is making a comeback… seems all of us that grew-up eating it in cafeterias, diners and the occasional TV dinner miss it.

Oh… it’s not fancy… but it is hearty and satisfying.. another alternative to meatloaf or a hamburger… and besides… what’s not to like? …it’s usually served with mashed potatoes or noodles or rice…an excuse to slop on more gravy.

Salisbury Steak is easy to make… numerous recipes are out there… bottom line here… it’s seasoned ground beef, cooked in a skillet and topped with mushroom gravy… tweak as you may.. it’s still going to be seasoned ground beef, cooked in a skillet and topped with mushroom gravy.

TIPS

This doesn’t have to be a nutritional nightmare… in fact… use lower fat ground beef and it’s not too bad.

I think it’s really important to sauté the onions in a bit of butter before adding them to the ground beef… raw onion has a harsher taste… sautéing them keeps the onion flavor and loses the harshness.

I always use fresh parsley… it has more flavor than the dried stuff…. and that makes a difference here.

I chopped the onion and garlic together in a mini chopper.

My instructions cook the beef in a skillet… you can also.. brown the beef patties in the skillet and remove them to a baking dish… then preheat your oven to 375 degrees F… pour a couple of ladles of mushroom gravy over the beef and cover with foil… bake for about 25 minutes or until meat is done (you can check that with a instant read meat thermometer). Time will depend on how big you make your patties.

Be aware that if you do bake them… the meat will release a bit of water while cooking… this is normal and okay.. it just will thin the gravy in the baking dish a bit… I usually just mix it into the gravy I still have in the pot… we don’t care for really thick gravies anyway.

So let’s get to it… so you can enjoy this diner favorite.


Recipe: Salisbury Steak

All you need:

1 pound lean ground beef
3 tablespoons fresh parsley, chopped
2 tablespoon Worcestershire sauce
½ medium onion, finely chopped
1 clove garlic, finely chopped
1 egg
10 crushed buttery crackers (like Ritz)
¼ cup beef broth
1/8 teaspoon salt
1/8 teaspoon pepper
3 tablespoon butter, divided
1 tablespoon oil
Mushroom Gravy

All you need to do:

In a small skillet over medium heat, melt 1 tablespoon of the butter.

Add the onions and garlic. Cook for about 5 minutes until the onions are translucent and soft… do not let them brown, stir occasionally.

Remove the skillet from the heat and allow the onion mixture to cool.

In a medium bowl, mix the meat, parsley, Worcestershire sauce, onion mixture, egg, crushed crackers, beef broth, salt and pepper.

Form into patties (3 or 4 depending on how big you want them).

In a large skillet, heat the remaining 2 tablespoons of butter and olive oil.

Please Note: Lean ground beef shouldn’t render much fat, so to keep from charring the pan I add a little butter and oil. If you use a non-stick pan…. spraying with cooking oil spray should be enough… I would use the spray and omit the butter and oil)

Add the patties and brown them over medium high heat.

Meanwhile … make the mushroom gravy. (click here for the recipe)

Add 2-3 ladles of gravy to the pan. Lower the heat to a simmer. Cook for 25 minutes, turning the patties once.

Serve with noodles, mashed potatoes or rice and additional gravy.

Recipe: Mushroom Gravy


This recipe for Mushroom Gravy is a slight variation to the Brown Gravy recipe I posted before. It simply adds sautéed mushrooms to the gravy.

Gravies are easy to make and so easy to vary to your tastes. This particular gravy is the one I use for Meatloaf, Salisbury Steak and Roast Beef.

TIPS

I use unsalted butter so I can adjust the salt to my taste by adding it the salt in.. you can use salted butter if you prefer.

If you do have meat drippings.. use them in place of some of the butter… I always use at least some butter.. I think it adds to the taste.

Adjust the seasonings to your taste … even add other seasonings that you think will go with the meal you’ll use it with.

I know the Dijon mustard seems odd… but it really does work well in this.


Recipe: Mushroom Gravy

All you need:

8 oz. fresh mushrooms, sliced
4 tablespoons unsalted butter, divided
2 tablespoons flour
1 can beef broth or about 1 ¾ cups of beef broth
¼ teaspoon garlic powder
½ teaspoon onion powder
2 tablespoons ketchup
2 teaspoons Dijon mustard
2 teaspoons Worcestershire sauce
Salt and pepper to taste

All you need to do:

In a medium skillet, melt 2 tablespoons butter over medium heat.

Add the mushrooms… and sauté until soft. Set aside.

In a small saucepan, melt the butter over medium heat.

Add the flour and mix (make a roux).

Allow the butter and flour to cook for about 2 minutes .. to cook off the flour taste.

Gradually add the beef broth while whisking the sauce. Whisk until all lumps are out.

Add the remaining ingredients and whisk until gravy thickens… about 5 minutes or so.
Adjust seasonings to your taste.

Remove the mushrooms from the skillet with a slotted spoon and add them to the gravy.

Recipe: California Omelet


This simple recipe for a California Omelet combines avocado, tomato and green onion… with cheddar and jack cheeses… and a little side of salsa… now doesn’t that sound refreshing?

Breakfast is my favorite meal… hands down… no question about it… I could eat breakfast foods for breakfast, lunch and dinner… much like the commercial.. the incredible edible egg… eggs are so versatile … omelets have limitless options…

This is a 2 egg omelet recipe… quantities are really up to you… I used half a Roma tomato and four slices of avocado.. a sprinkling of shredded cheese in and over the omelet and a about a tablespoon of chopped green onions.

TIPS

Use butter flavor cooking oil spray and a good non-stick skillet to save fat and calories instead of using butter.

Use both the white and the green parts of the green onion… they’re both delicious.

Hope you enjoy this as much as I did!


Recipe: California Omelet

All you need:

2 eggs, lightly beaten
Roma tomato
Avocado slices
Green onion, chopped
Shredded cheddar and Monterey Jack cheese
Salt and pepper
Butter flavor cooking oil spray
Salsa

All you need to do:

Spray an 8 inch non-stick skillet with butter flavor cooking oil spray and heat it over medium heat.

Add the eggs and allow the eggs to set for about 30 seconds.

Add a sprinkling of shredded cheese, salt and pepper.

Allow the eggs to set for at least a minute.

Carefully using a spatula loosen the sides of the omelet, continue to cook until eggs are cooked and set.

Lay the tomatoes, avocado slices, some chopped green onion, and some shredded cheese on half of the eggs.

Carefully flip the one side of the omelet over the side with the tomato, avocado slices etc.

Slide onto a plate… garnish with additional shredded cheese and chopped green onion.

Serve with salsa.

All About Avocados


The California Avocado is a native American plant and the most popular variety is the Haas. Avocados originated in Mexico some 5,000 years ago. As for today, we can thank Judge R. B Ord of Santa Barbara for introducing avocado trees to the US from Mexico in 1871.

California is the leading producer of avocados in the US…. It’s no wonder so many recipes from California feature avocados. They’re grown year-round and one tree on average produces about 150 avocados per year…. although they can produce up to 500 avocados or 200 pounds of avocados yearly… now that’s a lot of guacamole!

How to Pick an Avocado

The avocado growers of California suggest looking the Fresh California Avocado Brand to be sure you are getting avocados grown under the best possible conditions.

Gently squeeze the avocado in your hand… it should be firm yet yield to gentle pressure. Unfortunately, you cannot go but color to determine ripeness… the Haas avocado, that I mentioned earlier, for example, will turn dark green or black as it ripens, but other varieties won’t…. so the squeeze test is your best bet in helping choose a ripe avocado.

Did you know you can freeze avocado?

Yep… you can… wash, seed and peel the avocado. Puree the avocado … add 1 tablespoon lemon juice to two pureed avocados. Put it in a freezer bag or air tight container (leave about an inch of head space) and freeze…. it’s as simple as that. it will last in the freezer 4-5 months.

Avocado Trivia

There are about 6,000 avocado growers in California and the average grove size is 10 acres.


Source: www.avocado.org

Recipe: Spicy Ranch Dressing


This Spicy Ranch Dressing is a variation of my Buttermilk Ranch Dressing… a few added spices to add a bit of zip… perfect for everything from salads to veggies dippers and more.

Homemade dressings are not only easy.. but you can also control what is and isn’t in your food. .. and much like my seasoning recipes.. you control the heat.

TIPS

Use my quantities as a guide… my dressing has a bit of zip… so if you like a lot of zip.. start with my quantities and taste it… then add additional spices to your taste.

Measure the buttermilk, mayo and sour cream to the recipe… don’t make the same mistake as I’ve done before… not careful with the measuring.. it will get the ratio out of balance and the taste will be off.

I used McCormick Hot Mexican-Style Chili Powder… you should be able to find it in the grocery store. You can substitute any chili powder of your choice.

I “sprinkled” the cayenne over the top… twice… I suggest you start with that and go from there when adding more heat.

I used chives.. I like the light onion flavor… if you have to substitute something for the chives… finely chopped shallots would be my first choice… about the same quantity as the chives are listed as.

Whole milk buttermilk does give the best flavor and texture… you can use a lower fat buttermilk but the taste will be slightly different…. same goes for the sour cream.

Substituting another brand of mayo for the Hellman’s mayo will change the taste as well. I would not recommend using Miracle Whip.

I like to use white pepper instead of black pepper, if you don’t have it, you can substitute black pepper for it.

Once you try homemade salad dressings you won’t go back to store bought.


Recipe: Spicy Ranch Dressing

All you need:

1 cup whole milk buttermilk
2/3 cup Hellman’s Real Mayonnaise
2/3 cup sour cream
1 ¼ teaspoon garlic powder
1 ¼ teaspoon onion powder
1 teaspoon dried parsley
1 tablespoon fresh chives, chopped
1 ½ teaspoon paprika
1 ½ teaspoon chili powder
Dash of cayenne
About 5 drops hot sauce
Salt to taste
White pepper to taste

All you need to do:

Combine all ingredients in a medium bowl. Whisk until smooth.

Recipe: Banana Pie


This recipe for Banana Pie is different from all the others… but one I think you will love. First, let me say this… I know I’ve posted a few no-bake pies lately… but they really happen to travel well… are perfect for last minute company or last minute invites to a BBQ… and I wanted to be sure to get them all posted for you to chose the one that’s right for you.

For those of you who have no interest in these no-bake pies… take heart… lots of different recipes and tips are coming.. so bear with me… and peruse the archives… there are over 1,000 recipes and tips that surely more than one will trip your trigger.

Now back to the Banana Pie… this has a really light banana flavor… and topped with Chantilly Cream… the banana flavor blends so well with the light vanilla flavor in the whipped cream… a truly delicious combination.

The “different” part of this pie… it uses cream cheese and sour cream… but unlike the other no-bake cream cheese pies.. it really doesn’t taste like a cheese pie… but it does give it a wonderful consistency and balances out the sweetness just perfectly.

I like bananas… but I’m not as nuts about them as Warren and Bubba (you remember… my taste tester)… yes… Bubba loves bananas… shares one with Warren most mornings… and well.. whipped cream is always a favorite… so this recipe passed my taste testers with flying colors.

TIPS

I made the pie and refrigerated it.. for at least 6 to 8 hours… cutting it is a snap.. if you’re impatient .. you may have a challenge cutting a clean slice … it’s best to let it set-up.

It’s very important to have very soft cream cheese.. to soften it fast.. see my instructions here.

I didn’t top the pie with the whipped cream.. instead, I topped each slice… I like softer whipped cream (Chantilly Cream) and prefer homemade over Cool Whip … I do think it will cut easier and make a better presentation if you make the whipped cream just before serving and top each slice.

If you need the recipe for Chantilly Cream… click here… it’s quick and easy.


Recipe: Banana Pie

All you need:

1 graham cracker pie shell
1 pkg. (8 oz.) Philadelphia Cream Cheese, softened
1/3 cup sugar
1 ½ cups sour cream
¼ cup heavy cream
1 small pkg. (3.9 oz.) JELLO instant banana pudding
Chantilly Cream

All you need to do:

In a large mixing bowl, beat the cream cheese and sugar until smooth.

Add the remaining ingredients and beat at low to medium speed until well mixed and smooth.

Pour the mixture into the graham cracker crust, smoothing top.

Cover and refrigerate 6-8 hours.

Remove from fridge just before serving.

Top each slice with Chantilly Cream.

Recipe: Spinach and Ricotta with Pasta Noodles


This easy recipe for Spinach and Ricotta with Pasta Noodles combines some of my favorite ingredients… obviously spinach, ricotta and pasta… but also Parmesan Cream, chopped pancetta and mushrooms.. the result?... absolutely delicious!

Supper time… a time for making decisions… using up miscellaneous ingredients and trying new things when nothing else sounds good…

I have always really liked the combination of spinach and ricotta… I’ve used it in numerous recipes… lasagna, stuffed shells, baked ziti and stuffed chicken breasts to name a few… so when I was trying to decide what to make for supper and after surveying the fridge and pantry… I decided to combine a few things that naturally go well together… and a new recipe was born… and a good one at that.

TIPS

This recipe will work easily with chopped bacon as a substitute for pancetta… the pancetta gives it a unique flavor.. while the bacon will give it a heavier more smokey flavor.. both are good…

The Parmesan Cream can be made thinner if you prefer a creamier casserole… you can also lower the fat by substituting a lower fat milk for the whole milk.

If you decide to use a 10 oz. box of frozen spinach instead of the 8 oz. of spinach called for in the recipe… be sure to make more Parmesan Cream to compensate for the additional spinach. You can always make an additional ½ recipe of Parmesan Cream… use as much of it as you like to get it to a good consistency and save the leftover Parmesan Cream for a quick lunch of Pasta and Parmesan Cream.

I hope you try this!


Recipe: Spinach and Ricotta with Pasta Noodles

All you need:

1 pkg. egg noodles, cooked
½ a bag (16 oz. bag) frozen chopped spinach, thawed and drained
1 pkg. (4 oz.) chopped pancetta
1 pkg. (8 oz.) mushrooms, sliced
1 tablespoon olive oil
1 small container ricotta cheese
1 tablespoon Italian seasoning
1 teaspoon garlic powder

For the Parmesan Cream:

2 tablespoons butter or margarine
2 tablespoons flour
1 ½ cups whole milk
½ cup grated Parmesan cheese
Salt to taste
White pepper to taste

All you need to do:

Preheat oven to 350 degrees F.

Cook the noodles according to package directions. Set aside.

To make the Parmesan Cream:

In a small pot, melt the butter over medium heat.

Add the flour and mix well… allow to cook for about 2 minutes to cook off the flour taste, stirring constantly so the flour doesn’t brown.

Slowly add the milk whisking constantly with a wire whisk.

Whisk the mixture vigorously to ensure it becomes velvety smooth.

Add the Parmesan cheese and mix well.

Add salt and white pepper to taste. Set aside.

To make the Spinach and Ricotta Mixture:

In a large skillet over medium high heat, cook the pancetta and mushrooms with 1 tablespoon olive oil. Cook until the mushrooms are soft and the pancetta has rendered its fat.

Add the thawed spinach, ricotta, Italian seasoning and garlic powder...stir well.

Add the Parmesan Cream to the skillet.

To Assemble the Casserole:

Return the noodles to the pot you cooked them in and then add the contents of the skillet to them. Mix well.

Pour the mixture into a 9 x 13 baking dish.

Bake the casserole at 350 degrees F for about 25-30 minutes or until the top is slightly crisped and the casserole is bubbly.

Looking for More Recipes?

If you are looking for more recipes click the "Older Posts" link to page back to older posts or go to the archives in the right column. The list of labels at the bottom in the right column will help you find specific types of recipes or try our search engine at the top and search by name or ingredient.


What's more comforting on a cold day than Homemade Chicken Noodle Soup? .. and it's so easy to make!

Chicken Noodle Soup