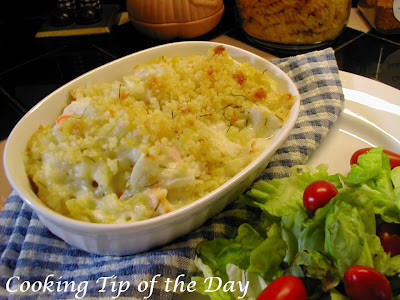
Recipe: Double Chocolate Toll House Cookies


This recipe is a slight variation on the Original Toll House Cookie Recipe…. and I’m sure I’m not the only one to do this…. but I thought with the cookie baking season upon us… it might be a good idea to post this recipe for those who haven’t thought about changing up the Toll House Cookie Recipe.

Basically…. because I happen to love white chocolate…. I used ½ the chocolate chip quantity in semi sweet chocolate chips and ½ the quantity in white chocolate chips… adding macadamia nuts instead of the usual walnuts….. They disappeared in no time!

There are probably hundreds of “slight variations” to this recipe…. and all I can say is… go for it…. I have yet to make a batch that wasn’t good.

I hope you try this variation and come up with some of your own, as well. Be creative!


PRINT RECIPE

Recipe: Double Chocolate Toll House Cookies

All you need:

2 ¼ cups all-purpose flour
1 teaspoon baking soda
1 teaspoon salt
2 sticks unsalted butter, softened
¾ cup granulated sugar
¾ cup firmly packed brown sugar
2 eggs
1 teaspoon vanilla extract
1 cup Nestle Premier White Morsels
1 cup Nestle Semi-Sweet Morsels
1 cup chopped macadamia nuts (optional)

All you need to do:

Preheat oven to 375 degrees F.

Line cookie sheets with parchment paper for easier cookie removal. (optional step)
In a small bowl combine the flour, baking soda and salt. Set aside.

In a large bowl, beat the butter, granulated sugar and brown sugar until creamy.

Add the eggs, beating well after each addition.

Add the vanilla and continue beating.

Gradually add the flour mixture and continue beating.

Add the white, semi-sweet morsels and nuts (if including the nuts)….mix well.

Drop by rounded tablespoons onto ungreased cookie sheets.

TIP: Use a medium sized melon ball scoop for more uniform sized cookies (see my Cooking Tip of the Day)

Bake 9 to 11 minutes until edges are golden brown.

Let stand on the cookie sheet for 2 minutes.

Remove cookies to a baking rack to cool completely.
Storing Cookie Dough

Cooking Tip of the Day

Cookie baking can be time consuming….. but it doesn’t have to be. This tip was one I learned from my Aunt Fredrique… she would spend one day making cookie doughs…. and freezing them. Then she baked them when she could fit in time here and there.

Just defrost the dough and scoop them onto parchment paper lined cookie sheets using a melon ball scoop…. You can have a batch in and out of the oven in about 30 minutes. It really is a terrific efficient way to bake cookies.

If you really want to get a jump on things… you can drop the scoopfuls onto a baking sheet and then freeze them… when the balls are solid… put them in an airtight container… using waxed paper to layer them and pop the container in the freezer… this way you can make as much as you want at a time.

You can freeze the cookie dough in airtight containers and store in your freezer … they’re good for up to 8 weeks in the freezer of 1 week in your refrigerator.

Leftover Food Safety

Food Safety Tip of the Day

According to the Partnership for Food Safety Education, even if your leftovers were refrigerated properly (at 40 degrees F) and promptly, the food leftover from your Thanksgiving dinner should be eaten, frozen or discarded by Monday, November 30.

Recipe: Cheese Stuffed Shells


This recipe for Cheese Stuffed Shells is so quick and easy and best of all, even the pickiest eaters will like it. For all you vegetarians… this is a meatless dish.
You can use any tomato sauce you like (homemade or store-bought) and use part skim or whole milk cheeses (ricotta or mozzarella)….

This time saving recipe goes together quickly for a great weeknight meal… and even better… can be prepared ahead and baked when you need it…. perfect for those weeknights during the holiday season.

I hope you try it.


PRINT RECIPE

Recipe: Cheese Stuffed Shells

All you need:

1 package jumbo shells
15 ounce container part skim ricotta cheese
1 egg, slightly beaten
1 teaspoon salt
¼ teaspoon pepper
2 teaspoons garlic powder
1 teaspoon onion powder
2 tablespoons Italian Seasoning
1 cup grated Parmesan cheese
24 ounce jar of tomato sauce (or homemade)
2 cups shredded mozzarella cheese

All you need to do:

Preheat the oven to 400 degrees F.

Spread a thin layer of tomato sauce on the bottom of a 13x9 baking dish. Set aside.

Prepare jumbo shells according to package directions.

Drain and allow to cool enough to handle.

Meanwhile, in a medium bowl, lightly beat the egg.

Add the ricotta, salt, pepper, garlic powder, onion powder, Italian Seasoning, Parmesan cheese, and ½ cup mozzarella cheese to the beaten egg …mix well.

Stuff each shell with about 2 tablespoons of filling…place open side up in baking dish. Make sure to fill the shell as much as possible.

Drizzle tomato sauce over the top and reserve the rest of the sauce to serve at the table.

Sprinkle the remaining mozzarella cheese over the top of the shells.

Bake at 400 degrees F for about 25 minutes or until bubbly and cheese has melted.

Recipe: Oatmeal Cookies with Heath Toffee Bits


This recipe for Oatmeal Cookies with Heath Toffee Bits is a slight variation on a oatmeal cookie recipe I have from Quaker Oats. Warren loves oatmeal cookies and he loves Heath Bars… so I thought …why not combine the two. The result was a pretty darn good cookie, one my son would have loved in his lunch box.

When my son was in grammar school his school didn’t have a cafeteria so he had to bring his lunch… I always included a fruit and a sweet…. often a 2 or 3 homemade cookies. I especially liked to experiment with add-ins. I always started my Christmas cookie baking around Thanksgiving, so his lunch box desserts were a variety of cookies I baked. I never sent him with chips or junk food… little did I know he would auction off his “Mother’s homemade cookies” for Cheetos and Fritos… so much for no junk food…. I guess I should be proud … apparently my homemade cookies fetched 2 to 1…. So my son made out like a bandit.

The recipe is simple and you can find a bag of Heath Bits in the baking aisle of the supermarket.

These are delicious and a great addition to cookies you make for the holidays, as well as, a great lunch box dessert anytime.

Enjoy!

PRINT RECIPE

Recipe: Oatmeal Cookies with Heath Toffee Bits

All you need:

14 tablespoons (1 stick plus 6 tablespoons) unsalted butter, softened
¾ cup firmly packed brown sugar
½ cup granulated sugar
2 eggs
1 teaspoon vanilla
1 ½ cups flour
1 teaspoon baking soda
½ teaspoon salt
3 cups Quaker Oats (quick or old fashioned, uncooked)
1 bag Heath Toffee Bits

All you need to do:

Preheat the oven to 350 degrees F.

In a bowl combine the flour, baking soda and salt. Set aside.

In a large bowl, beat the butter and sugars at medium speed until creamy.

Add the eggs and vanilla, beat well.

Add the flour mixture and mix well.

Add the oats and the Heath Bits and mix well.

Drop by rounded tablespoons onto an ungreased cookie sheets. (See my Cooking Tip of the Day)

Bake 8 to 10 minutes or until golden brown.

Cool 1-2 minutes on the cookie sheets and remove to a wire rack.

Cool Completely.

Store in an airtight container.

Using a Melon Ball Scoop to Drop Cookies onto a Baking Sheet


Cooking Tip of the Day

I like to use a melon ball scoop to drop my cookie dough onto baking sheets. I have a very small one… that I use for those cookies that call for rounded teaspoons… and a larger one that I use when I need rounded tablespoons dropped.

I took my teaspoon measuring spoon and put water into it and poured it into the scoop to test how much the scoop held… it is a perfect teaspoon…. And I did likewise for the larger scoop… it’s a perfect tablespoon.

Not only is it quick and easy to drop the dough by using the scoop… your cookies also come out more uniform and they all bake evenly. I saw this tip somewhere a long time ago and tried it… and never looked back.

Turkey Leftovers?

Well I hope you all had a wonderful holiday and you’re enjoying the start of this holiday weekend. Warren’s one request was to have leftovers… and leftovers he has. We probably will just have another reheat… but there are other things to do with those terrific leftovers.

First of all…. consider freezing some of them. Most things freeze well… turkey especially. Believe me they will come in handy when you want to do a quick dinner during this upcoming holiday season when the malls have sapped all your strength.

Consider the following recipe “remakes” using turkey instead of chicken:


Turkey Pot Pie with Puff Pastry


Turkey Salad with Cranberries Apples and Pecans


Turkey Tetrazzini


Bacon Ranch Turkey Salad


And these recipes too (no photos ...sorry!):

Creamed Turkey with Mushrooms

Cheesy Turkey and Rice Medley

Just substitute the cooked turkey for the chicken in these recipes… and remember … you can freeze the turkey and make these terrific meals when things get hectic.

Happy Thanksgiving


I hope you have a wonderful Thanksgiving with your friends and family and give thanks for the many blessings we have.

For those of you in other countries that don't celebrate the holiday.... I hope you have a wonderful day and we will be back tomorrow with more great cooking tips and recipes.

Wine Pairings


Usually I leave my wine information to my special section called “The Wine Rack”, which is in the lower left column. I only post the information periodically to get it into the archives. Several weeks ago I started researching what wine would pair best with turkey. I scoured the net for information, only to be more confused than when I started.

Different sites will inevitably give different suggestions, and mind you, the suggestions are far apart when considering taste and heaviness. Going to local wine shops will also yield different suggestions.

So just what is the answer to the million dollar question… what will pair best with turkey? It seems the answer will lie mostly in the tastes of you and your guests. Someone once told me… if you like it… drink it… while I agree with that advice… there are some things to consider when pairing foods to wine.

In my quest to answer the question… I found a site… Wine Tours – inetours.com…. that offered a really good list of 10 rules of thumb of things to consider when pairing food and wine. I highly recommend that you take a look at the site… it not only lists the rules of thumb but also has valuable information about the basic flavors in wine. An understanding of the basic flavors in different wines will help you match them to the different flavors found in foods.

Their ten rules of thumb:

1. If you’re taking wine as a gift to a dinner … don’t worry about matching the wine to the food unless you have been asked to. You would need enough information about what is being served to make an informed decision. Just bring a good wine. Match the quality of the food and wine…. a grand dinner deserves a better wine than wine for hamburgers made on the grill.

2. When serving more than one wine at a meal, its customary to serve lighter wines before full-bodied ones. Dry wines should be served before sweet wines unless a sweet flavored dish is served early in the meal. In that case you would match the sweet dish with a sweet wine. Lower alcohol wines should be served before higher alcohol wines.

3. Balance flavor intensity. Pair light bodied wines with lighter food and fuller-bodied wines with heartier, more flavorful, richer and fattier dishes.

4. Consider how the food is prepared. Delicately flavored foods…poached or steamed… pair best with delicate wines. It’s easier to pair wines with more flavorfully prepared food… braised, grilled, roasted or sautéed. Pair the wine with the sauce, seasoning or dominant flavor of the dish.

5. Match flavors. An earthy Pinot Noir goes well with mushroom soup and the grapefruit/citrus taste of Sauvignon Blancs go well with fish for the same reasons that lemon does.

6. Balance the sweetness.

7. Consider pairing opposites. Very hot or spicy foods….some Thai dishes or hot curries…often pair well with sweet dessert wines. Opposing flavors can play off each other, creating new flavor sensations and cleansing the palate.

8. Match by geographic location. Regional foods and wines often have a natural affinity for each other.

9. Pair wine and cheese. In some European countries the best wine is reserved for the cheese course. Red wines go well with mild to sharp cheese. Pungent and intensely flavored cheese is better with a sweeter wine. Goat cheeses pair well with dry white wine, while cheese like Camembert and Brie, if not over ripe, pair well with just about any red wine including Cabernet, Zinfandel and Red Burgundy.

10. Adjust food flavor to better pair with the wine. Sweetness in a dish will “bring out” the bitterness and astringency in wine making it appear drier, stronger and less fruity. High amounts of acidity in food will make the wine seem mellower and less sour….sweet wine will taste sweeter.

I found these rules of thumb to make perfect sense. I think they are an excellent guide for you to think about when choosing wine for your food. Keep in mind your personal tastes and the tastes of your guests.

So what have I decided to pair with turkey? I decided to offer 3 choices…. a Zinfandel because I know several guests really like it and it’s a light wine that I think will go well with the roast turkey…. a full-bodied red wine… probably a Cabarnet…. again because I know that some guests really like it and we will also be serving ham… which I think will go well with it… and a Chardonnay because it has been suggested by several sources as a good pairing and I’m willing to try it with this meal to see what I think of the pairing…. I like Chardonnay which is also a consideration.

I hope this information has been helpful and I strongly suggest you visit Wine Tours for more information to help you decide what’s right for you.

Recipe: Poached Eggs in Puff Pastry Shells with Garlicy Cream Sauce


Just because the holiday is coming up next week there is no reason why you can’t still take the time to have a lovely Sunday breakfast…. read the newspaper… and just take a deep breath.

As many of you already know… I’m all about reducing stress and enjoying a holiday or even just enjoying the holiday time of year…. if you get caught up in the prep too much the holidays just seem to pass you by… and I never let that happen. So my advice is have a leisurely breakfast and enjoy it.

This recipe for poached eggs is a slight revision to one my Mother used to make on holidays. She liked to serve poached eggs on English muffins and drizzle (well… maybe not drizzle… we all liked the garlicy cream sauce a lot) garlicy cream sauce over it.

I was out of English muffins and decided to do something a little different… I decided to use puff pastry shells I had in the freezer. … the result was not only a great presentation… but was also delicious. Quick and easy to make… and the sauce can have dual purposes (see tip below).

The quantities depend on how many eggs you make… I figured one poached egg per person since I served this with a small fruit salad and mini muffins. The sauce recipe makes enough for about 6 eggs, again depending on how much sauce you like to use.

TIP: I made a double batch of sauce and stored the leftovers in an airtight container in the fridge… for use in another recipe…. it’s the same Garlicy Cream Sauce I use when I make creamed onions… ( I do add some onion powder to the sauce for that)…. It’s a Thanksgiving Day dinner staple…. It’s also delicious over cauliflower or broccoli.

Enjoy!


Recipe: Poached Eggs in Puff Pastry Shells with Garlicy Cream Sauce

All you need:

Eggs, poached
Garlicy Cream Sauce (see recipe)
Frozen Puff Pastry Shells

All you need to do:

Make Puff Pastry Shells according to package instructions.

Make Garlicy Cream Sauce according to the recipe.

Make poached eggs.

To assemble…

Carefully cut the top off the puff pastry shell.

Drop a poached egg into the puff pastry shell.

Drizzle Garlicy Cream Sauce over the egg.

Place the puff pastry shell top on top of the sauced egg.

Serve hot.

Sauce Making Basics

Cooking Tip of the Day

Learning the basics of making sauces is easy and well worth the effort. Many sauces are just slight adaptations to a few basic ones.

The most popular basic sauce is the Classic Bechamel or White Sauce. You can add different cheeses to make Cheese Sauce… Cheddar for a velvety Cheddar Cheese sauce or perhaps Gruyere for a sauce called Mornay Sauce….or even herbs and spices… such as garlic to make a Garlicy Cream Sauce….

You can add vegetable, chicken, beef or fish broth instead of milk to make a Veloute´ Sauce…. you can add also wine for a light wine sauce…. or mustard for a wonderful sauce for poultry or fish……

Gravies are made much the same way.... you can use meat drippings instead of butter and then the liquid would be the appropriate broth... the method is the same.

The possibilities are limitless…and the ingredients are probably in your pantry and refrigerator… so you can whip up meals or side dishes at a moments notice.

The classic French way of starting a sauce is to make a roux…. a mixture of melted butter and flour… which is a pastey mixture to which you add your liquid… milk or broth…. whisking it vigorously until all lumps are out … it thickens in minutes and is ready for whatever you’ve decided to add for additional flavors.


Melt the butter.


Add the flour.


Make the roux.


Cook the roux over medium heat for a few minutes to get cook the floury taste away.. it will look almost golden.


Add the liquid... milk, broth or wine... whisk vigorously until all the lumps are out of it.


Whisk over medium heat until thickened.... about 4-5 minutes.

Recipe: Garlicy Cream Sauce


This recipe for Garlicy Cream Sauce is a basic one. The sauce is a Classic Bechamel Sauce or White Sauce and seasoned with garlic. I use this sauce in countless dishes … the ingredients are simple and the method is easy… it can turn an ordinary dish into one that is packed with flavor depending on what you decide to add to it.

The recipe calls for whole milk… you can use a lower fat milk, just be aware the sauce will be a little thinner…. and for those of you that are trying to watch your fats… you can substitute margarine for the butter… it just will not be as rich tasting but it will definitely make a good sauce.

I like to use unsalted butter so I can control the amount of salt I put into a dish… you can use salted butter … just be sure to add additional salt slowly so it doesn’t become too salty.

For tips on sauce making... see my Cooking Tip of the Day... Sauce Making Basics.


PRINT RECIPE

Recipe: Garlicy Cream Sauce

All you need:

For the Garlicy Cream Sauce Sauce:

Bechamel Sauce

½ - 1 teaspoon garlic powder (to taste)

Freshly ground pepper to taste (white pepper preferred)

Salt to taste

For the Bechamel Sauce:

2 tablespoons unsalted butter
2 tablespoons flour
1 cup whole milk

All you need to to:

Make a classic roux by melting the butter in a medium saucepan over medium heat.

Add the flour and stir with a cooking spoon over the heat for about 2 minutes… you want the flour to lose its floury taste.

Add the milk and whisk vigorously with a wire whisk until all the lumps are out of it and it thickens (about 4-5 minutes).

Add the garlic powder, salt and pepper to taste.

Recipe: Bechamel Sauce (Classic White Sauce)


This recipe for Bechamel or Classic White Sauce is one of the most popular basic sauces. It is the base for many other sauces and is quick and easy to make.

For tips on sauce making… see my Cooking Tip of the Day… Sauce Making Basics.

Enjoy!

PRINT RECIPE

Recipe: Bechamel Sauce (Classic White Sauce)

All you need:

2 tablespoons unsalted butter
2 tablespoons flour
1 cup whole milk
Salt to taste
Pepper to taste (white pepper preferred)

All you need to to:
Make a classic roux by melting the butter in a medium saucepan over medium heat.

Add the flour and stir with a cooking spoon over the heat for about 2 minutes… you want the flour to lose its floury taste.

Add the milk and whisk vigorously with a wire whisk until all the lumps are out of it and it thickens (about 4-5 minutes).

Salt and pepper to taste.

Countdown to Turkey Day – Day 6


Thawing the Turkey

For those of you planning on making a large frozen turkey… you need to start thinking about thawing methods and if you plan on refrigerator thawing your large bird… then plan out when you need to start thawing based on the weight of the bird.

Remember you need about 1 day of refrigerator thawing for every 4 pounds of meat… so for a 24 pound turkey… today is the day you need to move it from the freezer to the refrigerator.

If you have only one refrigerator and space is tight… you may want to consider thawing your large bird in a water bath…. you will need about 30 minutes per pound to do that…. which works out to just 12 hours for a 24 pound bird… in any case… today is decision day for you.. decide what method will work best for you.

Finalizing the Menu

Okay, it’s Friday… and you are down to 6 days before the holiday… it’s a good idea to finalize your intended menu…. this way it gives you time to purchase what you need this weekend.

Turkey Guide

Just click on the links below to go directly to the post. To return to the main page hit the back button twice or just click on Home

Let's Talk Turkey
Fresh or Frozen Turkey - Your Decision
How Much Turkey to Buy?
Turkey Guide - Part 2
Cooking Methods for Turkey
Thawing a Frozen Turkey
Turkey Guide Part 3
Safe Handling and Roasting of the Turkey Tips
Stuffing Tips
Food Safety Support
Turkey Guide Part 4
Safe Carving and Serving of Turkey
Storing Leftovers Safely
Time Limits on Leftovers
Fun Stuff - Turkey Trivia

Additional posts you may find helpful:

Using Thermometers
Instant Mini Grilling Thermometers

Countdown to Turkey Day – Day 7


Grocery Shopping

I like to start grocery shopping about a week before the holiday. I buy non-perishables… and start picking up some produce like potatoes, onions, celery and carrots. By buying ahead… and crossing them off my grocery list… I make it that much easier for the “just before the holiday” grocery shopping trip. It also gives me a chance to look over that list and check it twice. I think it reduces the stress of being overwhelmed with all the details.

Checking Linens, Dishes and Glassware


By checking my table linens, serving dishes, plates, silverware and glassware the week before, I give myself a week to fill in any gaps. I also wash and iron anything I think needs it.

TIP: This tip is from a Great Aunt of mine…. she always rolled her table cloths never folded them… this way there weren’t any creases to iron out at the last minute….

Follow-up with Everyone Bringing Something


I always like to follow-up with everyone that has volunteered to bring something. By doing it a week before…. it reminds them you haven’t forgotten they are bringing something…. by reminding them close to the weekend… it gives them time to purchase what they need to….

A word about volunteers…. be sure they’re reliable …. I have been burned by people I considered very reliable…. either they forget… or don’t even show-up… or in some cases.. they unfortunately get sick and can’t attend…. I never leave something to someone else that will ruin the dinner if it doesn’t show up…. I have learned that the hard way. If someone has offered to purchase the turkey… be sure to pick it up a couple of days before so it can be thawed properly and put in the oven early.

I try to limit what other people bring to “extra” specialty items or basic ones that can be replaced easily in a pinch. If someone makes an outstanding apple pie… by all means… let them volunteer to bring it… but be sure to have other pies on hand as well…. who cares if you have leftover pie (I should be so lucky as to have leftover desserts).

Another good item for someone to bring is dinner rolls. I always purchase a couple cans of crescent rolls… just in case…. if I need them… I have them.. if not.. I know I’ll use them before the expiration date.

Countdown to Turkey Day – Days 8-9

The Menu

It’s a good idea to start that menu list, if you haven’t done so already. I usually start with the definite… Turkey, Gravy, Mashed Potatoes, Cranberry Sauce, Dinner Rolls, etc. Toward the bottom of the sheet… I put the “possibles’… things that I’m thinking of serving… just not quite sure yet…. I have to evaluate time and money before committing.

When deciding on menu items, keep in mind any dietary restrictions any of the guests may have as well as, likes and dislikes….. try to have a well-rounded meal that everyone can enjoy.

I like to divide the menu into “Before” “The Main Meal” “Dessert” and “After”… and Beverages

Before …meaning appetizers or hors’dourves …. and depending on the timing of the Main Meal… any foods needed for consuming earlier in the day… for example, breakfast… or light lunch if your Thanksgiving meal is an evening one.

The Main Meal….. obviously the main event..

Dessert…. The actual dessert(s) that will be served … don’t forget to figure on coffee and tea… I have an excellent Buying Guide for Coffee and Tea for a Crowd… as well as … Tips for Making Coffee for a Crowd

After….. depending on how long your guests are staying… will they be partaking in Round Two… leftovers? Will you need additional snacks? This is particularly important when having overnight guests..

Beverages… don’t forget to figure on beverages….wine, any alcoholic beverages you plan to serve, milk, soda, coffee and tea… most can be purchased well in advance.. a perfect “buy ahead item”. Don’t forget to put ice on your list to purchase that morning….

When the definite items go on the menu… I add what I need to the grocery list…. and I print out any recipes I need to make it… clip everything together and on the fridge it goes. If something on the list is delegated to a guest to bring… I make note of who is bringing it.

The Grocery List

Believe it or not the Grocery List is far more important than people give it credit. Don’t underestimate the importance of the Grocery List….it keeps you from forgetting something you will need and it also keeps impulse buying to a minimum and keeps the meal budget friendly.

Countdown to Turkey Day – Day 10


Lists

The countdown to the big day is here. Whether you’re bringing a dish to the celebration or you’re hosting the dinner… it’s always a good idea to make a couple of lists.

My Mother always had lists…. The main list was the actual menu… it was always on the refrigerator door…. and growing up… I admit… I always rolled my eyes….

As an adult that has hosted many dinners… and forgotten numerous things… either in the fridge or the microwave… yes… the microwave… I have learned my Mother was a lot smarter than I gave her credit for.

I can’t tell you how many times I have forgotten something I was reheating in the microwave… the darn little beep goes off… I’m doing something… so I figure I’ll grab it in a minute… and well… you can see where this is going…

Lists take the stress out of having to remember everything… which is a good thing… especially for me… I hate stressful holidays… and I’m always willing to try something that will reduce stress.

So about 10 days before the event… I start my lists.

I have a list for the menu…. a list of things I need to do and when…. and a shopping list…. all subject to change… but I find once I start planning and it goes on the list… it’s pretty much going to get done and not forgotten…. that’s the important part… not forgotten.

Turkey Quick Fixes - #2

Cooking Tip of the Day

The big day has finally arrived… you have a house full of people… you start to carve your bird and the breast meat is on the dry side… Don’t panic…. you can fix this.

Carve the breast meat and lay it in a shallow dish…. ladle chicken or turkey broth over it… don’t drown it… but spoon a liberal amount over the meat. Cover with aluminum foil and place in the already heated oven for about 10 minutes. Remove from the oven and arrange the meat on a serving platter.

You can also arrange the meat on a platter and drizzle a liberal amount of gravy over the middle of the pieces… this not only makes a nice presentation, it also helps keep the meat moist.

And the Winner is….


The winner of our Vacu Vin Jar Opener is…… Shorty …. Congrats! You will love the Jar Opener as much as I do.

Just to clarify my very unsophisticated method of choosing the winner….

Each person leaving a comment on the Give-Away post gets 1 entry… if they’re a follower (new or old) they get another entry… and if they subscribe (new or old) they get another entry….. I write out a slip of paper for each entry and fold them… in a hat they go… and I pull one…. not scientific… but it works.

And if you subscribed or became a follower on an earlier give-away … you still get that extra entry each time….

So highlandsranchfoodie… (to answer your comment)… you got the extra entries too…..

And for you lucky people….even if you won before… you have an equal chance of winning again…..

And to the unlucky people who didn’t win…. there are more give-aways to come…

So keep coming back….

Shorty…. Just email cookingtipoftheday@gmail.com with your full name and address and I’ll notify the sponsor to send it directly to you. Enjoy!

Cranberry Liqueur


For a nice little different touch you might want to consider a cranberry liqueur for a surprise after dinner drink for a Thanksgiving turkey dinner… it’s also good with apple pie…

When I was first married, my husband bought a bottle of Boggs Cranberry Liqueur for Thanksgiving…. It was the perfect after dinner liqueur for Thanksgiving… it had a rich cranberry flavor. A very nice smooth flavor… and ending to a perfect meal.

Sadly, I understand the company stopped making it over ten years ago… but I have seen another cranberry liqueur called Black Duck that according to several sources is very similar…

This is just a thought …. something a little different for the adults after Thanksgiving dinner.

Turkey Quick Fixes - #1

Cooking Tip of the Day

Quick little fixes that save the day…. we all have little things that… well… don’t go picture perfect when entertaining… whether it’s a holiday or party or evening dinner with special guests… and quick little tips help you through those “oh no!” moments.

If you’ve made a turkey and go to pull it out of the oven and it hasn’t browned to that even golden glow that you see in all those heart-warming pictures…. I’ve got a quick solution for you.

Just melt butter in a small saucepan on the stove… add a little orange liqueur or rum…. with a little orange marmalade… or you could use apple jelly and apple juice…. and baste the parts of your turkey that haven’t browned evenly… pop it back into the oven for about 10 minutes and your turkey should have nicely browned.

Recipe: Banana Sauce over Vanilla Ice Cream


This Bananas Foster-like sauce is what I used for my Banana Crepes about a week ago. I had a little left over sauce and decided it would go really well over vanilla ice cream…. and I was right!

I had a little Chantilly Cream left and put a dollop on top as well. This is a perfect example of finding ways to use the same recipe in different ways. I enjoyed the crepe on one day and the ice cream the next…. and nothing went to waste…. not that desserts go to waste in our house.

This sauce is great as a stand-alone sauce… a definite dessert sauce that can have many uses… here is the Banana Sauce recipe again.

This recipe uses rum extract instead of the real thing… feel free to use rum… just be careful when your skillet ignites because of the alcohol.

Enjoy!

PRINT RECIPE

Recipe: Banana Sauce Over Vanilla Ice Cream

All you need:

4 large bananas, sliced
3 tablespoons butter
2 tablespoons brown sugar
¼ teaspoon rum extract
Vanilla ice cream

For the Chantilly Cream:

1 cup heavy cream
2 tablespoons sugar
½ to 1 teaspoon vanilla (to taste)* I use 1 teaspoon

All you need to do:

To make the sauce:

Melt butter in a skillet over medium heat… do not allow butter to brown.

Add the bananas and cook until soft.

Add the brown sugar, stirring to evenly coat the bananas until all the sugar has melted.

To make the Chantilly Cream:

Whip all ingredients until the cream forms soft peaks.

To assemble:

Scoop vanilla ice cream into a serving dish.

Pour a generous amount of the warm banana sauce over the ice cream.

Put a dollop of Chantilly Cream on top.

Recipe: Slightly Sweet Parslied Carrots


This recipe for Slightly Sweet Parslied Carrots is just a short and quick recipe….. just a pleasant way to dress up carrots. They really are only slightly sweet… enhancing the carrot flavor not overpowering it. We make them fairly frequently as a side dish to weeknight meals since they’re so quick and easy to make… but they look and taste good enough to be the vegetable for a meal served to guests…. even at a holiday dinner.

I used frozen crinkle cut carrots this time… but we usually use fresh Belgian carrots found in the produce section of the grocery store.

This recipe was written for 4 servings ( ½ cup servings per person).

Enjoy!


Recipe: Slightly Sweet Parslied Carrots

All you need:

2 cups frozen crinkle cut carrots or fresh Belgian carrots
¼ cup water
2 tablespoons butter
1 tablespoon sugar
1 tablespoon finely chopped parsley

All you need to do:

In a saucepan, cook the carrots in the water over medium heat until they are cooked through but still crisp.

Add the butter and sugar and cook for an additional 2-3 minutes.

Toss the carrots with the parsley just before serving.

Recipe: Baked Chocolate Custard


I worked on this recipe for Baked Chocolate Custard for quite awhile. I was dissatisfied about one thing or another each time…. until I finally came up with a chocolaty tasting custard (not pudding) that I liked.

Most recipes that you find for Chocolate Custard are not custard but a pudding…. the difference lies in the eggs and the baking.

I really like Classic Baked Egg Custard… a lot…. Where I grew up in New York… delis always had custard in small individual sized aluminum foil cups…. I absolutely loved them. You know by now… I love chocolate too… and it just made sense to me to combine the two… well... it was easier said than done.

Non-blog worthy, aka recipes in the recipe graveyard, were either not chocolaty enough or grainy. I had tried using powdered chocolate and that just didn’t work.

Then I had a moment of inspiration… I tried using chocolate syrup… and added a couple of tablespoons of brewed coffee ( I add coffee to a lot of chocolate recipes to bring out the chocolate flavor)… and it worked. The syrup didn’t separate in the baking process and solved the grainy texture issue….The result was a chocolaty custard worthy of my blog and the calories it would add to my hips.

I decided to post this recipe today since we’re coming off a chocolate sugar high from yesterday’s Mocha Crepes… I figured we might as well continue the buzz.

Now here comes my real inspiration…. I had some Mocha Whipped Cream in the fridge (imagine that)… and added a dollop on my chocolate custard…. I thought I died and went to heaven… it was magic…

So you may want to consider doing adding that dollop of Mocha Whipped Cream on top of your custard… this also makes a really nice “guest dessert… just add some chocolate shavings on top of the Mocha Whipped Cream… and your guests will be so impressed…. and no one will know how easy it was to make.


PRINT RECIPE

Recipe: Baked Chocolate Custard

All you need:

3 eggs
¼ cup sugar
2 cups whole milk
Pinch of salt
½ cup Hershey chocolate syrup
½ teaspoon vanilla
2 tablespoons brewed coffee

All you need to do:

Preheat oven to 325 degrees F.

Put the custard cups or ramekins into a deep dish baking dish and set aside.

In a tea kettle, bring about 4 cups of water to a boil (for the water bath)… when water boils turn off the heat and leave the kettle until needed.

In a large mixing bowl, beat together the milk, eggs, vanilla, chocolate syrup, coffee, sugar and salt.

Pour milk mixture into custard cups.

Place the baking dish with the custard cups into the preheated oven.

Carefully pour the hot water from the kettle into the baking dish so the water comes to about ½ to 2/3 of the custard cups.

Bake for 45-55 minutes or until the custard is set (a knife inserted into the center should come out clean).

Chill in the refrigerator for at least 2 hours.

Makes 4-6 servings depending on the size of the custard cups.

Serving Suggestion: Serve with a dollop of Mocha Whipped Cream on top.

Recipe: Mocha Crepes


This recipe for Mocha Crepes is so easy and …. It is sooooo decadent. If you love coffee and chocolate… then you are a mocha person and this is the dessert for you…. it’s a perfect blend of rich creamy coffee ice cream inside a crepe with the hint of vanilla flavor…drizzled with a rich chocolate sauce and topped off with a fabulous mocha whipped cream….

When I was growing up my Mom and I used to go to a fantastic restaurant called The Magic Pan…. if you’re a regular reader here… you’ve heard mention them before. My absolute favorite dessert there was their Mocha Crepe. The first time I had it… well… let’s just say it was love at first bite. I don’t think I ever ordered another kind of dessert crepe there…. I just mooched off others for taste tests of other desserts… but nothing came close to their Mocha Crepe…. it was positively orgasmic.

I’ve spent time in the kitchen perfecting my version of that wonderful crepe… the result is this recipe.

What’s also wonderful about this recipe is that it’s perfect as a show stopping dessert for guests. Simply make the crepes ahead… stack them with waxed paper in between them… reheat them until they’re just warm… so if you refrigerate them … then allow them to get to room temperature again or reheat them for 20 seconds or so on high in the micro.

The whipped cream can also be made ahead… just refrigerate it until you need it… I would make it the same day I plan to use it.

Make sure you use a good quality coffee ice cream… I used Häagen Daz… Starbucks is good too.

You can use chocolate syrup for the chocolate sauce, but the Chocolate Sauce recipe from Hershey is really wonderful and easy to make..

I would figure one crepe per person… so you can either cut the crepe recipe in half or use them for other crepe recipes…. if you need less.

I provided links to the crepe recipe and posted the chocolate sauce and mocha whipped cream recipes…. they are all very easy.

A word about the picture…. I put a lot of mocha whipped cream on that one… I ate it… I admit it… I loooove mocha whipped cream… usually a dollop would be enough …. But restraint when it comes to Mocha Whipped Cream is … well frankly out of the question…so now you know I pigged out… smiling the whole time!

Try this fabulous dessert.

Enjoy!


Recipe: Mocha Crepes

All you need:

Crepes
Coffee Ice Cream, slightly softened
Chocolate sauce (see previous post)
Mocha Whipped Cream (see previous post)

All you need to do:

Lay a crepe in the middle of a plate.

Scoop about 3 small scoops of coffee ice cream down the middle of the crepe.

Fold the crepe over the ice cream.

Drizzle the chocolate sauce or syrup over the crepe and plate.

Put a dollop or two (or three or four) of mocha whipped cream on top.

Serve and take bows for a spectacular dessert.

Recipe: Mocha Whipped Cream


Mocha Whipped Cream soooo good…. it can go on so many things… particularly Mocha Crepes… it’s a great topping for chocolate pudding or chocolate custard also.

It takes minutes to make and …well… probably lasts that long too!

Enjoy!

PRINT RECIPE

Recipe: Mocha Whipped Cream

All you need:

1 cup heavy cream
4 tablespoons General Foods International Suisse Cafe Mocha instant coffee
1 tablespoon sugar

All you need to do:

Put all ingredients into a large mixing bowl and beat until the whipped cream has soft peaks.

Recipe: Chocolate Sauce


This Chocolate Sauce is my favorite … it comes from the folks at Hershey. I love Hershey chocolate.. . and this recipe is so easy… a lot of chocolate sauce recipes are complicated… using a double boiler… I hear food network chefs make a big deal of melting chocolate… I sit there and roll my eyes….honestly… I’ve never had a problem melting chocolate…. I like to do it in the microwave and I use Hershey chocolate… it comes out perfect every time.

I am a firm believer that cooking does not have to be complicated or difficult… and I try to make recipes that are tried and true… this recipe is one of them.

You can find it on their website… they call it Hershey’s Favorite Chocolate Gift Sauce….. nice idea to give it as a gift… mine never makes it out of my house.

Just a quick note…. this recipe uses evaporated milk… not sweetened condensed… there is a big difference.

Here is the recipe… it’s wonderful over cake, ice cream and desserts like my Mocha Crepes.


PRINT RECIPE

Recipe: Chocolate Sauce

All you need:

½ cup ( 1 stick) butter or margarine
¾ cup Hershey’s Cocoa
1 ¾ cups sugar
Dash of salt
1 ½ cups (12 ounce can) evaporated milk
1 teaspoon vanilla extract

All you need to do:

Place the butter in a medium sized microwaveable bowl… you could also use a 4 cup glass measuring cup.

Microwave on HIGH (100%) for 1 – 1 ½ minutes or until melted.

Add the cocoa, and stir until smooth.

Add the sugar, salt and evaporated milk…. stir until well blended.

Microwave on HIGH for 5 -8 minutes or until the mixture comes to a boil, stirring occasionally. Just a note… mine rarely boils.

Beat with a whisk until smooth.

Add the vanilla and stir.

Variation: I sometimes add 2 tablespoons brewed coffee.

Recipe: Tomatoes with Basil Pesto


I like to serve sliced tomatoes with basil pesto drizzled over them… they make a perfect appetizer… or even a side dish to a meal. It's a perfect accompaniment to Parmesan Chicken (Milanese). I like to serve the chicken with a small salad made up simply of baby greens drizzled with a vinaigrette.

You can also alternate slices of fresh mozzarella…. I usually only do that as an appetizer… when it’s a side dish, I keep it simple with just the tomatoes.

I didn’t list quantities in the recipe… it all depends on how many servings you need. Figure one medium tomato per person.

I posted the basil pesto recipe previously.

Enjoy!

PRINT RECIPE

Recipe: Tomatoes with Basil Pesto

All you need:

Tomatoes, sliced
Basil Pesto

For the Basil Pesto:

3 cups fresh basil leaves
½ cup pine nuts
3 garlic cloves, minced
½ cup Parmesan cheese
½ cup olive oil
Salt to taste
Pepper to taste

All you need to do:

Slice the tomatoes and arrange on a plate.

Drizzle the pesto down the center of the tomatoes.

For the Basil Pesto:

Place basil leaves, pine nuts and garlic in a food processor.

Pulse until well chopped and incorporated.

Slowly pour olive oil into the processor while it is running.

Pour the mixture in a bowl and add the Parmesan cheese. Mix well.

Add salt and pepper to taste.

Recipe: Chicken Parmigiana


This is a classic Italian recipe for Chicken Parmigiana…. It was one of the first things I learned to make when I started cooking as a young teen. It has been a staple in our house… my son absolutely loves this… and I do too. It’s nice and easy… cooks quickly and can be made ahead. I always make enough for leftovers… which reheat well and also make great Chicken Parmigiana Subs.

The base recipe for this is the same as Parmesan Chicken (Milanese) that I posted last week… all you do is add some tomato sauce and mozzarella cheese and bake it until the cheese melts… very easy.. I promise.

I hope you try this wonderful recipe.


PRINT RECIPE

Recipe: Chicken Parmigiana

All you need:

4 thin boneless skinless chicken breast cutlets
¾ cup flour
1/8 teaspoon salt
About 6 turns on a pepper mill
1 teaspoon garlic powder
2 eggs
Dash of milk
1 cup Italian season bread crumbs
½ cup grated Parmesan cheese
3 tablespoons butter
3 tablespoons olive oil
Tomato Sauce (homemade or your favorite brand)
Mozzarella cheese, shredded
Olive oil cooking spray

All you need to do:

Preheat the oven to 375 degrees F.

If your cutlets are not really thin, then place them between two pieces of plastic wrap and pound then thin with a kitchen mallet. If you don’t have a mallet, you can use the back of a skillet.

In a shallow bowl, mix the Italian bread crumbs and Parmesan cheese until they are fully mixed.

In another shallow bowl, mix the flour, salt, pepper and garlic powder until they are fully mixed.

In another shallow bowl, beat the eggs with the dash of milk.

Line up the bowls…. first the flour mixture…. then the egg mixture… then the bread crumbs.

Dredge both sides of the chicken cutlet in the flour… making sure it’s completely coated… shaking off any excess.

Then dip it into the egg mixture…. coating it completely with the egg.

Then put the cutlet into the bowl with the bread crumbs. Press down gently to fully coat the bottom side with crumbs…. flip it over and do the same for that side…. Any “bald spots” .. just take a spoon and drip a bit of egg mixture on it and then pat with bread crumbs.

TIP: I used to do the dredging, egg mixture and bread crumbs with my hands… I’d end up with fingers thick crusted with bread crumbs… and I had to constantly run my hands under water….whatta mess! Then I had one of those “duh” moments… I use 3 forks… one in each bowl … works like a charm.

Melt the butter with the olive oil in a large skillet over medium high heat.

Add the cutlets when the butter/oil mixture is hot. Make sure the skillet is hot… otherwise the cutlets won’t crisp up. To test the skillet… drop a few bread crumbs into the oil if they immediately sizzle… the pan is ready.

Cook the cutlets about 3 minutes a side (assuming the cutlets are thin)…. they should be golden brown and crispy.

Drain on paper towels.


Lay the cutlets in a large baking dish (13 x 9 size works well). Don't overlap them.

Spoon a generous amount of tomato sauce on top of each cutlet.

Sprinkle a generous amount of shredded mozzarella cheese over the sauce on each cutlet.

Spray the cheese with a little olive oil cooking spray. (This will help the cheese to melt and get gooey)

Bake for about 20 minutes or until cheese is melted and starts to brown a bit.

Serve with pasta and additional tomato sauce.

Enter for the Give-Away!


In celebration of Cooking Tip of the Day’s first anniversary …. we’re having a giving away of the Jar Opener to one lucky winner courtesy of Jardina Communications. It retails for $19.99 (US) … so this is a great value give-away! You can read all about this Jar Opener in the Product Review post.

This Give-Away Contest will end at midnight November 12th 2009 EST…. so be sure to enter….

Entering is easy…

All you have to do to enter is leave me a comment on the original Give-Away post….. and you get one entry

Become a follower… you get another entry

Subscribe to Cooking Tip of the Day …. you get another entry

Indicate in your comment if you are following and/or subscribing. Let me know how you want me to contact you…. or you can check back when I post the winner and email me at Cooking Tip of the Day.

So celebrate with us and enter to win today.

This Give-a-Way has ended.

Recipe: Parmesan Chicken (Milanese)


I’ve made this recipe for years and years… it’s a family favorite… and so simple and quick… I must admit to making it quite a lot just because it is quick…. this is one of those 30 minute meals that really does take 30 minutes to make. You can serve this with baby lettuce drizzled with a vinaigrette.

This dish is very similar to the German Schnitzel…. The main difference is that Milanese uses Italian seasoned bread crumbs and grated Parmesan cheese and a little garlic.

Be sure to make extra…. I like to double the recipe… the leftovers are delicious cold. I also use this recipe as a base for several other recipes.

Depending on the size of your boneless chicken breast cutlets…. will determine how many per person to make.. I usually make 2 cutlets per person. This recipe is for two servings ( 4 cutlets… 2 each).

Enjoy!

PRINT RECIPE

Recipe: Parmesan Chicken (Milanese)

All you need:

4 thin boneless skinless chicken breast cutlets
¾ cup flour
1/8 teaspoon salt
About 6 turns on a pepper mill
1 teaspoon garlic powder
2 eggs
Dash of milk
1 cup Italian season bread crumbs
½ cup grated Parmesan cheese
3 tablespoons butter
3 tablespoons olive oil

All you need to do:

If your cutlets are not really thin, then place them between two pieces of plastic wrap and pound then thin with a kitchen mallet. If you don’t have a mallet, you can use the back of a skillet.

In a shallow bowl, mix the Italian bread crumbs and Parmesan cheese until they are fully mixed.

In another shallow bowl, mix the flour, salt, pepper and garlic powder until they are fully mixed.

In another shallow bowl, beat the eggs with the dash of milk.

Line up the bowls…. first the flour mixture…. then the egg mixture… then the bread crumbs.

Dredge both sides of the chicken cutlet in the flour… making sure it’s completely coated… shaking off any excess.

Then dip it into the egg mixture…. coating it completely with the egg.

Then put the cutlet into the bowl with the bread crumbs. Press down gently to fully coat the bottom side with crumbs…. flip it over and do the same for that side…. Any “bald spots” .. just take a spoon and drip a bit of egg mixture on it and then pat with bread crumbs.

TIP: I used to do the dredging, egg mixture and bread crumbs with my hands… I’d end up with fingers thick crusted with bread crumbs… and I had to constantly run my hands under water….whatta mess! Then I had one of those “duh” moments… I use 3 forks… one in each bowl … works like a charm.

Melt the butter with the olive oil in a large skillet over medium high heat.

Add the cutlets when the butter/oil mixture is hot. Make sure the skillet is hot… otherwise the cutlets won’t crisp up. To test the skillet… drop a few bread crumbs into the oil if they immediately sizzle… the pan is ready.

Cook the cutlets about 3 minutes a side (assuming the cutlets are thin)…. they should be golden brown and crispy.

Drain on paper towels.

Serve hot or cold.

We’re Celebrating Our First Anniversary!!


Today Cooking Tip of the Day is one year old and we’re celebrating!

It’s been a wonderful year…. lots of great food and new friends and fun. The blog has grown since those first days…. both in content and readers. I am extremely grateful to all my loyal readers for their time and encouragement…. It’s meant a lot to me. Thanks to all of you!

Of course I have to thank Warren, my ace photographer and taste tester… and yes… he taste tests the non-blog worthy stuff too….. it’s a tough job but someone has to do it. The man has the patience of a saint… listening to me babble constantly about my recipes and tips… and how many “hits” I got today…. He just smiles through it all… and takes another piece of cake…

My son, Erik, has been a terrific help and inspiration…. He has grown into a well developed foodie in his own right… his tips and ideas and recipes all have been part of the success of the blog. He really is very imaginative and creative… and I appreciate his help.

We’re all looking forward to making year two a great success…. lots of new ideas … now just to find the time to do it all…. and I know we will…. I hope you keep coming back and leave me your comments… it’s really nice to have a dialogue with so many people… it’s been great fun and the next year will be even better.

And .... we're starting off with a great anniversary give-away.... see the giveaway post for details.... and enter today!

An Anniversary GIVE-A-AWAY !!


Now that you’ve seen my review of that wonderful little gadget…. The Jar Opener from Vacu Vin … you can win one!

To celebrate our anniversary…..we’re having a giving away of the Jar Opener to one lucky winner courtesy of Jardina Communications. It retails for $19.99 (US) … so this is a great value give-away!

I’m sure the lucky winner will love this opener as much as I do. I used to try and get a can opener under those lids before… but it was often too thick… this opener is perfect…. works like a charm.

This Give-Away Contest will last for 1 week…. it will end at midnight November 12th 2009 EST. I’ll post the winner and all they need to do is email Cooking Tip of the Day at cookingtipoftheday@gmail.com with their name and mailing address and voila´!... it will be sent.

TO ENTER:

All you have to do to enter is leave me a comment on this post….. you get one entry

Become a follower… you get another entry

Subscribe to Cooking Tip of the Day …. you get another entry

Indicate in your comment if you are following and/or subscribing. Let me know how you want me to contact you…. or you can check back when I post the winner and email me at Cooking Tip of the Day.

It’s so easy to enter… so enter today!

This Give-a-Way has ended.

Recipe: Carrot Cake Cupcakes with Cream Cheese Frosting


Our blog anniversary coincides with Warren’s Birthday …. well, they’re only a few days apart… so the cupcake for the blog celebration was his choice for a birthday cupcake…. and this year it’s a Carrot Cake Cupcake with Cream Cheese Frosting.

This recipe for Carrot Cake Cupcakes is slightly adapted from my Carrot Cake recipe. The Carrot Cake has always come out terrific… very light and fragile. Cakes are great when they’re light and fragile… not so when they’re cupcakes… it makes them difficult to eat..

When the recipe was made as cupcakes … they rose far too high, then sinking a bit and the tops ended up going over the sides… they were very fragile…. all probably due to the amount of baking soda and baking powder that recipe uses…. as well as, the amount of flour.

So I ended up tweaking the recipe a bit…. and I omitted the pecans for the cupcakes… they were going to work with him.... so I try to avoid putting nuts in baked goods that go out of the house…. so people with nut allergies don’t have to worry.

I used my Cream Cheese Frosting recipe I’ve previously posted… I included those instructions at the bottom for your convenience.

The result was one darn good cupcake… I’ve had requests to make them again and they’d pay for them! I’ll make them again for sure… getting paid for them… well I don’t know about that…. I’m just glad they enjoyed them so much.

Hope you try these…. in celebration of one wonderful year at Cooking Tip of the Day… oh and Warren’s birthday of course.


PRINT RECIPE

Recipe: Carrot Cake Cupcake

All you need:

4 eggs
1 cup vegetable oil
1 cup white sugar
1 cup firmly packed brown sugar
3 teaspoons vanilla extract
2 ½ cups flour
1 tablespoon baking soda
½ teaspoon salt
2 teaspoons cinnamon
2 ½ cups grated carrots

All you need to do:

Preheat oven to 350 degrees.

Put cupcake liners in the muffin tin and set aside.

In a large mixing bowl, beat eggs, oil, sugars and vanilla.

In another bowl, combine flour, baking soda, baking powder, salt and cinnamon.

Add in the flour mixture in small batches (about ¼ of the flour mixture) at a time, mixer should be on medium speed.

Stir in the carrots.

Ladle into the cupcake liners…filling only to 2/3 full.

Bake for 20-22 minutes or until a toothpick comes out clean.

Let cool in the pan for 10 minutes.

Then take them out of the panand cool completely on a rack before frosting.

**For your convenience I am listing my Cream Cheese Frosting recipe again… here it is…

Cream Cheese Frosting Recipe:

All you need:

1 stick of butter, softened
1 (8 oz.) package of Philadelphia Brand Cream Cheese, softened
3 cups confectioner’s sugar
1 teaspoon vanilla extract

All you need to do:

In a medium bowl, beat the butter, sugar, cream cheese and vanilla until smooth and creamy.

Looking for More Recipes?

If you are looking for more recipes click the "Older Posts" link to page back to older posts or go to the archives in the right column. The list of labels at the bottom in the right column will help you find specific types of recipes or try our search engine at the top and search by name or ingredient.


What's more comforting on a cold day than Homemade Chicken Noodle Soup? .. and it's so easy to make!

Chicken Noodle Soup